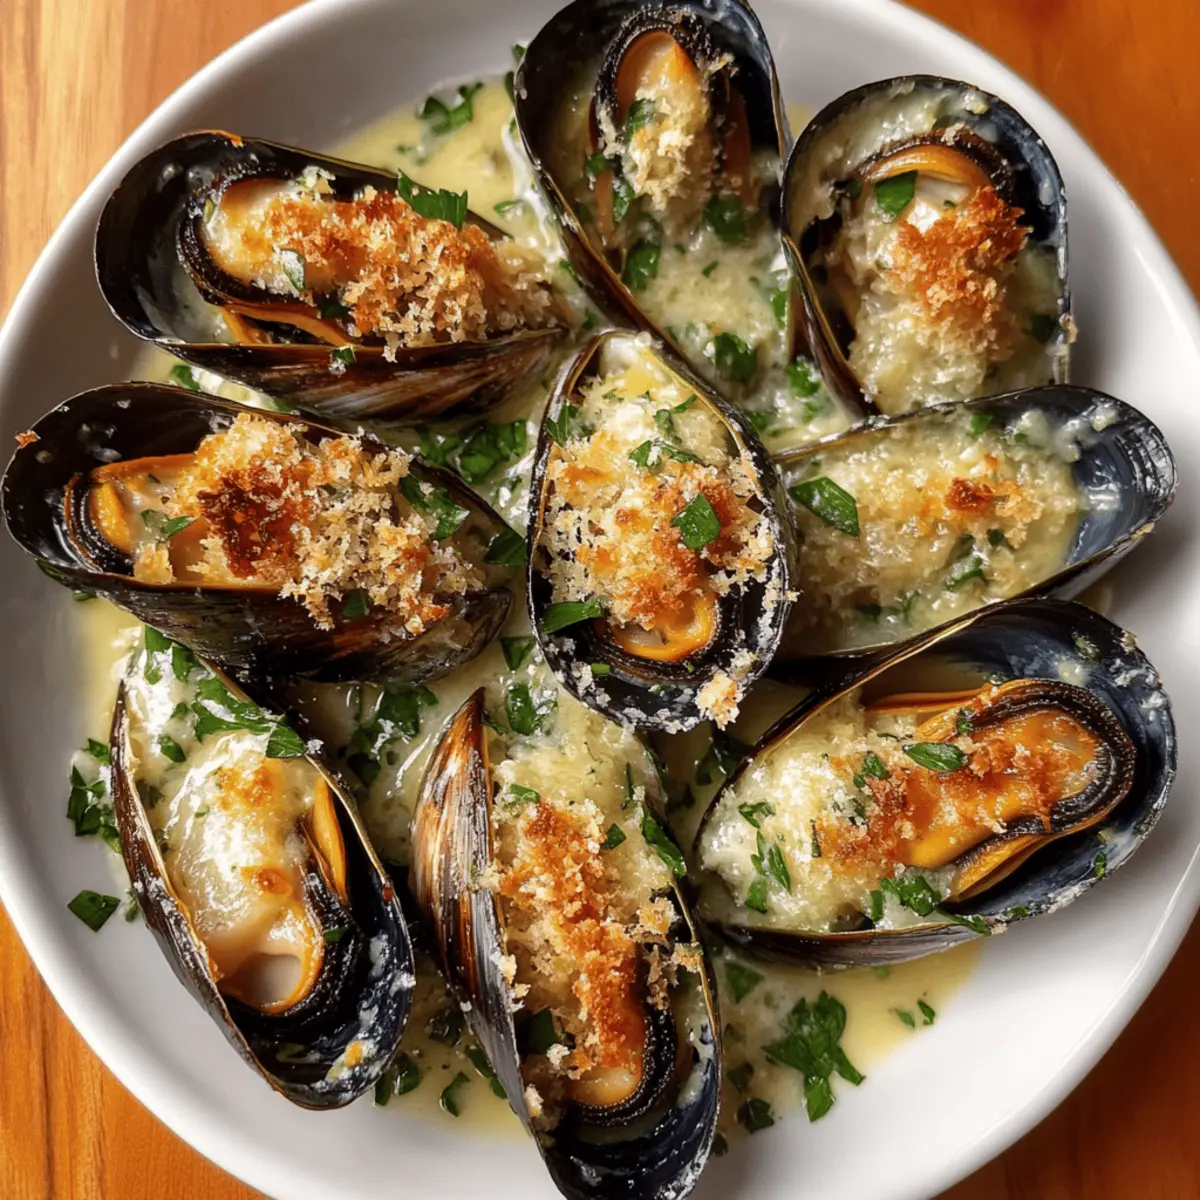
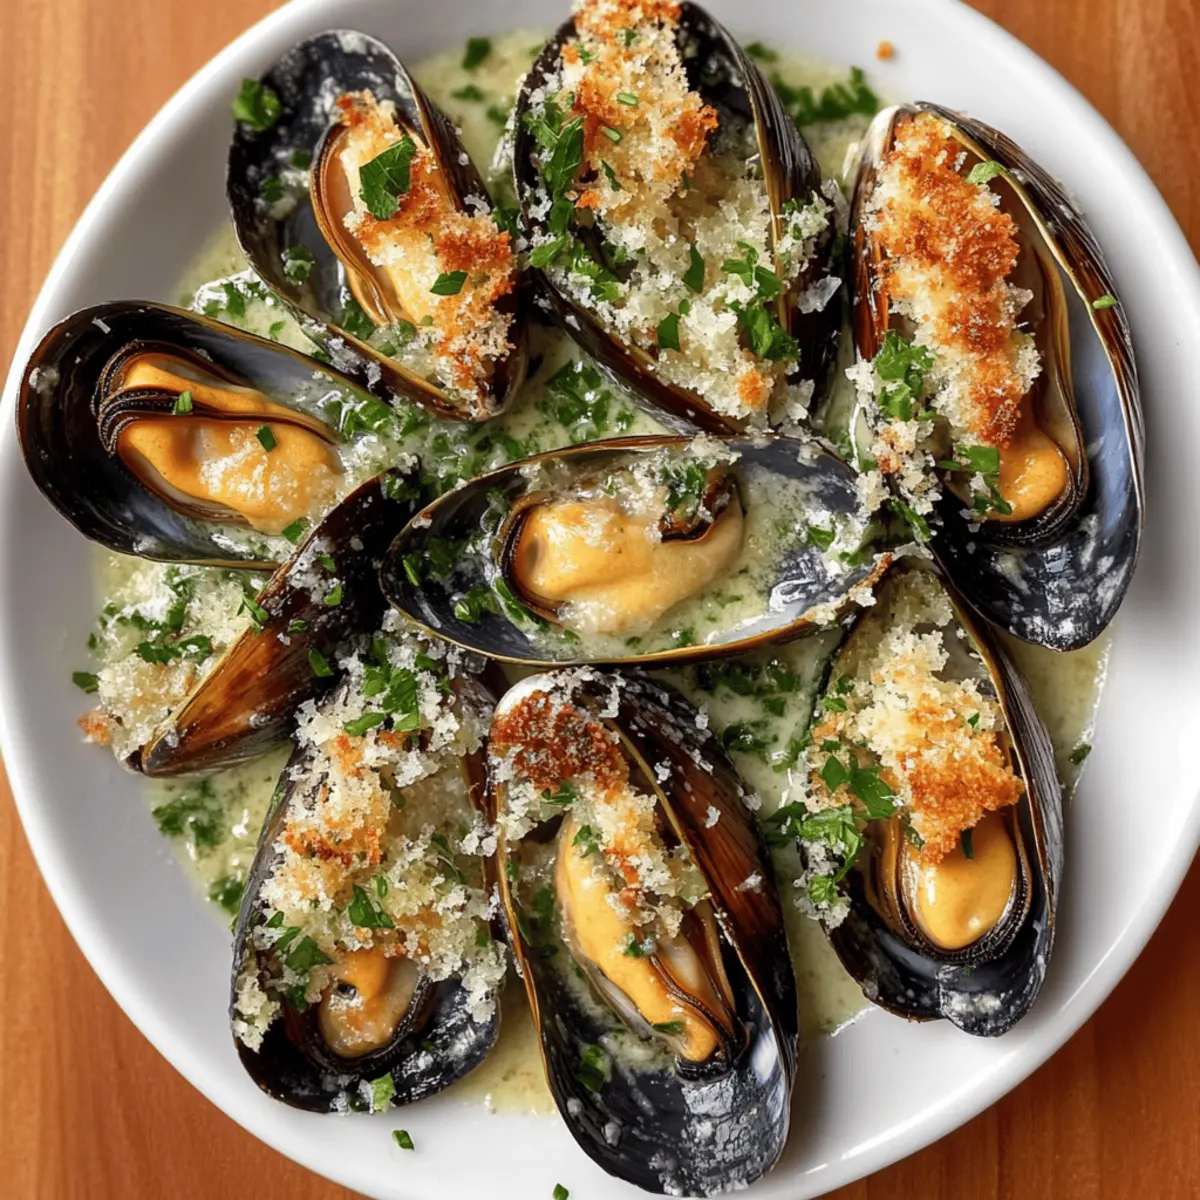
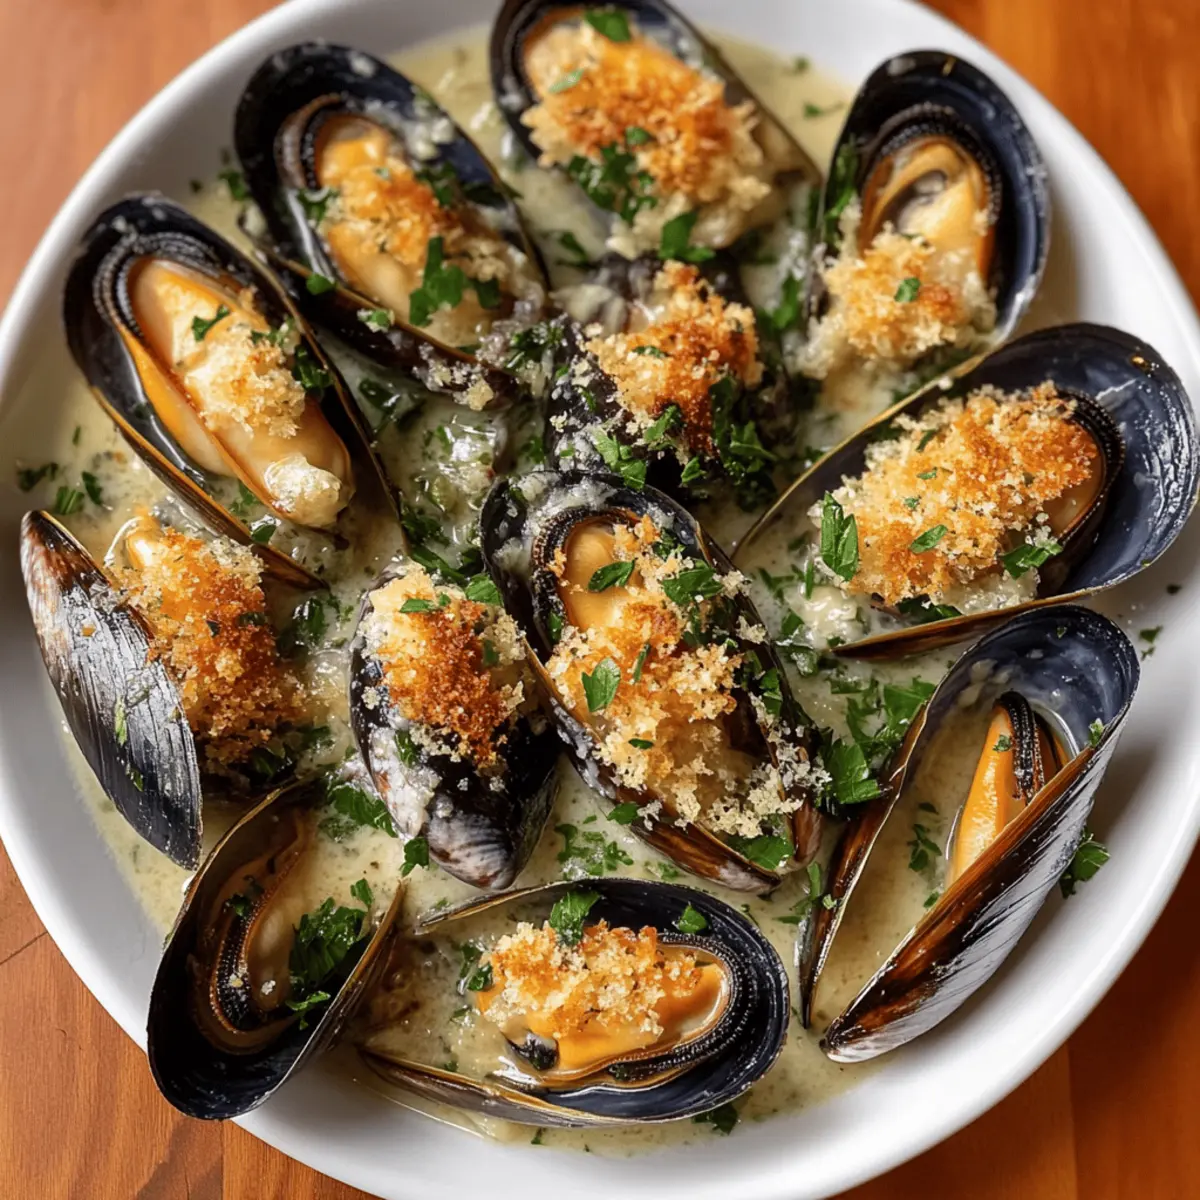
Delicious Chicken Burrito Casserole for Cozy Family Dinners

After a long, hectic day, the last thing anyone wants is a complicated dinner. That’s where my Easy Chicken Burrito Casserole comes to the rescue! This dish turns the comforting flavors of a classic burrito into a simple, one-pot meal that even the busiest of home chefs can whip up in no time. With tender chicken, seasoned rice, and vibrant vegetables all baked together and topped with gooey cheese, this casserole is not only family-friendly but also perfect for meal prep. Imagine having leftovers that are just as delicious the next day! Ready to bring some explosion of flavors to your dinner table? Let’s dive into this simple yet satisfying recipe!

Why is this casserole a must-try?

Simplicity: This Chicken Burrito Casserole is a one-pot wonder, making cleanup a breeze. No need for multiple pans or complicated steps; it’s perfect for busy weeknights!

Flavor explosion: Each bite bundles together savory chicken, perfectly cooked rice, and vibrant veggies, smothered in melted cheese that’s just calling out to be devoured.

Versatile: Whether you stick to the classic recipe or experiment with protein substitutions like Savory Chicken Cheesy or even opt for a vegetarian twist, this dish adapts to your cravings.

Meal Prep Champion: Whip up a batch on Sunday and enjoy delicious leftovers throughout the week. It stores well for up to five days, making it an ideal candidate for your meal prep!

Crowd-Pleaser: Perfect for family gatherings or casual dinners, everyone will love digging into this hearty casserole, similar to a cozy family feast like Homemade Chicken Pot that brings everyone together!

Chicken Burrito Casserole Ingredients

Get ready to create a flavorful feast!

For the Casserole

  • Long-Grain White Rice – Provides the essential base for your Chicken Burrito Casserole; remember to use dry rice for the best results.
  • Corn Kernels – Adds a delightful sweetness and texture; you can also substitute with frozen corn for convenience.
  • Shredded Cooked Chicken – The star of the dish, providing protein and flavor; leftover or rotisserie chicken works wonderfully to save time!
  • Chicken Broth – Infuses moisture and elevates the dish’s flavor; opt for low-sodium broth if you’re looking for a healthier option.
  • Monterey Jack Cheese – Melts beautifully on top for that gooey finish; feel free to substitute with cheddar or pepper jack to suit your taste.
  • Spices (chili powder, garlic powder, cumin, oregano, and salt) – These key elements enhance flavor and can be adjusted to suit your preferences.
  • Bell Pepper and Onion – Offer aromatic notes and vibrant color; other pepper varieties or shallots can work as substitutes if desired.

Optional Toppings

  • Avocado – Adds creaminess and freshness; perfect for balancing out the flavors.
  • Sour Cream – A classic addition that complements the casserole beautifully.
  • Salsa – Drizzle it on top for an added kick and burst of flavor.

This Chicken Burrito Casserole is sure to make your family dinner a hit and satisfy even the pickiest eaters!

Step‑by‑Step Instructions for Chicken Burrito Casserole

Step 1: Preheat the Oven
Begin by preheating your oven to 400°F (200°C). This temperature will ensure that your Chicken Burrito Casserole cooks evenly, allowing all the flavors to meld beautifully. While the oven heats up, gather your ingredients and a large baking dish to prepare for the next steps.

Step 2: Prep Ingredients
In your large baking dish, combine the dry long-grain white rice, corn kernels, chopped bell pepper, and onion. Sprinkle in the spices such as chili powder, garlic powder, cumin, oregano, and salt. Mix everything together well to ensure that the rice is coated with the aromatic spices; this will create a flavorful base for your casserole.

Step 3: Add Chicken & Broth
Gently fold in your shredded cooked chicken, making sure it’s evenly distributed throughout the ingredients. Next, pour in the chicken broth, which adds moisture and enhances the overall flavor of the Chicken Burrito Casserole. Stir everything together until combined; the liquid should cover the rice and other ingredients well.

Step 4: Cover and Bake
Once your ingredients are well mixed, cover the dish tightly with aluminum foil. Place the casserole in the preheated oven and bake for 50-60 minutes. The goal is for the rice to absorb the liquid and become tender, so keep an eye on it as the time approaches, ensuring it doesn’t dry out.

Step 5: Add Cheese
After baking, carefully remove the foil from the casserole, revealing the delicious contents inside. Sprinkle a generous amount of Monterey Jack cheese over the top. This cheesy layer will melt beautifully. Return the dish to the oven, uncovered, for an additional 5-10 minutes until the cheese is melted and bubbly, creating a delightful golden crust.

Step 6: Serve
Once the cheese has melted to perfection, take the Chicken Burrito Casserole out of the oven and let it cool for a few minutes. This will make serving easier. Optionally, garnish with fresh avocado, sour cream, or salsa to add some flair and additional flavors, and enjoy this comforting dish with your loved ones.

Expert Tips for Chicken Burrito Casserole

  • Cover While Baking: Always cover the casserole with foil to retain steam, ensuring the rice cooks properly and doesn’t dry out.

  • Check Liquid Levels: Different types of rice absorb liquids differently. Adjust the chicken broth based on whether you use white or brown rice to achieve the right texture.

  • Don’t Overcrowd Ingredients: Too many additions can affect cooking time and moisture levels. Stick to the recommended ingredients for the best results.

  • Rest After Baking: Allow the casserole to sit for a few minutes after baking. This helps the flavors meld together and makes serving easier.

  • Customize Wisely: While it’s fun to experiment, don’t stray too far from the base ingredients of this chicken burrito casserole to maintain its iconic flavor profile.

Chicken Burrito Casserole Variations

Feel free to let your creativity shine and personalize your Chicken Burrito Casserole to suit your taste buds!

  • Protein Alternatives: Swap shredded chicken for shredded turkey or ground beef. Not a meat lover? Try a plant-based protein for a hearty vegetarian version.

  • Grain Options: For a low-carb twist, use cauliflower rice instead of traditional white rice. Just remember to adjust the liquid ratio to avoid a soggy bottom!

  • Cheese Choices: While Monterey Jack is delicious, experimenting with cheddar or pepper jack can introduce a whole new flavor profile. The gooey texture will remain delightful!

  • Spice it Up: Looking for a little heat? Add diced jalapeños or a sprinkle of cayenne pepper to amp up the flavor and bring some excitement to your meal.

  • Vegetable Variety: Switch out bell peppers and onions for seasonal veggies. Zucchini, corn, or black beans can add new flavors and textures – you could even toss in leftover veggies from previous meals!

  • Sour Cream & Guacamole: Elevate the dip game by mixing sour cream or guacamole in with the casserole before baking. It will add creaminess and a lovely fresh flavor to the entire dish.

  • Extra Crunch: For an added texture, sprinkle tortilla chips or crushed tortilla strips over the cheese before returning it to the oven. They’ll create a delightful crunch on top!

  • Herb Enhancements: Fresh chopped cilantro or parsley can add a burst of brightness and freshness to each serving. Don’t hesitate to sprinkle it on top just before serving!

This Chicken Burrito Casserole is a blank canvas ready to support your culinary creativity. Each tweak not only personalizes your dish but also keeps mealtime exciting! And if you’re ever in need of more hearty chicken dishes, check out Honey Chili Chicken or try a delightful twist with Tropical Chicken Pineapple!

What to Serve with Chicken Burrito Casserole

A comforting casserole deserves delightful accompaniments that elevate your meal experience.

  • Warm Tortillas: Soft, warm tortillas can be a perfect side, allowing everyone to make their own burrito-inspired wraps with the casserole.
  • Fresh Guacamole: Creamy guacamole brings an avocado richness that wonderfully complements the savory flavors of the casserole.
  • Zesty Salsa: A side of salsa adds a refreshing twist, offering a burst of vibrant flavor that enhances every bite.
  • Mexican Street Corn Salad: This vibrant salad provides a crunchy, sweet contrast, balancing the creamy casserole with its fresh ingredients.
  • Black Beans: A side of seasoned black beans packs additional protein and works seamlessly with the casserole’s flavors—perfect for a hearty meal.
  • Cilantro Lime Rice: Fluffy rice tossed with cilantro and lime can be an excellent base, bringing zest and brightness to your plate.
  • Crispy Salad: A crisp side salad featuring romaine and a tangy vinaigrette refreshes the palate and adds delightful crunch.
  • Mexican Beer: Pair your meal with a light Mexican lager for a refreshing sip that complements the zest of the casserole wonderfully.
  • Churros: For dessert, serve warm churros sprinkled with cinnamon sugar, adding a sweet finish to your cozy dinner experience.

Make Ahead Options

These Chicken Burrito Casseroles are fantastic for meal prep enthusiasts! You can prepare the entire casserole up to 24 hours in advance by assembling all ingredients (dry rice, corn, vegetables, and shredded chicken) in your baking dish, then cover and refrigerate it. This ensures that the flavors meld beautifully. When you’re ready to cook, simply pour the chicken broth over the mixture and bake as directed. If you prefer, you can also cook, cool, and store leftovers for up to 3 days in the refrigerator. For best quality, ensure it’s tightly covered to maintain moisture. Just before serving, sprinkle on the cheese and return it to the oven until melted and bubbly, delivering delicious results with minimal effort!

How to Store and Freeze Chicken Burrito Casserole

  • Fridge: Store leftovers in an airtight container in the refrigerator for up to 5 days. This keeps the Chicken Burrito Casserole fresh and ready to enjoy again.

  • Freezer: For longer storage, freeze the casserole in a freezer-safe container for up to 3 months. Make sure to cool it completely before sealing tightly to prevent freezer burn.

  • Reheating: When ready to enjoy, thaw in the fridge overnight. Reheat individual portions in the microwave or warm the whole casserole in the oven at 350°F (175°C) until heated through.

  • Assembly Frozen: If you prefer, assemble the casserole (without baking), wrap tightly, and freeze. When ready to serve, bake directly from frozen, adding about 15-20 minutes to the cooking time.

Chicken Burrito Casserole Recipe FAQs

What kind of rice should I use for the Chicken Burrito Casserole?
Using long-grain white rice is ideal because it cooks evenly and absorbs flavors well. Make sure to use dry, uncooked rice for the best texture and results in your casserole.

How should I store leftovers of the Chicken Burrito Casserole?
Store any leftovers in an airtight container and keep them in the refrigerator for up to 5 days. It’s a great way to enjoy the delicious flavors again without the hassle of cooking anew!

Can I freeze Chicken Burrito Casserole? If so, how?
Absolutely! You can freeze your Chicken Burrito Casserole for up to 3 months. Allow it to cool completely, then store it in a freezer-safe container. For the best results, wrap it tightly in plastic wrap or foil to prevent freezer burn. To reheat, thaw it overnight in the fridge, and warm it in the oven at 350°F (175°C) until heated through.

What can I do if the rice isn’t cooked through after baking?
If the rice remains undercooked, add a little more chicken broth or water to the casserole, cover it with foil, and return it to the oven for an additional 10-15 minutes. This will help the rice absorb the extra liquid and finish cooking.

Are there any dietary considerations for the Chicken Burrito Casserole?
If you or someone in your family has dietary restrictions, you can easily adjust the recipe. Use gluten-free rice and low-sodium broth to make it gluten-free, or substitute the chicken with a plant-based protein for a vegetarian variant. Always check ingredient labels for allergies, especially with cheese and spices.

Chicken Burrito Casserole

Delicious Chicken Burrito Casserole for Cozy Family Dinners

This Chicken Burrito Casserole is a simple, one-pot meal that blends comforting flavors and is perfect for family dinners.
Prep Time 15 minutes
Cook Time 1 hour
Cooling Time 5 minutes
Total Time 1 hour 15 minutes
Servings: 6 servings
Course: Dinner
Cuisine: Mexican
Calories: 450

Ingredients
  

For the Casserole
  • 1 cup Long-Grain White Rice Use dry rice for best results.
  • 1 cup Corn Kernels Can substitute with frozen corn.
  • 2 cups Shredded Cooked Chicken Leftover or rotisserie chicken works well.
  • 2 cups Chicken Broth Opt for low-sodium for a healthier option.
  • 1 cup Monterey Jack Cheese Substitute with cheddar or pepper jack if preferred.
  • 1 tablespoon Chili Powder Adjust to taste.
  • 1 teaspoon Garlic Powder Adjust to taste.
  • 1 teaspoon Cumin Adjust to taste.
  • 1 teaspoon Oregano Adjust to taste.
  • 1 teaspoon Salt Adjust to taste.
  • 1 cup Bell Pepper Chopped.
  • 1 cup Onion Chopped.
Optional Toppings
  • 1 medium Avocado Sliced.
  • 1 cup Sour Cream
  • 1 cup Salsa

Equipment

  • oven
  • Large Baking Dish

Method
 

Step-by-Step Instructions
  1. Preheat your oven to 400°F (200°C).
  2. In a large baking dish, combine the dry long-grain white rice, corn kernels, chopped bell pepper, and onion. Mix in spices.
  3. Fold in the shredded chicken and pour in the chicken broth. Stir well until combined.
  4. Cover the dish tightly with aluminum foil and bake for 50-60 minutes.
  5. Remove the foil and sprinkle cheese over the top. Bake uncovered for an additional 5-10 minutes until cheese is melted.
  6. Let cool for a few minutes before serving. Optionally garnish with avocado, sour cream, or salsa.

Notes

This casserole can be stored in an airtight container in the refrigerator for up to 5 days, or frozen for up to 3 months.

Delicious Strawberry Pop-Tart Pie for Nostalgic Sweet Cravings

Strolling through the farmers’ market, I was greeted by a vibrant display of plump, sweet strawberries that instantly transported me back to my childhood. It made me think of creating a delightful Strawberry Pop-Tart Pie—a whimsical twist on a nostalgic favorite. This recipe merges the juicy goodness of fresh (or frozen) strawberries with a rich, buttery homemade crust. One of the best perks? It’s not just a stylish centerpiece for gatherings; it’s also effortless to whip up, making it perfect for both novice and seasoned bakers. And trust me, a slice of this pie paired with a scoop of vanilla ice cream will have everyone reminiscing about their own fond memories. Curious to learn how to bring this pie to life? Let’s dive into making your own delicious Frosted Strawberry Pop-Tart Pie!

Why Make Strawberry Pop-Tart Pie?

Nostalgic Flavor: This pie brings back memories of childhood with its sweet strawberry filling and flaky crust that captures the essence of a classic dessert.

Versatile Ingredients: Whether you opt for fresh or frozen strawberries, this recipe accommodates whatever you have on hand.

Easy to Prepare: With simple steps, even beginner bakers can create a stunning dessert that wows friends and family without fuss.

Impressive Presentation: Topped with royal icing and colorful sprinkles, this pie not only tastes amazing but looks fantastic on any dessert table, just like a classic Apple Pie.

Perfect for Sharing: Cut into generous slices, it’s ideal for gatherings, making you the star of your next brunch or family dinner.

Make-Ahead Friendly: You can bake it in advance and freeze it for later, simplifying your hosting duties, similar to how I manage with my Chicken Pot Pie preparation.

Strawberry Pop-Tart Pie Ingredients

• Gather your essentials for a scrumptious bake!

For the Filling

  • Strawberries – Fresh strawberries bring vibrant flavor and sweetness; feel free to use frozen strawberries in a pinch.
  • Sugar – Adjust the sweetness to taste, depending on how ripe your strawberries are.

For the Pie Crust

  • Pie Crust – A homemade crust lends rich flavor; if you’re short on time, a store-bought version works just fine!

For Frosting and Decoration

  • Royal Icing – This adds a glossy finish that captures the eye, making your Strawberry Pop-Tart Pie feel like a true treat!
  • Sprinkles – They’re optional but provide a fun pop of color that enhances the nostalgia.
  • Egg (for egg wash) – Brush on the crust for a beautiful golden color when baked.

Step‑by‑Step Instructions for Strawberry Pop-Tart Pie

Step 1: Prepare Strawberries
Begin by washing and trimming your fresh strawberries, removing the stems. Par cook the strawberries in a pot of simmering water for about 5 minutes, until they soften slightly but remain intact. Drain the strawberries well and let them cool while you prepare the pie crust. This process will make your filling easier to eat and enhance the flavors in your Strawberry Pop-Tart Pie.

Step 2: Make Pie Crust
If you’re making a homemade crust, combine flour, butter, sugar, and a pinch of salt in a mixing bowl. Use a pastry cutter or your fingers to mix until it resembles coarse crumbs. Add cold water, one tablespoon at a time, until a dough forms. Chill the dough for 30 minutes, then roll it out to fit your pie dish, leaving some excess for the top. A well-made crust is essential for your Strawberry Pop-Tart Pie.

Step 3: Layer Strawberries & Sugar
Take your chilled pie crust and fill it with the prepared strawberries. Evenly sprinkle sugar over the strawberries, adjusting the amount based on their sweetness. Spread them out gently to ensure every slice has a burst of berry goodness. This layering is crucial for creating delicious pockets of flavor in your Strawberry Pop-Tart Pie, making it irresistible to your family and friends.

Step 4: Cover Pie
Roll out the second crust for the top and gently lay it over the filled pie. Pinch the edges to seal securely, preventing any filling from leaking during baking. Use a sharp knife to cut several slits in the top crust, allowing steam to escape while baking. This step not only helps with even cooking but also adds a charming homemade touch to your Strawberry Pop-Tart Pie.

Step 5: Bake
Preheat your oven to 375°F (190°C). Once heated, place the pie on the middle rack and bake it for 45 minutes or until the crust is golden brown and flaky. Keep an eye on it during the last 10 minutes; if the edges brown too quickly, cover them with foil to prevent burning. The smell of the baking Strawberry Pop-Tart Pie will surely tempt your taste buds!

Step 6: Cool & Frost
After baking, remove the pie from the oven and allow it to cool on a wire rack for at least 30 minutes. This cooling period will help the filling set, making it easier to slice. Once cooled, prepare your royal icing by mixing powdered sugar with water until smooth. Spread the icing over the top of the pie and decorate with colorful sprinkles for a nostalgic finish that perfectly complements your Strawberry Pop-Tart Pie.

Expert Tips for Strawberry Pop-Tart Pie

  • Berry Selection: Choose sweet, ripe strawberries for the best flavor. If using frozen, ensure they’re thawed and well-drained to prevent a watery filling in your Strawberry Pop-Tart Pie.

  • Crust Technique: Avoid overly warm dough when making pie crust; it should be cold to create the flaky texture you desire. This is key in ensuring a beautiful, crispy crust.

  • Sealing Edges: Properly seal the edges of the pie to prevent the filling from bubbling over. Dampen the edges with a bit of water before crimping for a secure hold.

  • Baking Temperature: Always preheat your oven fully before baking. This helps the crust bake evenly and achieve that golden-brown perfection.

  • Cooling Time: Be patient and allow the pie to cool completely before slicing. This helps the filling to set, ensuring cleaner slices of your Strawberry Pop-Tart Pie.

  • Creative Customization: Don’t hesitate to experiment with various fruit fillings or flavor the icing. This way, you can create different versions of your delightful Strawberry Pop-Tart Pie for every occasion.

How to Store and Freeze Strawberry Pop-Tart Pie

Room Temperature: Allow the pie to cool completely before covering it with foil or plastic wrap. It can be stored at room temperature for up to 2 days.

Fridge: Store any leftover Strawberry Pop-Tart Pie in an airtight container in the fridge for up to 5 days. This helps maintain the freshness of the filling.

Freezer: For longer storage, slice the pie and wrap each piece tightly in plastic wrap, then place in a freezer-safe container. It can be frozen for up to 3 months. To enjoy, thaw in the fridge overnight and reheat in the oven for best results.

Reheating: Preheat the oven to 350°F (175°C) and place the pie slice on a baking sheet. Heat for about 10-15 minutes until warmed through, keeping that flaky crust crisp.

Strawberry Pop-Tart Pie Variations & Substitutions

Feel free to let your creativity shine and customize your pie with these fun twists and substitutions!

  • Frozen Strawberries: If fresh strawberries aren’t available, use thawed frozen ones for a quick and easy option that still packs a fruity punch.

  • Dairy-Free Crust: Swap butter for coconut oil or a vegan butter alternative in your pie crust to create a deliciously rich dairy-free version.

  • Different Fruits: Experiment with blueberries, raspberries, or cherries; these fruits add unique flavors that give your pie a delightful twist.

  • Lemon Zest: Add a teaspoon of lemon zest to your filling for a citrus kick that enhances the strawberry sweetness with bright, zesty notes.

  • Chocolate Drizzle: Melt some chocolate and drizzle it over the iced pie for an extra touch of indulgence that pairs beautifully with the fruity filling.

  • Nutty Crust: Mix ground almonds or walnuts into your pie crust for a crunchy texture that complements the soft filling; it adds an extra layer of flavor.

  • Cinnamon Sugar Topping: Sprinkle cinnamon sugar over the crust before baking to infuse warm spice notes that elevate the nostalgic flavors of your Strawberry Pop-Tart Pie.

  • Mini Tarts: Make individual mini tarts using muffin tins for easy-to-serve portions, perfect for gatherings or to satisfy sweet cravings throughout the week, just like a tasty Chicken Pot Pie!

Don’t be shy—mix and match these variations to create a Strawberry Pop-Tart Pie that’s uniquely yours!

What to Serve with Strawberry Pop-Tart Pie

Elevate your dessert experience with delightful accompaniments that will delight every palate at your table.

  • Vanilla Ice Cream: The creamy sweetness of vanilla ice cream creates a heavenly contrast to the tart strawberry filling.

  • Whipped Cream: Light and fluffy, whipped cream adds an airy texture that enhances the pie’s rich flavors.

  • Fresh Berries: A medley of fresh berries brightens up the plate and adds a refreshing burst of color and taste.

  • Chocolate Sauce: Drizzling warm chocolate sauce over each slice offers a decadent twist, perfect for chocolate lovers.

  • Mint Leaves: A sprinkle of fresh mint leaves not only adds a splash of color but also elevates the taste with a hint of freshness.

  • Sparkling Water: Serve with a bubbly drink to cleanse the palate and make your dessert feel extra special.

  • Lemonade: The refreshing tartness of lemonade pairs wonderfully, bringing a citrus zing that complements the strawberries beautifully.

  • Shortbread Cookies: Crunchy shortbread cookies add an additional layer of texture, making each bite of pie even more delightful.

  • Coffee or Tea: A warm cup of coffee or fragrant tea pairs perfectly, balancing the sweetness of the pie and inviting cozy conversation.

Make Ahead Options

These Strawberry Pop-Tart Pies are perfect for meal prep enthusiasts! You can prepare the pie crust and filling up to 24 hours in advance. Simply par cook the strawberries and layer them in the crust, then cover with plastic wrap and refrigerate until you’re ready to bake. This will keep the crust fresh and the flavors vibrant. Additionally, you can freeze the unbaked pie for up to 3 months; just make sure to wrap it tightly to prevent freezer burn. When ready to bake, simply pop the pie into the oven straight from the freezer, adding a few extra minutes to the baking time. With these make-ahead options, you’ll have a delightful dessert ready with minimal last-minute effort!

Strawberry Pop-Tart Pie Recipe FAQs

How do I choose the best strawberries for my pie?
Absolutely! Look for bright red, plump strawberries with a natural shine. They should be firm with no dark spots or mushy areas. If you’re buying frozen strawberries, ensure they aren’t clumped together, which indicates thawing and refreezing. Ripe strawberries are the key to a delicious filling in your Strawberry Pop-Tart Pie!

How should I store my Strawberry Pop-Tart Pie after baking?
Once your pie has cooled completely, store it at room temperature covered with foil or plastic wrap for up to 2 days. For longer freshness, transfer any leftovers to an airtight container and refrigerate for up to 5 days. This keeps the filling fresh and tasty, just like when you first baked it!

Can I freeze my Strawberry Pop-Tart Pie?
Absolutely! You can freeze the pie before baking. Wrap it tightly in plastic wrap, then in aluminum foil to protect it from freezer burn. When you’re ready to bake it, you can go straight from freezer to oven—just add an extra 10-15 minutes to the baking time. Alternatively, for convenience, slice the baked pie into individual portions and freeze each piece in plastic wrap for up to 3 months.

What if my pie crust turns out soggy?
Very! This can happen if the filling is too watery. To avoid this, be sure to drain your strawberries well and limit the amount of liquid in the filling. Additionally, pre-baking your crust for a few minutes before adding the filling—also known as blind baking—can help keep it nice and crisp.

Are there any allergens I should be aware of?
Yes, the main ingredients in this recipe include eggs and gluten. If you’re looking for alternatives, consider using egg substitutes for the wash, like almond milk or plant-based options. If you or someone you’re serving has gluten sensitivities, you can also find gluten-free pie crusts available in most grocery stores.

Can I make this recipe ahead of time?
Definitely! You can prepare the pie a day in advance, bake it, and let it cool completely before storing it in the fridge. Alternatively, if you plan on serving it later in the week, consider freezing it, as mentioned earlier—just remember to reheat carefully to restore that lovely flaky crust when serving!

Strawberry Pop-Tart Pie

Delicious Strawberry Pop-Tart Pie for Nostalgic Sweet Cravings

This Strawberry Pop-Tart Pie combines fresh strawberries and a buttery crust, perfect for nostalgic cravings.
Prep Time 30 minutes
Cook Time 45 minutes
Total Time 1 hour 15 minutes
Servings: 8 slices
Course: Dessert
Cuisine: American
Calories: 350

Ingredients
  

For the Filling
  • 2 cups Strawberries Fresh or frozen, trimmed and washed
  • 1/2 cup Sugar Adjust to taste
For the Pie Crust
  • 1 recipe Pie Crust Homemade or store-bought
For Frosting and Decoration
  • 1 cup Royal Icing For glossy finish
  • 1 cup Sprinkles Optional, for decoration
  • 1 large Egg For egg wash

Equipment

  • mixing bowl
  • Pie dish
  • Pot for cooking strawberries
  • Rolling Pin
  • Wire rack

Method
 

Preparation
  1. Wash and trim fresh strawberries, removing the stems. Par cook strawberries in simmering water for about 5 minutes.
  2. If making homemade crust, combine flour, butter, sugar, and salt. Mix until coarse. Add cold water until dough forms. Chill dough for 30 minutes.
  3. Fill the chilled pie crust with strawberries and sprinkle sugar over them, adjusting the amount as needed.
  4. Roll out the second crust for the top and lay over the filled pie. Seal edges, cut slits in top crust.
  5. Preheat oven to 375°F (190°C). Bake pie for 45 minutes until golden brown.
  6. Cool pie on a wire rack for at least 30 minutes. Prepare royal icing, spread on pie, and add sprinkles.

Notes

This pie can be made ahead of time and frozen for later use. Thaw and reheat for best results.

Hearty Irish Potato Pie: A Cozy Comfort Food Classic

There’s a certain magic in the air when you pull a freshly baked Irish Potato Pie from the oven, the golden crust glistening with anticipation. This heartwarming dish, filled with creamy potatoes, garlic, and cheese, is just what you need for cozy family gatherings or a comforting night in. What truly sets my recipe apart is its versatility and ease; you can whip it up in under an hour while effortlessly incorporating seasonal ingredients to keep things exciting. It strikes the perfect balance between rich flavors and that soul-soothing comfort food feeling. Curious how to create this delightful pie and make it your own? Let’s dive into the recipe and explore the delicious possibilities!

Why is Irish Potato Pie a must-try?

Hearty Comfort: This Irish Potato Pie is the epitome of comfort food, providing a warm, filling hug for your taste buds.
Flexible Creation: With options to add seasonal ingredients like spinach or sweet corn, this recipe allows for personalization, elevating your dining experience.
Quick and Easy: Ready in under an hour, it’s perfect for busy weeknights or spontaneous get-togethers.
Rich, Creamy Filling: The creamy potato filling, blended with savory garlic and sharp cheese, creates a rich flavor profile that will have everyone asking for seconds!
Crowd-Pleaser: Whether you’re serving it at a family dinner or potluck, this dish is sure to impress and satisfy your guests. If you’re looking for more potato inspirations, check out my recipes for Savory Onion Potato and Zucchini Potato Fritters.

Irish Potato Pie Ingredients

For the Filling

  • Russet Potatoes – Four large, peeled and cubed; essential for a creamy filling with the right texture. Substitute with Yukon Gold for a slightly different flavor.
  • Heavy Cream – 1 cup; adds richness and smoothness to the filling; can substitute with milk for a lighter version, though texture will differ.
  • Unsalted Butter – 4 tablespoons; provides a rich taste and helps achieve a creamy mash. No substitutes recommended for the best flavor.
  • Salt – 1 teaspoon; enhances all flavors; adjust to taste if sodium intake is a concern.
  • Black Pepper – ½ teaspoon; offers spice; increase for a bit more heat.
  • Nutmeg – ¼ teaspoon; adds warmth and depth; optional if preferred.
  • Shredded Sharp Cheddar Cheese – 1 cup; delivers a savory note and forms a golden crust; swap with Gruyère for a different cheese profile.
  • Onion – 1 finely chopped; provides savory depth to the filling; can be replaced with shallots for a milder flavor.
  • Garlic – 2 cloves, minced; enhances the flavor of the pie; garlic powder can be a quick alternative.
  • Fresh Chives – 2 tablespoons, chopped; adds color and mild onion flavor; scallions can be used instead.

For the Crust

  • Pre-made Pie Crust – 1 (store-bought or homemade); saves time; homemade is recommended for a flakier, personalized crust.

Feel the excitement build as you gather these ingredients for your Irish Potato Pie – it’s the perfect blend waiting to be transformed into a comforting home-cooked meal!

Step‑by‑Step Instructions for Irish Potato Pie

Step 1: Prepare Potatoes
Start by placing the peeled and cubed Russet potatoes into a large pot of salted water. Bring the water to a boil over medium-high heat and let the potatoes cook for 15-20 minutes until fork-tender. Once tender, drain the potatoes well and return them to the pot, ready for mashing.

Step 2: Mash Filling
Add the heavy cream, unsalted butter, salt, black pepper, and optional nutmeg to the drained potatoes in the pot. Using a potato masher, mash the mixture until it reaches a smooth and creamy consistency. This savory filling will serve as the heart of your Irish Potato Pie, so ensure it’s well blended and flavorful.

Step 3: Sauté Aromatics
In a skillet, melt 1 tablespoon of butter over medium heat. Once melted, add the finely chopped onion and sauté for about 5 minutes, or until it becomes translucent. Stir in the minced garlic and cook for an additional minute, just until fragrant. This aromatic mixture will add depth and flavor to your pie’s filling.

Step 4: Combine Ingredients
Gently fold the sautéed onion and garlic mixture into the creamy mashed potatoes. Next, add half of the shredded sharp cheddar cheese and the chopped fresh chives, mixing them in carefully. This combination enhances the richness of the filling and gives your Irish Potato Pie that delightful, savory flavor everyone loves.

Step 5: Assemble Pie
Take a pre-made pie crust and pour the creamy potato mixture into it, smoothing the top with a spatula. Sprinkle the remaining shredded cheddar cheese evenly over the top, creating a delicious cheesy crust. Ensuring an even spread helps the cheese melt beautifully, forming a golden-brown topping while baking.

Step 6: Bake
Preheat your oven to 375°F (190°C). Place the assembled Irish Potato Pie in the oven and bake for 25-30 minutes. Keep an eye on it as it bakes; the cheese should bubble and the top should turn golden brown. Once ready, remove it from the oven and let it cool for about 10 minutes before slicing and serving.

What to Serve with Irish Potato Pie

Enhance your delightful pie experience with these perfect accompaniments that balance flavors and textures beautifully.

  • Crisp Side Salad: A fresh salad with mixed greens, cherry tomatoes, and a light vinaigrette provides a refreshing contrast to the creamy pie. The crispness of the greens invigorates each bite.

  • Roasted Vegetables: Seasonal roasted veggies such as carrots, bell peppers, and zucchini add a hearty, wholesome element. Their caramelized flavors complement the savory richness of the pie.

  • Garlic Bread: Golden, buttery garlic bread is a comforting side that echoes the garlic notes within the pie. It’s perfect for scooping up that creamy filling.

  • Steamed Broccoli: Lightly steamed broccoli with a sprinkle of salt or lemon juice brings a vibrant color and a slight crunch to your plate. Its subtle earthiness pairs well with the richness.

  • Chardonnay: A chilled glass of Chardonnay enhances the meal with its crisp acidity that cuts through the creamy pie, elevating every mouthful.

  • Apple Crisp: End on a sweet note with a warm apple crisp drizzled with vanilla ice cream. The contrasting flavors and textures create a delightful finale to your meal.

Expert Tips for Irish Potato Pie

  • Prevent Sogginess: Drain potatoes thoroughly after boiling to avoid a soggy crust. Excess moisture can lead to a less satisfying pie texture.

  • Crispy Bottom Crust: To achieve a crispier bottom, consider pre-baking the pie crust for a few minutes before adding the filling. This will help keep the crust flaky.

  • Perfectly Creamy Filling: Mix in the heavy cream and butter gently to avoid excess moisture. A creamy filling should be rich but not too wet.

  • Herb Variations: Don’t hesitate to experiment with fresh herbs like thyme or rosemary. They can add a delightful twist to your Irish Potato Pie’s flavor profile.

  • Cheese Choices: While sharp cheddar is traditional, feel free to swap in Gruyère or even a mixture for a unique flavor. Just remember to use a cheese that melts well for that glorious topping!

Make Ahead Options

These Irish Potato Pie preparations are perfect for busy home cooks looking to save time during the week! You can prepare the creamy potato filling and store it in an airtight container in the refrigerator for up to 3 days. Simply boil and mash the potatoes, then mix in the cream, butter, and seasonings as directed. For best results, wait to sauté the onions and garlic until the day you plan to bake. When ready to enjoy your pie, simply fold the aromatics into the filling, assemble in the pre-made crust, and bake. This way, you’ll have a delicious, warm Irish Potato Pie that feels freshly made with minimal effort!

How to Store and Freeze Irish Potato Pie

  • Room Temperature: Allow the Irish Potato Pie to cool completely before storing. It can be left out for up to 2 hours but should not be left unrefrigerated for longer.

  • Fridge: Store leftovers in an airtight container in the fridge for up to 3 days. Ensure the pie is completely cooled before sealing to maintain its texture.

  • Freezer: Wrap the pie tightly in plastic wrap and then foil before freezing to prevent freezer burn. It can be frozen for up to 1 month for optimal flavor.

  • Reheating: To reheat, thaw overnight in the refrigerator if frozen, then bake at 350°F (175°C) until heated through, about 20-30 minutes. Enjoy that delicious Irish Potato Pie just like fresh!

Irish Potato Pie Variations & Substitutions

Feel free to get creative and add your personal touch to this warming Irish Potato Pie, making it uniquely yours!

  • Seasonal Spinach: Fold in fresh or sautéed spinach in the spring for a delightful color and added nutrition.
  • Sweet Corn Addition: Toss in some sweet corn during summer months for a burst of sweetness and texture.
  • Creamy Dairy-Free: Use coconut milk or almond milk instead of heavy cream for a lighter, dairy-free version while still keeping it creamy.
  • Herb Twist: Mix in some fresh rosemary or thyme—these fragrant herbs can elevate the flavor profile and add complexity.
  • Extra Crunch: Sprinkle crispy bacon bits or breadcrumbs over the top before baking for added crunch and savory goodness.
  • Different Cheeses: Substitute sharp cheddar with Gruyère or fontina for a different melting experience and slightly bolder taste.
  • Caramelized Onions: Swap regular onions for caramelized onions for a sweeter and richer flavor that deepens the pie’s profile.
  • Spicy Kick: Add a pinch of crushed red pepper flakes or diced jalapeños for those who enjoy a bit of heat in their comforting dishes.

Ready for more potato-centric inspiration? Check out my delicious Savory Potato Mushroom Cake or indulge in some unique Tuna Potato Pancakes!

Irish Potato Pie Recipe FAQs

What type of potatoes should I use for Irish Potato Pie?
I recommend using four large Russet potatoes, which are perfect for achieving that creamy texture essential to the filling. You could also opt for Yukon Gold potatoes for a slightly different flavor, but remember that they may yield a creamier consistency.

How should I store leftover Irish Potato Pie?
Once cooled, store your Irish Potato Pie in an airtight container in the fridge for up to 3 days. Make sure it’s completely cooled before sealing; this helps maintain its delightful texture and flavor.

Can I freeze Irish Potato Pie?
Absolutely! To freeze, wrap the pie tightly in plastic wrap, followed by aluminum foil to prevent freezer burn. It will keep well for up to 1 month. When you’re ready to enjoy it, just thaw it overnight in the refrigerator and reheat it at 350°F (175°C) until warmed through—usually around 20-30 minutes.

Why is my Irish Potato Pie filling too runny?
If your filling turns out runny, it might be due to excess moisture from the potatoes. Ensure that you drain them well after boiling. You can also consider mashing a bit longer or even adding a bit more shredded cheese or a thickener like cornstarch to achieve the desired consistency.

Can I use different herbs or toppings?
Yes! Feel free to experiment with fresh herbs like thyme or rosemary for added flavor. Toppings like crispy bacon bits, caramelized onions, or even breadcrumbs can add fabulous texture and elevate your Irish Potato Pie to new heights!

Is Irish Potato Pie suitable for dietary restrictions?
If you’re making this pie for someone with dietary restrictions, be mindful of the cheese, cream, and butter used. Consider dairy-free alternatives like plant-based cream or vegan cheese. For gluten-free needs, select a gluten-free pie crust or create a crustless version!

Irish Potato Pie

Hearty Irish Potato Pie: A Cozy Comfort Food Classic

Enjoy a delightful Irish Potato Pie filled with creamy potatoes, garlic, and cheese, perfect for family gatherings.
Prep Time 20 minutes
Cook Time 30 minutes
Cooling Time 10 minutes
Total Time 1 hour
Servings: 6 slices
Course: Dinner
Cuisine: Irish
Calories: 350

Ingredients
  

For the Filling
  • 4 large Russet Potatoes peeled and cubed
  • 1 cup Heavy Cream can substitute with milk
  • 4 tablespoons Unsalted Butter no substitutes recommended
  • 1 teaspoon Salt adjust to taste
  • ½ teaspoon Black Pepper increase for more heat
  • ¼ teaspoon Nutmeg optional
  • 1 cup Shredded Sharp Cheddar Cheese swap with Gruyère if desired
  • 1 Onion finely chopped
  • 2 cloves Garlic minced
  • 2 tablespoons Fresh Chives chopped
For the Crust
  • 1 Pre-made Pie Crust store-bought or homemade

Equipment

  • Large pot
  • Skillet
  • potato masher
  • spatula

Method
 

Step-by-Step Instructions for Irish Potato Pie
  1. Start by placing the peeled and cubed Russet potatoes into a large pot of salted water. Bring the water to a boil over medium-high heat and let the potatoes cook for 15-20 minutes until fork-tender. Once tender, drain the potatoes well and return them to the pot, ready for mashing.
  2. Add the heavy cream, unsalted butter, salt, black pepper, and optional nutmeg to the drained potatoes in the pot. Using a potato masher, mash the mixture until it reaches a smooth and creamy consistency.
  3. In a skillet, melt 1 tablespoon of butter over medium heat. Once melted, add the finely chopped onion and sauté for about 5 minutes, or until it becomes translucent. Stir in the minced garlic and cook for an additional minute.
  4. Gently fold the sautéed onion and garlic mixture into the creamy mashed potatoes. Next, add half of the shredded sharp cheddar cheese and the chopped fresh chives, mixing them in carefully.
  5. Take a pre-made pie crust and pour the creamy potato mixture into it, smoothing the top with a spatula. Sprinkle the remaining shredded cheddar cheese evenly over the top.
  6. Preheat your oven to 375°F (190°C). Place the assembled Irish Potato Pie in the oven and bake for 25-30 minutes. Once ready, remove it from the oven and let it cool for about 10 minutes before slicing and serving.

Notes

Prevent sogginess by draining potatoes thoroughly after boiling. For a crispier bottom crust, pre-bake the pie crust for a few minutes.

Deliciously Smooth Healthy Homemade Protein Shake Recipe

As I stood in the kitchen with the morning sun streaming through the window, I felt the familiar tug for something delicious yet nutritious to kickstart my day. That’s when my go-to recipe, the Healthy Homemade Protein Shake, came to the rescue. Not only is this shake a breeze to whip up, but it’s also completely customizable, making it the ideal companion for those busy mornings or post-workout cravings. Packed with protein and vibrant flavors, this shake keeps me feeling full and satisfied, all while fitting perfectly into my health goals. Whether I’m celebrating a fitness triumph or just trying to squeeze in some extra nutrition, this shake has become a staple in my routine. Curious about the best part? You can mix and match ingredients to make it your own. What delightful flavors will you choose for your shake today?

Why You’ll Love This Protein Shake?

Customization at its finest: This recipe invites you to play with flavors, making it truly yours.
Packed with nutrients: Each ingredient serves a purpose, so you’re nourishing more than just your taste buds.
Quick and easy: Whip it up in minutes, perfect for those busy mornings.
Smooth, creamy texture: Each sip feels indulgent yet guilt-free—who wouldn’t love that?
Great for everyone: Whether you’re weight loss-focused or aiming to build muscle, it fits perfectly into your lifestyle.
Secrets to versatility: Try incorporating components from other recipes like Homemade Chicken Pot if you’re feeling adventurous!

Healthy Homemade Protein Shake Ingredients

  • For the Base
    Milk (1 cup) – This liquid base creates a smooth texture; swap with any plant-based milk for a dairy-free treat.
    Banana (1) – Provides natural sweetness and creaminess; for a twist, replace it with avocado for a creamy consistency without added sugar.
    Ice Cubes (1/2 cup) – Chill and thicken your shake; frozen fruits are a great substitute for added flavor.

  • For the Protein
    Protein Powder (1 scoop, plain/unflavored) – The star of your shake, offering the protein boost needed; consider vanilla protein powder for a sweeter profile without extra sweetener.

  • For Sweetness
    Honey/Maple Syrup/Agave Nectar (2 teaspoons) – Sweeten your shake with any of these options; you can also omit for a no-sugar addition or swap for a ripe date for natural sweetness.

  • Optional Add-ins
    Fresh or Frozen Berries/Sliced Fruit – Add a burst of flavor and vitamins to your shake.
    Spinach or Kale – Boosts nutrients without changing the flavor; a healthy hidden vegetable addition!
    Greek Yogurt/Cottage Cheese – Enhances creaminess and increases protein content for a satisfying shake.
    Nut Butter – Introduces healthy fats and a rich taste; perfect for peanut or almond butter lovers!
    Collagen Peptides – Offers extra protein alongside skin and health benefits.
    Raw Cacao/Matcha – Elevates your shake with unique flavors and added antioxidants.
    Chia Seeds/Ground Flaxseed/Hemp Hearts – Add omega-3 fatty acids and fiber for a nutritional boost.
    Spices (vanilla, cinnamon, nutmeg) – Infuse your shake with delightful flavor nuances.

This Healthy Homemade Protein Shake is not just about nourishment; it’s an experience waiting to be crafted by you!

Step‑by‑Step Instructions for Healthy Homemade Protein Shake

Step 1: Prepare Your Base
Start by pouring 1 cup of your chosen milk into a powerful blender. This will serve as the smooth liquid base for your Healthy Homemade Protein Shake. Follow with 1 ripe banana, which adds a delightful creaminess and natural sweetness. If you prefer alternatives, consider avocado for a velvety texture.

Step 2: Add Ice and Protein
Next, toss in 1/2 cup of ice cubes for a refreshing chill and thickness. Then, add 1 scoop of plain or vanilla protein powder, which is the key ingredient offering essential protein. At this stage, the blend should be looking colorful and inviting, filled with potential for a delicious shake.

Step 3: Customize with Add-Ins
Now it’s time to customize! If you want to amp up your Healthy Homemade Protein Shake, include optional add-ins like a handful of fresh or frozen berries, a scoop of Greek yogurt, or a spoonful of nut butter. Blend in some spinach or kale for a nutrient boost that remains surprisingly subtle in flavor.

Step 4: Blend Until Smooth
Secure the blender lid tightly, and blend everything on medium speed for about 30–45 seconds. Keep an eye on the mixture as it transforms into a smooth and creamy consistency; you might need to stop once and scrape down the sides if necessary. The shake should look velvety and homogenous when ready.

Step 5: Taste and Adjust
Before serving, taste your Healthy Homemade Protein Shake. If you want a bit more sweetness or flavor, add 2 teaspoons of honey, maple syrup, or your preferred sweetener, and blend again for 10 seconds. This ensures the flavors are well integrated, creating a shake that’s irresistibly delicious.

Step 6: Serve Immediately
Pour your shake into a tall glass, and enjoy it right away for the best texture and freshness. If you’re feeling fancy, garnish it with a sprinkle of cinnamon or some fresh fruit slices on top. Your Healthy Homemade Protein Shake is now ready to be savored, rich in nutrients and full of flavor.

How to Store and Freeze Healthy Homemade Protein Shake

Fridge: Store your shake in an airtight container for up to 3 hours to keep it fresh. Shake well before consuming, as separation may occur.

Freezer: For longer storage, pour the shake into ice cube trays and freeze. Once frozen, transfer the cubes to a zip-top bag for easy future use in smoothies or shakes.

Thawing: To enjoy, simply let the frozen cubes thaw in the fridge overnight or blend them into your smoothie for a cold, thick texture without extra ice.

Make-Ahead: If you prepare this Healthy Homemade Protein Shake in advance, remember that it’s best enjoyed fresh but will still taste great within a few hours when stored correctly.

Make Ahead Options

These Healthy Homemade Protein Shakes are perfect for busy home cooks looking to save time without compromising on nutrition! You can prepare the base ingredients—milk, banana (or avocado), and protein powder—up to 24 hours in advance by measuring them and storing them in an airtight container in the refrigerator. For added convenience, you can also portion the ice cubes and any optional fruits and veggies in freezer bags, keeping them fresh. When you’re ready to enjoy, simply combine the prepped ingredients in a blender, add your thickening ice and any desired add-ins, and blend until smooth. This prep method ensures a creamy shake that’s just as delicious, making healthy living easy and satisfying!

What to Serve with Healthy Homemade Protein Shake

Indulging in a delicious protein shake can be the perfect start or end to a satisfying meal; let’s explore delightful companions to elevate your experience.

  • Fresh Fruit Salad: A colorful medley of seasonal fruits adds a vibrant, refreshing note, amplifying the nutrients while satisfying your sweet cravings.

  • Whole Grain Toast: Crunchy and hearty, this toast provides a satisfying texture and pairs beautifully with a spread of almond butter or avocado for healthy fats.

  • Granola Parfait: Layer creamy yogurt with crunchy granola and berries for a delightful pairing, offering a contrast in texture and a boost in flavor. It’s both satisfying and visually stunning!

  • Oatmeal Bowl: A warm oatmeal topped with nuts and fresh fruit complements your shake’s cold kick while offering a comforting and hearty option.

  • Veggie Sticks and Hummus: The crunchy, fresh veggies along with creamy hummus create an enticing crunch that balances the smoothness of your protein shake, making it a perfect snack blend.

  • Herbal Tea: For a warm drink, herbal tea evens out the coolness of your shake, providing a calming and aromatic side to your protein-packed moment.

  • Dark Chocolate Square: Just a bite of rich, dark chocolate can enhance your protein shake’s living experience with a touch of indulgence, satisfying those chocolate cravings healthily.

Pairing these delicious options not only enhances your protein shake experience but also creates a wholesome meal you’ll feel great about!

Healthy Homemade Protein Shake Variations

Feel free to get creative with your Healthy Homemade Protein Shake! Here are some delightful twists to make it your own.

  • Dairy-Free: Use almond or oat milk instead of regular milk for a creamy, dairy-free shake. This opens up a whole new world of flavors!
  • Banana Substitute: Swap the banana for avocado to achieve a luscious, creamy texture without the sweetness, perfect for those who prefer less sugar.
  • Frozen Fruits: Replace ice cubes with your favorite frozen fruits for both chill and a flavor boost. Berries or mango can bring a delightful twist!
  • Protein Power-Up: Add a scoop of Greek yogurt or cottage cheese to increase the protein content and creaminess—an ideal option post-workout!
  • Nutty Goodness: Blend in a spoonful of almond butter or peanut butter for a rich and satisfying shake that adds healthy fats.
  • Choco-Lover’s Delight: For a chocolatey version, mix in raw cacao powder or chocolate protein powder. It’s like having dessert for breakfast!
  • Superfood Boost: Stir in chia seeds or flaxseed for added fiber and omega-3 goodness, an easy way to enhance your shake’s nutrient profile.
  • Spice it Up: Experiment with spices like cinnamon or nutmeg to add depth to the flavor. A sprinkle can transform your shake into a cozy treat!

With these variations, the possibilities are endless! You might even want to enjoy your shake alongside a side of Homemade French Fries for a fun combination. What flavors are you excited to try today?

Expert Tips for the Best Healthy Homemade Protein Shake

  • Layer Ingredients: Start with the liquid base first to ensure a smooth blend. Adding ingredients in the right order prevents clumping.

  • Watch the Sweetness: If using flavored protein powder, consider skipping additional sweeteners. This avoids an overly sweet shake that masks natural flavors.

  • Be Creative: Don’t hesitate to experiment! Swap out fruits or greens based on seasonal availability or personal taste to elevate your Healthy Homemade Protein Shake.

  • Blend Efficiently: Use a high-powered blender to achieve a silky texture; under-blending can leave lumps in your shake.

  • Serve Fresh: For the best taste and texture, enjoy your shake immediately after blending. If you store it, give it a good shake to reincorporate ingredients.

Healthy Homemade Protein Shake Recipe FAQs

What type of milk is best for a protein shake?
Absolutely! You can use any milk you prefer. Regular cow’s milk creates a creamy base for your shake, but for a dairy-free option, almond milk, oat milk, or coconut milk are fantastic substitutes. The choice of milk can slightly alter the flavor and texture, so I recommend experimenting to find your favorite!

How long can I store my protein shake in the fridge?
Your Healthy Homemade Protein Shake is best enjoyed fresh, but you can store it in an airtight container in the fridge for up to 3 hours. I often keep it chilled in a mason jar; just remember to give it a good shake before drinking, as ingredients may separate over time.

Can I freeze my protein shake?
Certainly! To freeze your shake, pour it into ice cube trays and freeze until solid. This way, you can pop out a few cubes and blend them into your smoothies later. For the best results, transfer the frozen cubes into a zip-top bag for long-term storage; they’ll keep well for up to 3 months.

What can I add to enhance my shake’s nutrition?
Feel free to customize! Adding ingredients like spinach or kale boosts nutrients without affecting the flavor much. You can also incorporate chia seeds or ground flaxseed for extra fiber and omega-3 fatty acids. Simply toss in a tablespoon of any of these add-ins while blending—it’s a great way to sneak in extra health benefits!

Is this protein shake suitable for those with allergies?
Great question! This Healthy Homemade Protein Shake is highly customizable to fit various dietary needs. For nut allergies, simply omit nut butters and use seeds or alternative milks. If you’re lactose intolerant, choose plant-based milk and skip the yogurt. Always double-check ingredient labels, like protein powders, to ensure they’re allergy-friendly.

What should I do if my shake isn’t thick enough?
If your shake comes out thinner than expected, don’t worry! You can thicken it by adding more ice cubes or frozen fruit, which will not only enhance the texture but also give your shake a flavorful punch. Alternatively, blending in a banana or adding oats can help create that desired creamy consistency.

Healthy Homemade Protein Shake

Deliciously Smooth Healthy Homemade Protein Shake Recipe

Kickstart your day with a Healthy Homemade Protein Shake that is customizable, nutritious, and delicious.
Prep Time 5 minutes
Total Time 5 minutes
Servings: 1 shake
Course: Drinks
Cuisine: Healthy
Calories: 300

Ingredients
  

For the Base
  • 1 cup Milk Any kind of milk, including plant-based.
  • 1 Banana For creaminess and sweetness; can substitute with avocado.
  • 1/2 cup Ice Cubes Or frozen fruits for added flavor.
For the Protein
  • 1 scoop Protein Powder Plain or vanilla protein powder.
For Sweetness
  • 2 teaspoons Honey/Maple Syrup/Agave Nectar Optional sweeteners.
Optional Add-ins
  • Fresh or Frozen Berries/Sliced Fruit Add flavor and vitamins.
  • Spinach or Kale Boosts nutrients without altering flavor.
  • Greek Yogurt/Cottage Cheese Enhances creaminess and protein content.
  • Nut Butter Rich taste and healthy fats.
  • Collagen Peptides Extra protein and health benefits.
  • Raw Cacao/Matcha For unique flavors and antioxidants.
  • Chia Seeds/Ground Flaxseed/Hemp Hearts Provide omega-3s and fiber.
  • Spices (vanilla, cinnamon, nutmeg) For added flavor.

Equipment

  • Blender

Method
 

Step-by-Step Instructions
  1. Step 1: Prepare Your Base: Pour 1 cup of milk into a blender, followed by 1 ripe banana.
  2. Step 2: Add Ice and Protein: Add 1/2 cup of ice cubes and 1 scoop of protein powder.
  3. Step 3: Customize with Add-Ins: Add any optional ingredients as desired.
  4. Step 4: Blend Until Smooth: Blend on medium speed for 30–45 seconds.
  5. Step 5: Taste and Adjust: Taste your shake and add sweeteners if needed, blending again.
  6. Step 6: Serve Immediately: Pour into a glass and enjoy fresh.

Notes

Enjoy this shake immediately or store in the fridge for up to 3 hours. Shake well before consuming if separated.

Toffee & Milk Chocolate Peanut Butter Cookies You’ll Love

As I rummaged through my pantry the other day, a hidden treasure caught my eye—an unopened bag of toffee bits just waiting to be transformed into something special. It sparked the idea for these Gluten-Free Toffee & Milk Chocolate Peanut Butter Cookies, a delightful treat that marries the rich nuttiness of peanut butter with the sweet crunch of toffee and melty chocolate. Not only are these cookies quick to whip up, making them perfect for unexpected guests or a late-night craving, but they also cater to gluten-free diets without sacrificing flavor or texture. Each cookie is a chewy masterpiece, ready to provide that nostalgic comfort of homemade goodness. Curious about how to bring this tasty delight to life right in your own kitchen? Let’s dive into the recipe!

Why You’ll Crave These Cookies?

Irresistible Flavor Combination: The rich blend of toffee, milk chocolate, and peanut butter creates a symphony of taste that will have you reaching for seconds.
Gluten-Free Goodness: Enjoy the indulgence without the gluten, making these treats perfect for everyone!
Quick and Easy: With simple ingredients and minimal prep, you can whip up a batch in no time—great for surprise visitors.
Nostalgic Treat: These cookies evoke the warmth of home baking, reminiscent of childhood favorites, perfect for sharing with family.
Customizable Options: Feel free to replace the toffee with mini M&Ms or use almond butter for a fun twist!
For more delightful cookie recipes, check out my Nutty Apricot Cookies or Chocolate Date Cookies to expand your offerings.

Toffee & Milk Chocolate Peanut Butter Cookies

Get ready to bake some magic with these delightful ingredients!

For the Batter

  • Peanut Butter – Provides structure and gives these cookies the classic nutty flavor; creamy or crunchy, it’s your choice!
  • Brown Sugar – Adds sweetness and a chewy texture; coconut sugar can be used for a lighter touch.
  • Eggs – Binds everything together and helps the cookies rise; no substitutes here for best results.
  • Vanilla Extract – This enhances the flavor profile, making your cookies extra warm and inviting.

For the Chocolatey Goodness

  • Milk Chocolate Chips – Offer sweetness and a creamy texture that pairs perfectly with the peanut butter; swap for dark chocolate chips for a richer experience.
  • Toffee Bits – Sprinkle in delightful crunch and a caramel flavor; if unavailable, finely chopped nuts can be a tasty alternative.

With these ingredients for your Toffee & Milk Chocolate Peanut Butter Cookies, you’re just moments away from a delicious homemade treat!

Step‑by‑Step Instructions for Toffee & Milk Chocolate Peanut Butter Cookies

Step 1: Mix Wet Ingredients
In a large mixing bowl, combine 1 cup of peanut butter, 1 cup of brown sugar, and 2 large eggs. Using an electric mixer, beat the mixture on medium speed until it is smooth and creamy, about 2-3 minutes. Add in 1 teaspoon of vanilla extract and continue mixing until well incorporated. The batter should be thick and glossy.

Step 2: Incorporate Dry Ingredients
Gradually fold in 1 cup of milk chocolate chips and 1 cup of toffee bits into the peanut butter mixture. Use a spatula to gently mix until everything is evenly distributed, and you can see the chocolate and toffee peeking through the thick cookie dough. This ensures each cookie gets a delightful crunch of toffee and a splash of chocolate.

Step 3: Shape Cookies
Preheat your oven to 350°F (175°C) while preparing your baking sheets. Line them with parchment paper to prevent sticking. Using a cookie scoop or tablespoon, portion out the cookie dough onto the lined sheets, spacing them about 2 inches apart. You should make about 12 to 15 cookies, ensuring they have room to spread as they bake.

Step 4: Bake
Once your oven is preheated, place the cookie sheets in the oven and bake for 12-15 minutes. Keep an eye on them; the edges should be set and starting to turn golden, while the tops might look a little soft. This is key to achieving that chewy texture in your Toffee & Milk Chocolate Peanut Butter Cookies.

Step 5: Cool
After baking, remove the cookie sheets from the oven and let them cool on the sheets for about 5 minutes. This allows them to firm up slightly before transferring. Using a spatula, carefully move the cookies to wire racks to cool completely. Once cooled, you’ll be left with irresistibly chewy cookies perfect for snacking!

What to Serve with Toffee & Milk Chocolate Peanut Butter Cookies

These tempting cookies are perfect to enjoy on their own or alongside delightful complements that enhance your snacking experience.

  • Chilled Milk: The classic pairing! A tall glass of cold milk balances the sweetness and richness of the cookies, creating a comforting treat.
  • Vanilla Ice Cream: A scoop of creamy vanilla ice cream on the side adds a delightful contrast, turning your cookies into an indulgent dessert.
  • Fresh Berries: Bright, juicy strawberries or raspberries offer a refreshing burst that complements the rich flavors, adding a pop of color to your plate.
  • Nutty Trail Mix: A handful of trail mix brings a crunchy texture and variety of flavors, perfect for those who enjoy a little contrast in their snack.
  • Caramel Sauce: Drizzle warm caramel sauce over the cookies for an extra layer of sweetness and a decadent, gooey treat.
  • Iced Coffee: The rich flavors of iced coffee enhance the nuttiness of the peanut butter, making for a perfect afternoon pick-me-up.
  • Fruit Salad: A vibrant mix of seasonal fruits refreshes the palate and provides a healthy touch to your dessert spread.
  • Chocolate Milkshake: Blend up a chocolate milkshake to create a fun and creamy accompaniment that accentuates the cookie’s chocolatey goodness.
  • Coconut Macaroons: These chewy, sweet bites bring a tropical twist, pairing beautifully with the flavor profile of peanut butter and chocolate.
  • Hot Cocoa: For a cozy evening treat, enjoy your cookies alongside a warm mug of hot cocoa topped with marshmallows for that nostalgic feel.

Storage Tips for Toffee & Milk Chocolate Peanut Butter Cookies

Room Temperature: Store cookies in an airtight container at room temperature for up to 1 week to maintain their delightful chewiness.

Freezer: For longer storage, freeze the cookies in a single layer on a baking sheet. Once frozen, transfer them to a freezer-safe bag, where they can last up to 3 months.

Thawing: When ready to enjoy, simply thaw cookies at room temperature for about 30 minutes, or pop them in the microwave for a few seconds for that fresh-baked taste.

Reheating: To refresh your Toffee & Milk Chocolate Peanut Butter Cookies, reheat in a preheated oven at 350°F (175°C) for about 5 minutes—this makes them soft and melty once again!

Make Ahead Options

Make your baking experience even smoother by prepping these Toffee & Milk Chocolate Peanut Butter Cookies ahead of time! You can prepare the cookie dough and refrigerate it for up to 24 hours before baking. Simply mix the wet and dry ingredients as detailed in the recipe, then cover the bowl with plastic wrap and store it in the fridge. This helps the flavors meld beautifully while maintaining the dough’s quality. When you’re ready to bake, just scoop out the dough onto your baking sheets and bake as instructed. With this meal prep option, you’ll have homemade cookies baked to perfection with minimal last-minute effort, providing a delightful treat whenever the craving strikes!

Helpful Tricks for Toffee & Milk Chocolate Peanut Butter Cookies

  • Room Temperature Peanut Butter: Ensure your peanut butter is at room temperature for easier mixing, resulting in a smoother, well-blended dough.
  • Watch the Baking Time: Cookies may look undercooked when you take them out. They will firm up as they cool, so don’t overbake.
  • Avoid Sticky Dough: If your cookie dough feels too sticky, refrigerate it for about 30 minutes before shaping—this can help improve handling.
  • Cookie Spacing: Make sure to space your cookies at least 2 inches apart on the baking sheet to allow for spreading.
  • Flavor Variations: Get creative! Substitute toffee bits with mini M&Ms or add a sprinkle of sea salt to elevate the flavors of your Toffee & Milk Chocolate Peanut Butter Cookies.

Toffee & Milk Chocolate Peanut Butter Cookies Variations

Feel free to unleash your creativity and personalize these cookies to suit your taste buds!

  • Nutty Swap: Replace peanut butter with almond butter for a delightful twist, offering a different but equally delicious flavor experience.

  • Colorful Crunch: Swap toffee bits with mini M&Ms for a vibrant pop of color and a fun surprise in every bite.

  • Salted Delight: Add a sprinkle of sea salt on top before baking to enhance the sweet and salty contrast, elevating the flavor profile to new heights.

  • Dark Chocolate Lovers: Use dark chocolate chips instead of milk chocolate for a richer, more intense chocolatey goodness that satisfies the deepest cravings.

  • Coconut Flavor: Mix in shredded coconut along with the chocolate chips for a tropical twist that pairs beautifully with the peanut butter.

  • Pumpkin Spice: Add a teaspoon of pumpkin spice for a warm, fall-inspired flavor that will leave your taste buds dancing with joy.

  • Chunky Textures: Stir in chopped nuts like pecans or walnuts for added crunch and a nutty enhancement that complements the toffee and chocolate.

  • Heat It Up: For those who enjoy a kick, mix in a pinch of cayenne pepper or chili powder to give your cookies a surprising and delightful heat.

Each of these variations offers a unique way to enjoy your Toffee & Milk Chocolate Peanut Butter Cookies. You can also explore adding some of your personal touches! And if you’re looking for more delicious treats, take a peek at my Garlic Butter French for a savory snack or my rich Coffee Chocolate Truffles for a sweet finish.

Toffee & Milk Chocolate Peanut Butter Cookies Recipe FAQs

What type of peanut butter should I use for these cookies?
Absolutely! You can use either creamy or crunchy peanut butter, depending on your personal taste preference. Creamy peanut butter will provide a smoother texture, while crunchy will add delightful bits of peanut to each cookie.

How should I store these cookies, and how long will they last?
To keep your Toffee & Milk Chocolate Peanut Butter Cookies fresh, store them in an airtight container at room temperature for up to 1 week. If you want them to last longer, you can freeze them. Just follow the steps I provided: freeze in a single layer on a baking sheet, then transfer to a freezer-safe bag, and they’ll be good for up to 3 months!

Can I freeze the cookie dough before baking?
Certainly! You can scoop the cookie dough onto a parchment-lined baking sheet, freeze until solid, and then store the frozen dough balls in a freezer-safe bag. When you’re ready to bake, you can pop them frozen into the oven; just add an extra couple of minutes to the baking time and enjoy fresh cookies on demand!

What if my cookies turn out too dry or crumbly?
If your cookies are turning out dry, it could be due to overbaking or too much flour being packed into your measuring cup. For the perfect chewy cookie, keep an eye on the baking time—remove them once the edges are set, even if the tops look a bit soft. A little moisture is key, as cookies continue to firm up while cooling, so don’t be afraid to take them out a tad sooner!

Are these cookies safe for people with nut allergies?
Since this recipe heavily relies on peanut butter, it is not safe for individuals with nut allergies. If you’re looking for a nut-free version, consider substituting the peanut butter with a sunbutter or a nut-free spread that is safe for those with allergies. Just keep in mind the different flavor profile that may result!

Can I make these cookies vegan?
You can create a vegan version of these cookies by substituting the eggs with a flax egg (1 tablespoon of ground flaxseed mixed with 2.5 tablespoons of water, let sit for 5 minutes) for each egg in the recipe. You can also opt for vegan chocolate chips to maintain the integrity of the recipe while accommodating dietary needs!

Toffee & Milk Chocolate Peanut Butter Cookies

Toffee & Milk Chocolate Peanut Butter Cookies You'll Love

Delightful gluten-free Toffee & Milk Chocolate Peanut Butter Cookies that combine rich nuttiness, sweet crunch, and an irresistible flavor.
Prep Time 15 minutes
Cook Time 15 minutes
Cooling Time 5 minutes
Total Time 35 minutes
Servings: 12 cookies
Course: Dessert
Cuisine: American
Calories: 150

Ingredients
  

For the Batter
  • 1 cup Peanut Butter Creamy or crunchy
  • 1 cup Brown Sugar Coconut sugar can be used
  • 2 large Eggs No substitutes for best results
  • 1 teaspoon Vanilla Extract
For the Chocolatey Goodness
  • 1 cup Milk Chocolate Chips Can substitute with dark chocolate chips
  • 1 cup Toffee Bits Finely chopped nuts can be a substitute

Equipment

  • mixing bowl
  • electric mixer
  • spatula
  • Cookie sheet
  • parchment paper

Method
 

Step-by-Step Instructions
  1. In a large mixing bowl, combine peanut butter, brown sugar, and eggs. Beat with an electric mixer until smooth and creamy, about 2-3 minutes. Add vanilla extract and mix well.
  2. Gradually fold in milk chocolate chips and toffee bits into the peanut butter mixture using a spatula.
  3. Preheat your oven to 350°F (175°C). Line baking sheets with parchment paper. Portion out cookie dough onto lined sheets, spacing about 2 inches apart.
  4. Bake for 12-15 minutes until edges are set and starting to turn golden. The tops might look a little soft.
  5. Remove from oven and let cool on sheets for about 5 minutes before transferring to wire racks.

Notes

Ensure room temperature peanut butter for easier mixing. Watch the baking time closely to avoid overbaking. To enhance flavors, consider adding sea salt or using mini M&Ms instead of toffee bits.

Soft Christmas Peppermints – Melt-In-Your-Mouth Delights

As I stood in my kitchen, the soothing scent of peppermint began to fill the air, instantly transporting me back to childhood holiday celebrations. There’s something undeniably special about making these Soft Christmas Peppermints—classic old-fashioned butter mints that are not only gluten-free and vegetarian but also delightfully easy to whip up. With their creamy, melt-in-your-mouth texture and refreshing minty flavor, these treats are a true crowd-pleaser, perfect for holiday gifting or simply brightening your festive table. Plus, they require no baking, allowing you to enjoy a stress-free cooking experience amidst the holiday hustle and bustle. Curious about how to create these nostalgic confections that capture the essence of Christmas? Let’s dive in!

Why Are Soft Christmas Peppermints Special?

Unforgettable nostalgia: These Soft Christmas Peppermints take you back to cherished holiday memories with every delightful bite.
Quick and easy: No baking is required! This simple recipe lets you whip up a batch in no time, leaving you more moments to enjoy.
Gluten-free and vegetarian: Perfect for all your guests, these treats cater to various dietary needs without compromising on taste.
Flavor versatility: Want to mix things up? You can easily substitute extracts for fun variations, adding a personal touch.
Gift-worthy presentation: These mints are not only delicious but also make lovely gifts when packaged in decorative jars or boxes. Try pairing them with other homemade delights like Cloud Soft Condensed for a delightful homemade gift basket!
Freshness guaranteed: Store them in an airtight container to maintain that melt-in-your-mouth texture, perfect for a week-long treat.

Soft Christmas Peppermints Ingredients

For the Mints
Sweetened Condensed Milk – Provides creaminess and sweetness; do not substitute with powdered milk as it lacks the necessary moisture.
Butter – Adds richness and a buttery flavor; for best results, use unsalted butter; margarine can be an alternative but may alter taste.
Powdered Sugar – Acts as the primary sweetener, giving the mints their structured consistency; substitutions are not recommended unless necessary.
Peppermint Extract – Infuses the mints with refreshing mint flavor; can be replaced with other extracts like vanilla or almond for different flavors.
Food Coloring (optional) – Used to customize mints’ colors for a festive appeal; dividing the dough allows for creating various colored mints.

Step‑by‑Step Instructions for Soft Christmas Peppermints

Step 1: Combine the Base
In a large mixing bowl, blend together 1 can of sweetened condensed milk and ½ cup of softened unsalted butter using a hand mixer or whisk until the mixture is smooth and creamy. This should take about 2-3 minutes. You’ll know it’s ready when the butter is fully incorporated and there are no lumps left.

Step 2: Add the Sweetness
Gradually sift in 4 cups of powdered sugar while continuing to mix on low speed. This process should take about 3-5 minutes, allowing for each addition to mix thoroughly before adding the next. The final result should resemble a thick, dough-like consistency, ensuring the base for your Soft Christmas Peppermints is achieved.

Step 3: Infuse with Flavor
Stir in 1 teaspoon of peppermint extract and, if desired, a few drops of food coloring for festive hues. Use a spatula to fold these ingredients into the dough until evenly distributed, which may take 1-2 minutes. This step ensures that every mint has that delightful peppermint flavor and eye-catching color.

Step 4: Chill the Dough
If the dough feels too soft to handle, place it in the refrigerator for 10-15 minutes. This chilling time is essential for the dough to firm up, making it easier to shape into mints. You’ll know it’s ready when it feels slightly firmer to the touch without being overly hard.

Step 5: Shape the Mints
Once the dough is chilled, take small portions and roll them into balls about 1 inch in diameter. Alternatively, you can use cookie cutters for fun shapes. Ensure uniform sizes for even setting, placing them on a parchment-lined baking sheet. This step shapes your Soft Christmas Peppermints into delightful bite-sized treats.

Step 6: Let Them Set
Allow the shaped mints to set at room temperature for about 1 hour. During this time, the mints will firm up nicely. You’ll know they’re ready when they hold their shape without any sticky residue. This step is crucial for that perfect melt-in-your-mouth texture.

Step 7: Store for Freshness
After your Soft Christmas Peppermints have set, transfer them to an airtight container for storage. Keep them at room temperature to maintain their delightful texture. They can be enjoyed for up to one week, ensuring you have a festive treat ready to share or enjoy throughout the holiday season.

Expert Tips for Soft Christmas Peppermints

  • Perfect Consistency: Use room temperature butter for a smoother mixture; if too cold, it can lead to lumps in your Soft Christmas Peppermints.
  • Chill Wisely: If the dough is sticky, chill it longer—too soft mints can lose their shape during the setting process.
  • Flavor Swaps: Don’t hesitate to experiment! Replace peppermint extract with vanilla, almond, or even orange extract for unique flavors that cater to your family’s taste.
  • Presentation Matters: For a festive touch, roll finished mints in crushed peppermint candies or sprinkles before they set, adding an extra layer of flavor and fun.
  • Storage Tip: Keep mints in a cool, dark place to maintain freshness and prevent them from becoming too soft or misshapen.

Storage Tips for Soft Christmas Peppermints

Room Temperature: Store mints in an airtight container at room temperature for up to one week to maintain their melt-in-your-mouth texture and freshness.

Fridge: If you prefer your mints a bit firmer, refrigerate them for a couple of hours. Just ensure they are in an airtight container to prevent them from absorbing any odors.

Freezer: For longer storage, freeze the mints in a single layer on a baking sheet, then transfer to an airtight container. They can last up to 3 months; simply thaw at room temperature before serving.

Reheating: There’s no need to reheat these delightful Soft Christmas Peppermints, but if they become too soft, simply place them in the fridge for a short time to regain their structure.

Soft Christmas Peppermints Variations

Inviting you to create your own unique twist on these delightful treats will bring happiness to your holiday table.

  • Nut-Free: Substitute butter with coconut oil for a nut-free option while keeping that rich flavor intact.
  • Chocolate-Dipped: After setting, dip the mints in melted chocolate for a decadent treat that takes them to a whole new level. You can choose dark, milk, or white chocolate depending on your preference, resulting in a harmonious blend of flavors.
  • Flavored Extracts: Try almond or orange extract instead of peppermint for a delightful flavor twist. Each option creates a new dimension of taste, making every batch just as exciting as the last.
  • Festive Sprinkles: Roll mints in crushed peppermint candies or colorful sprinkles before they set for an eye-catching presentation. This adds texture and a pop of color, making your holiday treats irresistible.
  • Sugar-Free: Use sugar-free powdered sugar to accommodate dietary restrictions without losing sweetness. These treats still provide all the joy, perfect for those watching their sugar intake. For other low-sugar options, consider checking out my recipe for Tropical Pineapple Soft.
  • Mini Versions: Make bite-sized mints by rolling the dough into smaller balls for a perfectly poppable treat. This is great for parties, allowing guests to sample and enjoy without feeling guilty.
  • Herbal Infusion: Infuse the dough with crushed herbs like rosemary or thyme for an adventurous flavor that intrigues the palate. The herbal notes will create a sophisticated twist, showcasing your culinary creativity.
  • Swirled Colors: For a festive touch, divide the dough into portions and create swirls of color using different food colorings. Not only does this look vibrant, but it adds an element of fun to the classic mints!

Make Ahead Options

These Soft Christmas Peppermints are a fantastic choice for busy home cooks looking to streamline their holiday preparations! You can easily prepare the dough up to 24 hours in advance by following the first four steps of the recipe. Simply mix the sweetened condensed milk, butter, powdered sugar, and peppermint extract, then chill the dough. Once prepped, wrap it tightly in plastic wrap and refrigerate until you’re ready to shape the mints. When you’re ready to serve, roll the chilled dough into balls or use cookie cutters, let them set for about an hour, and you’ll have delicious, melt-in-your-mouth peppermint treats ready to impress your guests! By prepping in advance, you’ll save valuable time during the bustling holiday season without sacrificing flavor or quality.

What to Serve with Soft Christmas Peppermints

These delightful mints are perfect for brightening up your holiday table, and there are plenty of delicious accompaniments to enhance your festive experience.

  • Rich Hot Chocolate: This warm, creamy beverage adds a cozy touch and complements the minty freshness with its rich chocolate notes.
  • Gingerbread Cookies: Their spiced flavor pairs beautifully, offering a perfect contrast to the sweet peppermint, creating a nostalgic holiday treat platter.
  • Coffee or Espresso: The bitterness of coffee balances the sweetness of the mints, making for a delightful after-dinner treat. A perfect pairing for those who love a little caffeine kick with their sweets!
  • Fruit Platter: Fresh fruits like berries or oranges bring vibrant flavor and a refreshing contrast, balancing the richness of the mints and adding a pop of color to your spread.
  • Festive Cheese Board: Include mild cheeses like cream cheese or goat cheese; their creamy texture and subtle flavor enhance the overall taste experience alongside the mints.
  • Warm Apple Cider: Serve hot apple cider spiced with cinnamon to add a warm, aromatic layer to your holiday gathering—its fruity warmth beautifully complements the cooling peppermint flavor.
  • Chocolate Dipped Pretzels: Their salty crunch brings a delightful textural contrast, enhancing the sweetness of the mints and providing an irresistible snack combination.
  • Mini Cupcakes: Light and fluffy, these sweet bites can be frosted with mint or vanilla flavors, making them an ideal sweet companion to your peppermints while adding variety to your holiday treat table.

Soft Christmas Peppermints Recipe FAQs

How do I select the best ingredients for Soft Christmas Peppermints?
Absolutely! For your Soft Christmas Peppermints, using high-quality sweetened condensed milk and unsalted butter is key to achieving that rich, creamy texture. When choosing sweetened condensed milk, look for brands that specify a smooth consistency on the label. The butter should be at room temperature to avoid lumps in your mixture. Fresh peppermint extract can make a significant difference in flavor; consider using pure extracts for the best results.

How should I store my Soft Christmas Peppermints?
To maintain their delightful melt-in-your-mouth texture, keep your Soft Christmas Peppermints in an airtight container at room temperature. They will stay fresh for up to one week. If you prefer a firmer texture, you can refrigerate them, but make sure they are well-sealed to prevent absorbing any other odors.

Can I freeze Soft Christmas Peppermints?
Sure thing! To freeze your Soft Christmas Peppermints, start by laying them in a single layer on a baking sheet lined with parchment paper. Once they’ve frozen solid (about 1-2 hours), transfer them to an airtight container or freezer bag, placing parchment paper between layers if stacking. They can last for up to 3 months in the freezer. To enjoy, simply let them thaw at room temperature—easy as pie!

What should I do if my mints are too soft to shape?
Very! If your dough feels too soft to handle after mixing, a little chilling goes a long way. Place the bowl in the refrigerator for 10-15 minutes. This will firm up the dough, making it easier to roll into balls or shape with cookie cutters. If they still seem sticky, chilling for an additional few minutes can help achieve the perfect consistency.

Are Soft Christmas Peppermints safe for those with dietary restrictions?
Absolutely! These Soft Christmas Peppermints are gluten-free and vegetarian, making them suitable for a wide range of dietary needs. However, it’s always best to check product labels for allergens, especially with extracts and butter substitutes. If you’re preparing these for someone with a specific allergy, you can easily swap ingredients or leave out the food coloring to ensure they’re safe and enjoyable for everyone.

Can I change the flavor of Soft Christmas Peppermints?
You bet! One of the best parts about making Soft Christmas Peppermints is their versatility. You can swap the peppermint extract for almond, vanilla, or even orange for a delightful twist. Just keep the same quantity of extract to maintain balance in flavor and consistency. You might even consider adding a sprinkle of crushed peppermint candies or colored sugar for festive flair—make it fun!

Soft Christmas Peppermints

Soft Christmas Peppermints – Melt-In-Your-Mouth Delights

Soft Christmas Peppermints are classic butter mints that are gluten-free, vegetarian, and delightfully easy to make.
Prep Time 15 minutes
Chilling Time 15 minutes
Total Time 30 minutes
Servings: 20 mints
Course: Dessert
Cuisine: American
Calories: 50

Ingredients
  

For the Mints
  • 1 can Sweetened Condensed Milk Do not substitute with powdered milk
  • ½ cup Butter Use unsalted butter for best results
  • 4 cups Powdered Sugar Do not substitute unless necessary
  • 1 teaspoon Peppermint Extract Can replace with vanilla or almond extracts
  • as needed drops Food Coloring Optional for festive colors

Equipment

  • mixing bowl
  • hand mixer
  • spatula
  • parchment paper

Method
 

Step-by-Step Instructions
  1. In a large mixing bowl, blend together 1 can of sweetened condensed milk and ½ cup of softened unsalted butter using a hand mixer or whisk until the mixture is smooth and creamy.
  2. Gradually sift in 4 cups of powdered sugar while continuing to mix on low speed until the mixture resembles a thick dough-like consistency.
  3. Stir in 1 teaspoon of peppermint extract and if desired, a few drops of food coloring, folding until evenly distributed.
  4. If the dough feels too soft, place it in the refrigerator for 10-15 minutes to firm up.
  5. Take small portions of chilled dough and roll them into balls about 1 inch in diameter or use cookie cutters for fun shapes.
  6. Allow the shaped mints to set at room temperature for about 1 hour.
  7. Transfer the mints to an airtight container and store at room temperature for up to one week.

Notes

For a festive touch, roll finished mints in crushed peppermint candies or sprinkles before they set.

Fluffy Cotton Candy Fudge: A Sweet Nostalgic Treat for All

As I was rummaging through my pantry the other day, the thought struck me: how can I bring a touch of summer carnivals back into my kitchen? That’s when I decided to whip up a batch of Fluffy Cotton Candy Fudge. This sweet delight is not only a colorful feast for the eyes but also incredibly simple to make—ready in just 15 minutes! Perfect for parties or a nostalgic treat, this fudge melts in your mouth, capturing the essence of those carefree summer days. Plus, it’s easily customizable, whether you need a dairy-free option or wish to play with different colors and flavors. Are you ready to dive into this whimsical dessert that is bound to bring smiles all around?

Why is Fluffy Cotton Candy Fudge a Must-Try?

Nostalgic Flavor: This fudge brings back memories of summer carnivals with its sweet cotton candy taste.
Vibrant Colors: The playful pink and blue swirls not only look enticing but also make for a beautiful presentation at any gathering.
Quick & Easy: In just 15 minutes, you’ll have a delightful treat ready for sharing or enjoying solo!
Customizable Delight: Easily adjust ingredients for dietary preferences, including dairy-free options for vegans. Want inspirations? Check out our Mini Pancakes for another fun cooking adventure!
Crowd-Pleasing Treat: Perfect for parties, gifts, or simply a whimsical snack that everyone will adore.

Fluffy Cotton Candy Fudge Ingredients

For the Fudge Base

  • Sweetened Condensed Milk – Adds creaminess and sweetness; substitute with dairy-free condensed milk for a vegan option.
  • White Bark – Provides a smooth and creamy base; white chocolate can be used as a substitute if preferred.

For the Flavor and Color

  • Cotton Candy Flavoring – Imparts the distinct sweet flavor of cotton candy; available at specialty stores or online.
  • Light Blue Food Coloring Gel – Creates a vibrant color for visual appeal; adjust the number of drops for your desired shade.
  • Light Pink Food Coloring Gel – Similar to the blue for color customization; use as needed for vibrant hues.

This easy and colorful treat is just a few ingredients away—perfect for capturing the joy of summer right in your kitchen with your Fluffy Cotton Candy Fudge!

Step‑by‑Step Instructions for Fluffy Cotton Candy Fudge

Step 1: Prepare the Pan
Begin by lining an 8×8-inch baking pan with aluminum foil or parchment paper, allowing some overhang for easy removal later. Make sure the foil is smooth and tight against the corners to ensure a clean finish for your Fluffy Cotton Candy Fudge. Set the pan aside while you work on the fudge mixture.

Step 2: Melt the White Bark
In a microwave-safe bowl, break the white bark into small pieces for even melting. Microwave for 30 seconds at a time, stirring well after each interval until completely smooth and melted, which should take about 1 to 2 minutes total. This will create a creamy base for your fudge that gives it that delightful texture.

Step 3: Combine the Fudge Base
Once the white bark is melted, immediately stir in the sweetened condensed milk and the cotton candy flavoring. Mix well until you achieve a homogeneous and creamy mixture, free from lumps. This step is crucial for infusing the fudge with the sweet, nostalgic flavor that makes the Fluffy Cotton Candy Fudge so special.

Step 4: Divide and Color the Mixture
With the fudge base ready, divide the mixture evenly into two separate bowls. Add a few drops of light blue food coloring gel to one bowl and light pink food coloring gel to the other, mixing until you reach your desired vibrant shades. This colorful step enhances the fun aesthetics of your fluffy cotton candy fudge.

Step 5: Layer the Fudge Mixtures
Spoon dollops of the blue and pink fudge mixtures alternatively into the prepared pan. This creates a beautiful patchwork effect as you layer the colors, allowing for a vibrant visual appeal. Take your time to arrange the mixtures prettily, as this contributes to the delightful presentation of the finished fudge.

Step 6: Swirl the Mixtures
Using a toothpick or a skewer, gently swirl the blue and pink mixtures together to achieve a marbled look. Avoid overmixing, which may muddy the colors, and instead create soft waves to enhance the aesthetics of your Fluffy Cotton Candy Fudge. Enjoy the process as the colors blend into whimsical patterns!

Step 7: Chill the Fudge
Place the pan in the refrigerator and allow the fudge to chill for about 2 hours, or until it is firm to the touch. This step is essential for setting the fudge properly, ensuring that it holds its shape when cut and brings that melt-in-your-mouth experience that everyone loves.

Step 8: Cut and Serve
Once the fudge is set, carefully lift it out of the pan using the overhanging foil or parchment paper. Place it on a cutting board and slice it into bite-sized squares. Your Fluffy Cotton Candy Fudge is now ready to be enjoyed, and its vibrant colors and sweet flavor are bound to bring smiles all around.

How to Store and Freeze Fluffy Cotton Candy Fudge

Room Temperature: Store your fudge in an airtight container at room temperature for up to 1 week. This keeps it soft and delicious while preserving its vibrant colors.

Fridge: For extended freshness, refrigerate your Fluffy Cotton Candy Fudge in an airtight container for up to 2 weeks. It will be firmer but just as delightful!

Freezer: You can freeze the fudge for up to 3 months. Wrap individual pieces in plastic wrap and place them in a freezer-safe bag or container. Thaw in the fridge before serving.

Reheating: If desired, gently warm it in the microwave for a few seconds to soften. Enjoy your fudgy treat while reminiscing about those fun carnival moments!

Make Ahead Options

These Fluffy Cotton Candy Fudge squares are perfect for busy weeknights or special occasions when you want to save time! You can prepare the fudge mixture up to 24 hours in advance by following all the steps except for chilling. After combining the sweetened condensed milk, white bark, and cotton candy flavoring, store the mixture in an airtight container in the refrigerator. To maintain its creamy texture, avoid leaving it out at room temperature for too long. When you’re ready to serve, simply divide, color, layer, and chill the fudge mixture, allowing it to set for about 2 hours. Enjoy the same delicious, melt-in-your-mouth treat with minimal prep time!

What to Serve with Fluffy Cotton Candy Fudge

Transform your sweet indulgence into a delightful meal experience with these fun pairings.

  • Creamy Ice Cream: A scoop of vanilla or cotton candy-flavored ice cream adds a luscious creaminess, perfect for balancing the fudge’s sweetness.
  • Fruit Salad: Lighten up your dessert table with a refreshing mix of berries and melon that provides a juicy contrast and a hint of tartness. This is a fantastic way to incorporate freshness!
  • Sparkling Lemonade: The zesty effervescence of sparkling lemonade complements the rich, sweet flavors of the fudge while adding a playful touch to your gathering.
  • Chocolate-Dipped Pretzels: The salty crunch of pretzels dipped in chocolate creates a satisfying contrast to the soft, sweet fudge, making every bite an adventure.
  • Colorful Cupcakes: Consider serving assorted cupcakes frosted in bright colors to mirror the fudge’s vibrant hues, creating a visually appealing dessert spread.
  • Whipped Cream: A dollop of homemade or store-bought whipped cream enhances the fudge’s silky texture, bringing a lightness that elevates each bite.
  • Milkshake: Pair your fudge with a thick milkshake, perhaps a berry or vanilla blend, for a nostalgic twist reminiscent of classic diners.
  • Dairy-Free Yogurt: For a healthier option, serve a side of coconut or almond yogurt with a sprinkle of granola; it brings crunch and a delightful creaminess to your dessert experience.
  • Cotton Candy: For the ultimate carnival effect, add a fluffy cotton candy confection on the side as a playful garnish that ties back to the fudge’s flavor.
  • Fruit-Infused Water: Serve water infused with fresh fruits like lemon or strawberries for a light, refreshing drink that perfectly complements the sugary richness of your fudge.

Expert Tips for Fluffy Cotton Candy Fudge

  • Smooth Melting: Ensure the white bark is fully melted for a creamy fudge; stop microwaving just before it’s completely smooth and stir to finish the melting process.
  • Vibrant Colors: Use gel food coloring for bold hues; too much liquid food coloring can lead to a soggy mixture and affect your fudge consistency.
  • Cool Completely: Allow the fudge to chill until it’s fully set in the refrigerator; this guarantees clean slices and a perfect texture for your Fluffy Cotton Candy Fudge.
  • Plan Ahead: For best results, prepare your fudge a day in advance to enhance its flavor and texture while allowing ample chilling time.
  • Make It Your Own: Feel free to add fun mix-ins like colorful sprinkles or switch flavors to chocolate for a delightful twist on the classic cotton candy taste.

Fluffy Cotton Candy Fudge Variations

Feel free to explore the world of flavors and colors as you make this delightful fudge your own!

  • Dairy-Free: Substitute sweetened condensed milk with coconut or almond milk for a vegan option without losing creaminess. This twist lets everyone enjoy a slice!

  • Flavor Experimentation: Instead of cotton candy flavoring, try using vanilla extract or even chocolate for a decadent spin. Each flavor brings its unique charm, transforming your fudge into a new experience.

  • Color Without Coloring: For a more traditional look, omit the food coloring and keep it classic white. The smoothness of white fudge can be just as appealing, especially with festive sprinkles on top.

  • Crunch Factor: Mix in crushed nuts or colorful sprinkles to add texture to your fudge. This extra dimension makes each bite an adventure of flavor and crunch.

  • Fruity Delight: Introduce a hint of fruitiness by adding a few drops of raspberry or strawberry flavoring. This fruity twist pairs beautifully with the sweetness of the fudge.

  • Heat It Up: For some excitement, add a pinch of cayenne pepper or chili powder to give a sweet and spicy kick. It’s an unexpected surprise everyone will love!

  • Layered Magic: Instead of swirling the mixture, layer the fudge by first pouring a pink layer, then a blue layer on top for an eye-catching stacked effect. Each slice reveals beautiful stripes of color!

  • Easy Chocolate Swirls: Add melted chocolate drizzles on top for a rich contrast that combines the sweetness of cotton candy with the richness of chocolate. It’s a delightful pairing that elevates the fudge.

Consider trying these variations during your next kitchen adventure, and while you’re at it, check out our Two Ingredient Omelet or indulge in Mini Pancakes for more fun recipes that spark creativity!

Fluffy Cotton Candy Fudge Recipe FAQs

How do I select the best ingredients for Fluffy Cotton Candy Fudge?
Absolutely! For the best flavor and texture, look for high-quality sweetened condensed milk and white bark. Make sure the white bark is fresh and smooth—check for any signs of discoloration or clumps. If you’re going dairy-free, a good brand of dairy-free condensed milk works just as well, providing a similar creaminess.

What is the best storage method for Fluffy Cotton Candy Fudge?
Great question! Store the fudge in an airtight container at room temperature for up to 1 week. If you’d like it to last longer, refrigerate it in the same container for up to 2 weeks. Just make sure to give it a moment to come to room temperature before serving; this restores its melt-in-your-mouth texture.

Can I freeze Fluffy Cotton Candy Fudge, and how do I do it?
Definitely! To freeze your fudge, wrap each piece individually in plastic wrap—this helps maintain moisture. Then, place the wrapped pieces in a freezer-safe bag or container. It can be frozen for up to 3 months. When you’re ready to enjoy some, simply transfer the pieces to the refrigerator to thaw overnight. They’ll be delicious when you’re ready for a sweet treat!

What if my fudge didn’t set properly?
No problem at all! If your fudge is too soft or gooey, it may not have chilled long enough. To fix this, place it back in the refrigerator for an additional hour or two. If it’s still not setting, you could melt it down again and carefully stir in a little more melted white bark to adjust the consistency, then re-chill.

Are there any dietary considerations I should keep in mind for Fluffy Cotton Candy Fudge?
Very much so! This fudge can easily be adapted for different dietary needs. To make it vegan, simply use dairy-free sweetened condensed milk and ensure your white bark is free from dairy. Always check labels for allergens, especially if serving to others, to avoid issues with nuts or other ingredients. You want everyone to enjoy this nostalgic treat!

Fluffy Cotton Candy Fudge

Fluffy Cotton Candy Fudge: A Sweet Nostalgic Treat for All

Fluffy Cotton Candy Fudge is a delightful dessert that captures the nostalgic essence of summer carnivals.
Prep Time 15 minutes
Chill Time 2 hours
Total Time 2 hours 15 minutes
Servings: 16 squares
Course: Dessert
Calories: 120

Ingredients
  

For the Fudge Base
  • 1 can Sweetened Condensed Milk Substitute with dairy-free condensed milk for a vegan option.
  • 10 oz White Bark White chocolate can be used as a substitute.
For the Flavor and Color
  • 1 tsp Cotton Candy Flavoring Available at specialty stores or online.
  • 3 drops Light Blue Food Coloring Gel Adjust the number of drops for desired shade.
  • 3 drops Light Pink Food Coloring Gel Use as needed for vibrant hues.

Equipment

  • microwave-safe bowl
  • baking pan
  • Aluminum foil or parchment paper
  • Toothpick or skewer
  • Cutting Board

Method
 

Instructions for Fluffy Cotton Candy Fudge
  1. Prepare the pan by lining an 8x8-inch baking pan with aluminum foil or parchment paper.
  2. Melt the white bark in a microwave-safe bowl by microwaving for 30 seconds at a time until smooth.
  3. Combine the melted white bark with sweetened condensed milk and cotton candy flavoring until creamy.
  4. Divide the fudge base into two bowls and add blue food coloring to one and pink to the other.
  5. Layer spoonfuls of the blue and pink mixtures into the prepared pan alternatingly.
  6. Swirl the mixtures gently with a toothpick to create a marbled appearance.
  7. Chill the fudge in the refrigerator for about 2 hours until firm.
  8. Cut the set fudge into bite-sized squares and serve.

Notes

This fudge can be customized with different colors and flavors, and is perfect for parties or gifts.

Refreshing Hydrating Watermelon Smoothie with Cucumber Bliss

As the sun blazed down, I found myself yearning for something cool and revitalizing. That’s when it hit me—a Refreshing Hydrating Watermelon Smoothie with Cucumber! This divine blend utilizes sweet, juicy watermelon paired with the crisp refreshment of cucumber, creating the ultimate thirst-quencher. Not only is this smoothie delightfully easy to whip up, but it’s also packed with hydrating properties that make it perfect for hot summer days or after an intense workout. With just a handful of ingredients, you’ll have a quick, low-calorie treat that will leave you feeling replenished and satisfied. So, are you ready to blend up some bliss? Let’s dive into this refreshing recipe!

Why You’ll Love This Smoothie Recipe

Quick and Easy: With just five ingredients, this Refreshing Hydrating Watermelon Smoothie with Cucumber is a breeze to make, perfect for busy mornings or a sudden craving.
Hydrating Delight: The watermelon and cucumber combo not only tastes amazing but also delivers a refreshing hydration boost.
Low-Calorie: Enjoy a guilt-free, low-calorie treat that fits perfectly into any wellness plan.
Versatile Inspiration: Customize your smoothie by adding mint or switching to plant-based yogurt for a dairy-free option.
Crowd-Pleaser: Whether it’s brunch with friends or a post-workout refreshment, this recipe will wow anyone who tries it. Serve it alongside a Refreshing Cucumber Carrot salad to elevate your meal!

Refreshing Hydrating Watermelon Smoothie Ingredients

• Here’s everything you need to whip up this delicious smoothie!

For the Smoothie

  • Watermelon – The base of the smoothie; use fresh, ripe watermelon for maximum sweetness and hydration.
  • Cucumber – Adds a crisp texture; can substitute with zucchini if desired for a similar crunch.
  • Greek Yogurt – Provides creaminess and a protein boost; opt for coconut yogurt for a delightful dairy-free twist.
  • Honey or Agave Syrup – Sweetener to enhance flavor; adjust the amount based on your personal preference for sweetness.
  • Lemon Juice – Balances the sweetness with acidity; freshly squeezed juice is best for optimal flavor.

This Refreshing Hydrating Watermelon Smoothie with Cucumber is not just a treat; it’s a beautiful blend of flavors waiting to be explored!

Step‑by‑Step Instructions for Refreshing Hydrating Watermelon Smoothie with Cucumber

Step 1: Prepare Your Ingredients
Start by cutting fresh, ripe watermelon and cucumber into manageable chunks. Aim for pieces about 1-2 inches to ensure they blend smoothly. You’ll want approximately two cups of watermelon and half a cup of cucumber to achieve that perfect balance of sweetness and refreshment in your Refreshing Hydrating Watermelon Smoothie with Cucumber.

Step 2: Combine in the Blender
In a blender, add the prepared watermelon and cucumber chunks. Next, scoop in half a cup of Greek yogurt for creaminess, followed by a tablespoon of honey or agave syrup to sweeten the mix. Finally, squeeze in the juice of half a lemon to brighten the flavors. This combination will create a luscious, hydrating blend that feels like a sip of summer.

Step 3: Blend Until Smooth
Secure the lid on your blender and blend the mixture on high speed for about 1-2 minutes. Watch as the ingredients transform into a vibrant, smooth puree, ensuring no chunks remain. You want a silky consistency that’s both inviting and refreshing, characteristic of the ideal Refreshing Hydrating Watermelon Smoothie with Cucumber.

Step 4: Taste and Adjust Sweetness
Once blended, taste your smoothie to see if it meets your sweetness preference. If you desire a little more sweetness, add an extra drizzle of honey or agave syrup, and blend for another 10-15 seconds. This step ensures your smoothie is perfectly tailored to your liking while maintaining its refreshing essence.

Step 5: Serve Immediately
Pour the smoothie into chilled glasses for an extra cool treat. The vibrant pink color should be inviting, and the texture should be creamy yet drinkable. Serve immediately to preserve the fresh flavors and hydrating benefits, making your Refreshing Hydrating Watermelon Smoothie with Cucumber a delightful treat for any occasion.

Refreshing Hydrating Watermelon Smoothie Variations

Feel free to get creative and tailor this smoothie to your taste!

  • Dairy-Free: Replace Greek yogurt with coconut yogurt for a creamy, dairy-free option that still packs a punch of flavor. You won’t miss the dairy at all!

  • Minty Fresh: Add a handful of fresh mint leaves before blending for an aromatic twist that enhances the overall refreshment. It’s like a breath of fresh air in your smoothie!

  • Protein Boost: Stir in a scoop of your favorite protein powder for an extra nutritional kick, perfect for post-workout recovery. This twist adds staying power to your delicious drink.

  • Citrusy Zing: Swap lemon juice for lime juice for a different citrus touch. The tartness of lime adds a unique brightness that pairs beautifully with the sweetness of watermelon.

  • Tropical Vibes: Incorporate diced pineapple or mango for a fruity twist that transports you to a beach paradise. This variation lends more sweetness and tropical flavor to your smoothie!

  • Smoothie Bowl: For a thicker texture, reduce the liquid ingredients and blend to a thicker consistency, then pour it into a bowl and top with your choice of fruits and granola. A delicious and visually stunning breakfast!

  • Chili Kick: Add a pinch of cayenne pepper for a touch of heat. This surprising ingredient elevates the flavor profile and adds a fun kick to the refreshing sweetness.

  • Frozen Delight: Freeze the entire smoothie mixture and scoop out to enjoy as a refreshing sorbet on hot days. Quick, easy, and perfect for beating the heat!

And if you’re looking for more refreshing ideas, consider serving this alongside a Crisp Cabbage Cucumber Salad with Lemon Sesame Dressing. Happy blending!

Make Ahead Options

These Refreshing Hydrating Watermelon Smoothies with Cucumber are perfect for meal prep enthusiasts! You can chop your watermelon and cucumber and store them in an airtight container in the refrigerator for up to 24 hours. This preparation saves you time during busy mornings and keeps your ingredients fresh. When you’re ready to enjoy, simply blend the prepped ingredients with Greek yogurt, honey, and lemon juice. For optimal quality, combine everything just before serving to preserve that delightful freshness. Make ahead to sip on this hydrating smoothie anytime you need a refreshing pick-me-up after a long day or a workout!

Expert Tips for Refreshing Hydrating Watermelon Smoothie

  • Chill Factor: Freeze watermelon chunks before blending for an extra refreshing and frosty smoothie that keeps you cool.
  • Avoid Over-Blending: Blend just until smooth to prevent your smoothie from becoming too liquid; a silky texture enhances enjoyment.
  • Yogurt Variations: Adjust thickness by using less Greek yogurt for a lighter consistency or add more for a creamier texture in your Refreshing Hydrating Watermelon Smoothie with Cucumber.
  • Balance Sweetness: Always taste before serving; adding more honey or agave can enhance the flavor to suit your taste buds perfectly.
  • Garnish Ideas: For an appealing presentation, serve with cucumber slices or fresh mint leaves on top, enhancing both look and flavor.

How to Store and Freeze Refreshing Hydrating Watermelon Smoothie

Fridge: Store in an airtight container for up to 24 hours. Stir well before serving, as separation may occur.

Freezer: For longer storage, pour the smoothie into ice cube trays and freeze. This allows you to use the cubes in future smoothies or drinks!

Reheating: Not recommended for this smoothie; enjoy it cold for the best taste and refreshing experience.

Tip: If you’re planning to make extra, consider blending and freezing in single-serving portions to have a quick, hydrating treat ready whenever you need it!

What to Serve with Refreshing Hydrating Watermelon Smoothie with Cucumber

Elevate your smoothie experience with delightful pairings that harmonize flavors and textures, ensuring a fulfilling meal.

  • Greek Yogurt Parfait: Layered with granola and fresh fruit, this creamy parfait complements the smoothie’s refreshing qualities with hearty crunch and richness.

  • Minty Fruit Salad: A vibrant mix of seasonal fruits with fresh mint brightens the dish, echoing the refreshing hints in the watermelon smoothie.

  • Savory Avocado Toast: The creamy, buttery taste of avocado on whole grain bread creates a delicious contrast to the smooth drink, making for a balanced meal.

  • Zesty Quinoa Salad: Packed with veggies and a lemon vinaigrette, this salad introduces a hearty bite, enriching your meal while matching the smoothie’s vibrant flavor.

  • Chilled Cucumber Soup: This light and refreshing soup mirrors the main ingredient’s crispness; it’s a perfect appetizer to awaken your palate before enjoying the smoothie.

  • Lemonade Sparkler: A fizzy lemonade with a hint of mint or cucumber provides a refreshing contrast while keeping the bright flavors alive, ideal for sipping alongside the smoothie.

These pairings not only enhance the refreshing hydrating watermelon smoothie experience but also create a delightful medley on your dining table!

Refreshing Hydrating Watermelon Smoothie with Cucumber Recipe FAQs

How do I choose the right watermelon?
Absolutely! When selecting watermelon for your Refreshing Hydrating Watermelon Smoothie with Cucumber, look for a heavy watermelon that has a uniform shape without any dents or blemishes. The skin should be a deep green color, with a creamy yellow spot, indicating it ripened on the ground. Give it a gentle tap; a ripe watermelon sounds hollow!

How long does the smoothie last in the fridge?
Very! Your smoothie can be stored in an airtight container in the refrigerator for up to 24 hours. Just make sure to give it a good stir before serving, as it may separate after sitting. It’s best enjoyed fresh, but you’ll still get that refreshing taste the next day!

Can I freeze the smoothie for later?
Certainly! To freeze your Refreshing Hydrating Watermelon Smoothie, pour it into ice cube trays and freeze until solid. This allows you to pop out smoothie cubes whenever you desire a refreshing treat. Simply blend with a bit of liquid when you’re ready to enjoy one, keeping your smoothie choices open for a few months!

What if my smoothie is too thick?
Oh, no worries at all! If your smoothie turns out thicker than you like, you can simply add a splash of cold water or additional lemon juice and blend again until you reach your desired consistency. Alternatively, using less Greek yogurt during the blending process can help achieve a lighter texture overall.

Is this smoothie safe for pets?
While the ingredients are generally safe, it’s best to be cautious. Watermelon is safe for dogs in moderation, but avoid giving them any portion with seeds or rind. Cucumber is also safe, but keep in mind that not all pets digest fruits and vegetables well. Always check with your vet if you’re unsure.

What if I’m allergic to one of the ingredients?
Absolutely understandable! If you have allergies, consider substituting Greek yogurt with coconut yogurt to keep it dairy-free. You can adjust the sweetness using maple syrup instead of honey or opt for fresh mint leaves for added flavor without any allergens. This way, you can still enjoy the refreshing goodness of your smoothie!

Refreshing Hydrating Watermelon Smoothie with Cucumber

Refreshing Hydrating Watermelon Smoothie with Cucumber Bliss

Enjoy a Refreshing Hydrating Watermelon Smoothie with Cucumber, a delightful and revitalizing drink perfect for hot days.
Prep Time 10 minutes
Total Time 10 minutes
Servings: 2 cups
Course: Drinks
Cuisine: American
Calories: 150

Ingredients
  

For the Smoothie
  • 2 cups Watermelon use fresh, ripe watermelon
  • 0.5 cups Cucumber can substitute with zucchini if desired
  • 0.5 cups Greek Yogurt opt for coconut yogurt for dairy-free
  • 1 tablespoon Honey or Agave Syrup adjust based on preference
  • 0.5 lemons Lemon Juice freshly squeezed for optimal flavor

Equipment

  • Blender

Method
 

Step‑by‑Step Instructions
  1. Start by cutting fresh, ripe watermelon and cucumber into manageable chunks, about 1-2 inches.
  2. In a blender, add the prepared watermelon and cucumber chunks, followed by Greek yogurt, honey or agave syrup, and lemon juice.
  3. Blend on high speed for 1-2 minutes until smooth and creamy.
  4. Taste and adjust sweetness as needed, adding more honey or agave if desired.
  5. Pour into chilled glasses and serve immediately to enjoy the fresh flavors.

Notes

Store in an airtight container for up to 24 hours and stir before serving. Freeze for longer storage.

Delicious Marzipan Shortbread Cookies for Your Holidays

As the aromas of butter and almonds waft through the kitchen, I can’t help but feel a warm rush of nostalgia. Marzipan Shortbread Cookies are my ultimate holiday treat, combining that irresistible melt-in-your-mouth texture with the unmistakable sweetness of marzipan. This recipe isn’t just a delightful way to indulge—it’s also a quick and easy preparation that invites everyone to join in the fun of holiday baking. With only a handful of ingredients, you can whip up a batch that’s perfect for sharing, gifting, or savoring while sipping a cozy cup of tea. Plus, if you find yourself short on supplies, homemade marzipan is just a few steps away! Curious how to create these unforgettable cookies? Let’s get started!

Why make Marzipan Shortbread Cookies?

Irresistible Delight: Marzipan Shortbread Cookies promise a blend of buttery richness and sweet almond flavor that captivates your senses.

Quick and Easy: With just a handful of ingredients and simple steps, you’ll find whipping these up a breeze—even with homemade marzipan!

Festive Appeal: Perfect for sharing at holiday gatherings, these visually charming cookies are sure to impress guests and family alike.

Versatile Variations: Feel free to experiment by adding nuts or trying different flavor pastes for a delightful twist. Need more cookie inspiration? Don’t forget to check out our Chocolate Date Cookies or Nutty Apricot Cookies for your next bake!

Nostalgic Flavor: Each bite brings back wonderful memories, making these cookies a cherished addition to your holiday traditions.

Marzipan Shortbread Cookies Ingredients

For the Cookie Dough

  • All-Purpose Flour – Provides structure for the cookies, ensuring they hold their shape.
  • Unsalted Butter – Adds rich flavor and a tender texture; make sure it’s softened for easy blending.
  • Marzipan – Imparts a delightful almond flavor; if you’re missing it, homemade marzipan is a great substitute!
  • Granulated Sugar – Sweetens the dough perfectly, balancing the rich flavors.
  • Vanilla Extract – Elevates the overall taste and adds a lovely aroma to the cookies.
  • Egg Yolks – Bind the ingredients together and enrich the cookie’s flavor; they add that classic richness we love!
  • Salt – Balances the sweetness and enhances all the flavors in every scrumptious bite.
  • Almond Extract (optional) – Boosts the almond flavor if you’re a marzipan fanatic!

Each ingredient plays a crucial role in crafting these delectable Marzipan Shortbread Cookies, setting the stage for a memorable baking experience!

Step‑by‑Step Instructions for Marzipan Shortbread Cookies

Step 1: Mix the Dough
In a large mixing bowl, cream together the softened unsalted butter and granulated sugar until light and fluffy, about 3-4 minutes. Then, add in the flour, marzipan, vanilla extract, egg yolks, salt, and optional almond extract. Using a spatula or wooden spoon, gently mix until just combined, being careful not to overmix, as this will keep your Marzipan Shortbread Cookies tender.

Step 2: Chill the Dough
Once your dough is mixed, shape it into a flat disc and wrap it tightly in cling film. Place the wrapped dough in the refrigerator for at least 30 minutes. This chilling time is essential as it firms up the dough, making it easier to roll out later and ensuring that your cookies maintain their shape while baking.

Step 3: Roll Out the Dough
After the dough has chilled, preheat your oven to 350°F (175°C) and flour your clean work surface lightly. Remove the dough from the refrigerator, unwrap it, and roll it out to your desired thickness—around 1/4 inch is ideal for flavorful Marzipan Shortbread Cookies. Use cookie cutters or molds to cut out festive shapes, ensuring clear and clean edges for a beautiful presentation.

Step 4: Prepare for Baking
Arrange the cut-out cookies on a parchment-lined baking sheet, giving them some space as they will spread slightly during baking. As the cookies rest, give your oven a few minutes to ensure it’s fully preheated, which is crucial for achieving that perfectly golden color. Check the temperature before moving ahead to ensure a consistent bake.

Step 5: Bake the Cookies
Place the baking sheet in the preheated oven and bake the Marzipan Shortbread Cookies for 12-15 minutes, or until they are lightly golden around the edges. Keep a close eye on them towards the end to avoid over-baking, as these delicate cookies can turn quickly. Once baked, remove the cookies from the oven and let them cool on the sheet for a couple of minutes before transferring them to a wire rack.

Step 6: Final Touches
Allow the cookies to cool completely on the wire rack. Once cooled, you may opt to dust them with powdered sugar for a festive touch or even drizzle a simple glaze for an extra treat! These Marzipan Shortbread Cookies are now ready to be enjoyed as part of your holiday celebrations or shared with loved ones.

How to Store and Freeze Marzipan Shortbread Cookies

Room Temperature: Store cookies in an airtight container at room temperature for up to 1 week to maintain their fresh taste and texture.

Fridge: If you prefer, you can refrigerate the cookies, but be aware they may lose some of their tenderness. Consume within 5 days for best quality.

Freezer: For longer storage, wrap the cookies tightly in plastic wrap and then place them in a freezer bag. They can be frozen for up to 3 months.

Reheating: When ready to enjoy, thaw cookies at room temperature. For a warm treat, reheat in a 300°F (150°C) oven for about 5-7 minutes.

What to Serve with Marzipan Shortbread Cookies

These delightful cookies are perfect for creating a cozy and inviting holiday atmosphere around your kitchen table.

  • Creamy Hot Chocolate: The rich, chocolatey warmth pairs beautifully with the almond flavor, making every sip and bite a heavenly experience.

  • Spiced Chai Latte: With its aromatic spices, a chai latte complements the sweetness of the cookies while enhancing their festive appeal.

  • Fresh Fruit Salad: A mix of bright citrus and juicy berries adds a refreshing contrast, lightening up the richness of the cookies.

  • Vanilla Ice Cream: Serve warm cookies alongside a scoop of vanilla ice cream; the creamy contrast is simply irresistible!

  • Holiday Punch: A sweet and tangy fruit punch brings a festive zing, creating a party ambiance that’s perfect for sharing treats.

  • Nutty Biscotti: Crunchy and flavorful, biscotti provide a delightful texture contrast and is perfect for dunking alongside your cookies and a steaming cup of coffee.

  • Almond Tea: Enhance that almond flavor with a warm cup of almond tea, perfect for echoing the flavors of the marzipan in the cookies.

  • Shortbread Crumble Cake: Serve a slice of light crumble cake for an enhanced shortbread experience and a twist on textures.

  • Gingerbread Men: For a classic touch, pair these cookies with gingerbread men to enjoy the harmony of holiday flavors.

  • Dark Chocolate Drizzle: Consider drizzling melted dark chocolate on the cookies for an elegant finish and a delightful surprise in every bite.

Make Ahead Options

These Marzipan Shortbread Cookies are perfect for busy holiday bakers looking to save time! You can prepare the dough up to 24 hours in advance by mixing it and wrapping it tightly in cling film before refrigerating. This chilling not only makes rolling easier, but it also helps the flavors meld together beautifully. If you’re really ahead of the game, you can also cut the cookies into shapes and freeze them for up to 3 days—just place them on a parchment-lined tray in the freezer until solid, then transfer to an airtight container. When you’re ready to bake, simply take them out of the freezer while preheating the oven, and bake from frozen for an extra minute or two. This way, you can enjoy fresh-baked Marzipan Shortbread Cookies with minimal effort while preserving their delightful texture and flavor!

Tips for the Best Marzipan Shortbread Cookies

  • Ingredient Warmth: Use room temperature butter for easy mixing, ensuring your Marzipan Shortbread Cookies have that perfect tender texture.

  • Chill, Chill, Chill: Don’t skip chilling the dough! This step is crucial for keeping the cookies from losing shape during baking and achieving a flaky consistency.

  • Avoid Overmixing: Gently combine ingredients until just mixed; overmixing can lead to tough cookies instead of the delicate bite you desire.

  • Watch the Bake: Start checking the cookies at 12 minutes to avoid over-baking—aim for a light golden color for that classic shortbread look and flavor.

  • Presentation Matters: For a festive touch, consider dusting cooled cookies with powdered sugar or adding a drizzle of glaze to enhance your holiday cookie platter!

Marzipan Shortbread Cookies Variations

Feel free to explore these delightful twists to customize your Marzipan Shortbread Cookies!

  • Nutty Crunch: Add chopped pecans or walnuts for a satisfying crunch and rich flavor; just fold them into the dough before chilling. The added texture beautifully contrasts with the soft cookie, creating a truly memorable bite.

  • Chocolate Lovers: Swap some flour for cocoa powder to introduce a rich chocolate note; this delightful twist is perfect for those who adore chocolate and almonds together. You might just create a new holiday favorite!

  • Spiced Twist: Incorporate cinnamon or nutmeg into the dough for a hint of warmth; these spices bring an inviting aroma and a perfect seasonal touch to your cookies. Imagine the cozy feel they’ll create in your kitchen!

  • Citrus Zing: Add zest of orange or lemon for a refreshing citrus flavor; this bright addition awakens the almond notes and complements the sweetness of the marzipan beautifully. It’s a delicious way to brighten your holiday treats!

  • Almond Extract Boost: For a stronger almond flavor, simply increase the almond extract by an additional 1/4 teaspoon; you’ll enhance the marzipan essence, perfect for almandine enthusiasts.

  • Dried Fruit Delight: Fold in chopped dried cherries or cranberries for a pop of tartness and vibrant color; these will not only add flavor but also a festive flair to each cookie.

  • Decadent Drizzle: Drizzle melted dark chocolate over the cooled cookies for an indulgent touch; it adds a lovely contrast to the sweetness and presents beautifully on any cookie platter. You can also dust them with powdered sugar for an extra festive feel!

  • Homemade Marzipan: If you’re feeling adventurous, create your own homemade marzipan as a fun baking activity; combine 100 g slivered almonds, 100 g powdered sugar, 1 egg white, and 1/2 tsp almond extract for a truly personal touch. These cookies can spark conversation and admiration at gatherings!

As you bake and experiment, don’t forget to check out our other delightful treats like Crunchy Banana Seed Cookies and German Style Cookies for more inspiration during your holiday season!

Marzipan Shortbread Cookies Recipe FAQs

Can I use any type of marzipan for these cookies?
Absolutely! You can use store-bought marzipan or make your own at home using 100 g slivered almonds, 100 g powdered sugar, 1 egg white, and 1/2 tsp almond extract. This homemade version offers fantastic flavor and can be a fun activity to do with family or friends.

How should I store the Marzipan Shortbread Cookies?
Store your cookies in an airtight container at room temperature for up to 1 week. If you want them to last longer, you can refrigerate them for about 5 days, but keep in mind that refrigeration might make them a bit less tender.

Can I freeze Marzipan Shortbread Cookies?
Yes, you can! To freeze, wrap the cookies tightly in plastic wrap and then place them in a freezer bag. They can be stored in the freezer for up to 3 months. When you’re ready to enjoy them, simply thaw them at room temperature or reheat them in a 300°F (150°C) oven for about 5-7 minutes for a fresh-baked taste.

What should I do if my cookie dough is too crumbly?
If your dough seems too crumbly, it may need a bit more moisture. Gradually add a teaspoon of cold water or an extra egg yolk while mixing to bring it together. Make sure you’re not adding too much, as we want to maintain that tender shortbread texture!

Are Marzipan Shortbread Cookies suitable for those with nut allergies?
Since marzipan is made from almonds, these cookies are not suitable for those with nut allergies. However, you could experiment with other flavorings like vanilla or chocolate, but keep in mind that this will change the character of the cookies.

How do I know when my cookies are done baking?
Keep a close eye on them as they bake. They should turn a light golden color, and you can start checking for doneness around the 12-minute mark. Remember, over-baking can lead to tough cookies, so take them out as soon as they’re lightly golden around the edges!

Marzipan Shortbread Cookies

Delicious Marzipan Shortbread Cookies for Your Holidays

These Marzipan Shortbread Cookies combine buttery richness with sweet almond flavor—a perfect holiday treat.
Prep Time 15 minutes
Cook Time 15 minutes
Chilling Time 30 minutes
Total Time 1 hour
Servings: 24 cookies
Course: Dessert
Cuisine: Holiday
Calories: 150

Ingredients
  

For the Cookie Dough
  • 2 cups All-Purpose Flour
  • 1 cup Unsalted Butter softened
  • 1/2 cup Marzipan homemade if needed
  • 1/2 cup Granulated Sugar
  • 1 teaspoon Vanilla Extract
  • 2 large Egg Yolks
  • 1/4 teaspoon Salt
  • 1/2 teaspoon Almond Extract optional

Equipment

  • mixing bowl
  • parchment paper
  • Rolling Pin
  • Cookie Cutters
  • baking sheet

Method
 

Step-by-Step Instructions for Marzipan Shortbread Cookies
  1. Cream together the softened unsalted butter and granulated sugar until light and fluffy, about 3-4 minutes.
  2. Add in the flour, marzipan, vanilla extract, egg yolks, salt, and optional almond extract. Mix until just combined.
  3. Shape the dough into a flat disc, wrap in cling film, and refrigerate for at least 30 minutes.
  4. Preheat the oven to 350°F (175°C). Flour your work surface and roll out the dough to about 1/4 inch thickness.
  5. Cut out festive shapes with cookie cutters and arrange on a parchment-lined baking sheet.
  6. Bake for 12-15 minutes, until lightly golden around the edges. Let cool on the sheet for a couple of minutes, then transfer to a wire rack.
  7. Dust with powdered sugar or drizzle with glaze once cooled, if desired.

Notes

For best results, use room temperature butter and do not skip the chilling step to maintain cookie shape.

Delicious Mango Sticky Rice: A Sweet Taste of Thailand

As I stood in my kitchen, the air filled with the sweet aroma of ripe mangoes, I was reminded of the vibrant streets of Thailand where Mango Sticky Rice reigns supreme. This delightful dessert combines chewy, sticky rice embraced by a luscious, creamy coconut sauce, offering a comforting treat that’s both gluten-free and vegan. Not only is this recipe surprisingly easy to whip up, but it also transforms your dining table into an exotic getaway, perfect for impressing guests or savoring on a cozy night in. With a few simple ingredients and expert tips, you can create a dish that marries classic flavors with a modern touch. Are you ready to dive into the world of Thai cuisine and bring the taste of Thailand right to your home?

Why is Mango Sticky Rice a Must-Try?

Indulgent Flavors: This dish features sweet, sticky rice paired with rich coconut sauce, creating an irresistible combination that will transport your taste buds straight to Thailand.

Easy Preparation: With minimal ingredients and a simple process, even novice cooks can master this delightful dessert.

Vegan-Friendly: You’ll love that it’s not just gluten-free, but also vegan—perfect for guests with dietary restrictions.

Versatile: Enjoy this treat warm or at room temperature, making it an ideal dessert for any occasion. For variations, consider trying the Sizzling Rice Wrapped for a fun twist on flavors.

Crowd-Pleaser: Mango Sticky Rice appeals to everyone, whether you’re serving it at a dinner party or enjoying it as a sweet treat on a quiet night in.

Mango Sticky Rice Ingredients

For the Sticky Rice
Sticky Rice – Use glutinous or sweet rice for that authentic chewy texture.
Salt – A pinch enhances the overall flavor of the dish.

For the Coconut Sauce
Coconut Milk – Full-fat coconut milk delivers the richest flavor; avoid using only coconut cream.
Sugar – White granulated sugar is best to maintain sweetness and color; it’s a key ingredient in Mango Sticky Rice.
Cornstarch (Optional) – Helps thicken the sauce for a creamier consistency; adjust with water if needed.
Salt – Balances the sweetness of the coconut sauce.

For Serving
Ripe Mangoes – Choose Ataulfo or Tommy Atkins mangoes for optimal sweetness; ensure they’re perfectly ripe.
Toasted Sesame Seeds (Optional) – Adds a delightful crunch and visual appeal on top of the dish.

Step‑by‑Step Instructions for Mango Sticky Rice

Step 1: Soak the Rice
Begin by rinsing the glutinous rice under cold water until the water runs clear, about 2-3 minutes. Then, transfer the rice to a bowl and submerge it in water for at least 1 hour or overnight for a softer texture. Soaking the sticky rice is essential for achieving that perfect, chewy consistency in your delicious Mango Sticky Rice.

Step 2: Steam the Rice
After soaking, drain the rice and place it in a heatproof bowl lined with cheesecloth or in a bamboo steamer. Bring a pot of water to a boil and carefully place the bowl or steamer over the pot. Steam the rice for 20-25 minutes, until it becomes tender and sticky. You’ll know it’s ready when it appears slightly translucent and glistens under the light.

Step 3: Prepare the Sauce
While the rice is steaming, combine the full-fat coconut milk, sugar, and a pinch of salt in a saucepan over low heat. Stir gently until the sugar dissolves completely, without bringing it to a boil. If you prefer a creamier consistency, create a cornstarch slurry with a little water and add it to the mixture, stirring continuously until it thickens slightly, achieving a luscious coconut sauce to pair with your Mango Sticky Rice.

Step 4: Combine Rice and Sauce
Once the sticky rice is cooked, pour 1 cup of the warm coconut sauce over it, mixing gently to ensure the rice absorbs the flavors. Allow this mixture to cool slightly, letting the rice soak up the sweetness of the sauce. This step is essential for enhancing the overall taste of your Mango Sticky Rice.

Step 5: Serve
To serve, scoop a generous portion of the sticky rice onto a plate and arrange sliced ripe mangoes alongside. Drizzle the remaining coconut sauce over the top, allowing its creamy richness to enhance the dish. For an extra touch, sprinkle toasted sesame seeds on top, adding both texture and visual appeal to your delightful Mango Sticky Rice dessert.

Expert Tips for Mango Sticky Rice

Soaking Is Key: Always soak the sticky rice for at least 1 hour, or overnight for maximum chewiness—this is critical for perfect Mango Sticky Rice.

Steamer Substitution: If you lack a steamer, use a heatproof bowl placed in a saucepan. Make sure to cover it tightly to trap the steam.

Choosing Mangoes: Opt for Ataulfo or Tommy Atkins mangoes, as their sweetness balances the dish beautifully. Wait for them to ripen at room temperature.

Watch the Sauce: Heat the coconut sauce gently; avoid boiling as this can change its texture. A smooth sauce enhances the overall dish.

Thickening Option: If you want a creamier sauce, mix cornstarch with water before adding to the coconut milk, ensuring a luxe texture in your Mango Sticky Rice.

Mango Sticky Rice: Variations You’ll Love

Feel free to get creative with your Mango Sticky Rice—it’s all about personal touches that elevate this beloved dessert!

  • Colorful Twist: Black Glutinous Rice: Swap white sticky rice for black glutinous rice for a stunning visual contrast and nutty flavor. This variation adds intrigue to your dish, capturing the eye and the palate.

  • Creamy Sweetness: Sweetened Condensed Milk: Instead of sugar, use sweetened condensed milk for an extra rich coconut flavor. This creates an indulgent, luxurious sauce that even the most discerning sweet tooth will crave.

  • Mango Medley: Different Mango Varieties: Explore different types of mangoes like Haden or Kent for unique sweetness and flavor notes. Each addition brings a new personality to this classic dessert, making each bite a delightful experience.

  • Nutty Flavor: Toasted Coconut Flakes: Top with toasted coconut flakes instead of sesame seeds for a tropical crunch. The additional texture complements the creamy rice, enhancing each luscious scoop.

  • Spice It Up: Cinnamon or Cardamom: Add a touch of ground cinnamon or cardamom to the coconut sauce for warm, aromatic notes. A little spice can beautifully transform the flavor profile and make it feel festive.

  • Creamier Sauce: Coconut Cream Variation: Use pure coconut cream instead of regular coconut milk for a richer, creamier sauce. The indulgence will leave you dreaming of tropical beaches and sunny skies.

  • Extra Tropical: Pineapple or Passion Fruit: Incorporate diced pineapple or a drizzle of passion fruit on top for a tangy, refreshing twist. This addition will brighten the dish and balance the sweetness of the mango.

  • Chocolate Delight: Chocolate Sauce Drizzle: For a fusion twist, drizzle your Mango Sticky Rice with a light chocolate sauce. The combination of chocolate and coconut is a rich, enticing treat that’s surprising and satisfying.

For even more adventurous options, don’t forget to check out the delicious Sizzling Rice Wrapped if you’re feeling experimental with flavors!

What to Serve with Traditional Mango Sticky Rice

As you prepare to relish the sweet goodness of this Thai dessert, consider delightful accompaniments that elevate your dining experience.

  • Fresh Coconut Drink: The creamy, tropical flavors of fresh coconut water or coconut milk perfectly balance the dessert’s sweetness, making it a refreshing companion.

  • Tropical Fruit Salad: Combine various fruits like papaya, pineapple, and passion fruit for a vibrant, fresh side that adds a juicy burst to each bite of Mango Sticky Rice.

  • Thai Iced Tea: A sweet and aromatic beverage, Thai iced tea’s spiced richness complements the dessert and creates a harmonious blend of flavors.

  • Mango Sorbet: For a cool, fruity treat, mango sorbet mirrors the flavors of the Mango Sticky Rice and adds a textural contrast that’s simply delightful.

  • Toasted Coconut Flakes: Sprinkle some toasted coconut on top for added crunch and a deeper coconut flavor that harmonizes wonderfully with the dish.

  • Sesame Seed Cookies: These cookies offer a crisp texture and a nutty flavor that pairs beautifully with the creamy riice dessert while enhancing the overall experience.

With these pairing ideas, you’ll take your traditional Mango Sticky Rice to new heights, creating a full meal that celebrates the joy of Thai cuisine.

How to Store and Freeze Mango Sticky Rice

Fridge: Store leftover Mango Sticky Rice in an airtight container for up to 3 days. Keeping it covered helps maintain moisture while preventing it from absorbing other odors.

Freezer: For longer storage, freeze the sticky rice and coconut sauce separately in freezer-safe containers. It will last up to 2 months. Thaw in the fridge overnight before reheating.

Reheating: To enjoy, reheat the rice gently in the microwave or on the stovetop with a splash of coconut milk to restore creaminess. Avoid high heat, which can dry it out.

Assembly: If stored separately, combine the rice and sauce just before serving for the best taste and texture.

Make Ahead Options

These Mango Sticky Rice are perfect for busy home cooks looking to save time without sacrificing flavor! You can soak the sticky rice and refrigerate it up to 24 hours in advance—just make sure it’s well submerged in water to maintain moisture. Additionally, prepare the coconut sauce and store it in an airtight container in the fridge for up to 3 days; this allows the flavors to meld beautifully. When you’re ready to serve, steam the rice and combine it with the sauce as directed, adding fresh mango slices just before plating. Rest assured, with these prep tips, your Mango Sticky Rice will taste just as delicious and fresh!

Mango Sticky Rice Recipe FAQs

How do I choose ripe mangoes for this dessert?
Absolutely! Look for mangoes that give slightly under gentle pressure, indicating ripeness. Ataulfo mangoes are renowned for their sweetness and creamy texture, while Tommy Atkins are more fibrous but still delicious. If they have slight blemishes or dark spots, they’re perfectly ripe!

How should I store leftover Mango Sticky Rice?
Store your leftover Mango Sticky Rice in an airtight container in the fridge for up to 3 days. Keeping it sealed will help maintain its moisture. If you find the rice has dried out a bit, you can add a spoonful of coconut milk when reheating to bring it back to life!

Can I freeze Mango Sticky Rice, and how do I do it?
Very! To freeze, place the mango sticky rice and coconut sauce in separate freezer-safe containers. It’ll keep well for up to 2 months. When ready to enjoy, simply thaw in the refrigerator overnight. Reheat the rice gently over low heat, adding a splash of coconut milk for that creamy texture.

What if my coconut sauce doesn’t thicken?
No worries! If your coconut sauce is still too thin after heating, you can create a cornstarch slurry. Mix 1 tablespoon of cornstarch with 2 tablespoons of cold water until smooth. Stir it into the sauce over low heat, cooking for another 1-2 minutes until it thickens to your liking.

Is Mango Sticky Rice suitable for people with allergies?
Yes, Mango Sticky Rice is naturally gluten-free and vegan! However, always check labels on store-bought coconut milk to ensure there are no hidden allergens. For those with sesame allergies, simply omit the toasted sesame seeds garnishing for a safe, enjoyably sweet treat!

How can I enhance the flavors in my Mango Sticky Rice?
The more the merrier! You could add some pandan leaves while steaming the rice for an aromatic twist. A sprinkle of freshly grated coconut or a drizzle of sweetened condensed milk can also elevate the flavors beautifully while keeping it deliciously satisfying. Enjoy experimenting!

Mango Sticky Rice

Delicious Mango Sticky Rice: A Sweet Taste of Thailand

This Mango Sticky Rice recipe combines sweet, sticky rice and creamy coconut sauce, creating a delicious vegan dessert that transports you to Thailand.
Prep Time 1 hour
Cook Time 25 minutes
Soaking Time 1 hour
Total Time 2 hours 25 minutes
Servings: 4 servings
Course: Dessert
Cuisine: Thai
Calories: 350

Ingredients
  

For the Sticky Rice
  • 1 cup glutinous rice or sweet rice
  • 1 pinch salt
For the Coconut Sauce
  • 1 cup full-fat coconut milk avoid using only coconut cream
  • 1/4 cup sugar white granulated sugar is best
  • 1 tablespoon cornstarch optional, for thickening
  • 1 pinch salt to balance sweetness
For Serving
  • 2 medium ripe mangoes preferably Ataulfo or Tommy Atkins
  • 2 tablespoons toasted sesame seeds optional, for topping

Equipment

  • Bamboo steamer
  • Saucepan
  • Bowl
  • Cheesecloth

Method
 

Step-by-Step Instructions
  1. Begin by rinsing the glutinous rice under cold water until the water runs clear, about 2-3 minutes. Then, transfer the rice to a bowl and submerge it in water for at least 1 hour or overnight.
  2. After soaking, drain the rice and place it in a heatproof bowl lined with cheesecloth or in a bamboo steamer. Bring a pot of water to a boil and steam the rice for 20-25 minutes until tender and sticky.
  3. While the rice is steaming, combine the full-fat coconut milk, sugar, and a pinch of salt in a saucepan over low heat. Stir gently until the sugar dissolves completely without boiling.
  4. Once the sticky rice is cooked, pour 1 cup of the warm coconut sauce over it, mixing gently to ensure the rice absorbs the flavors. Allow it to cool slightly.
  5. To serve, scoop the sticky rice onto a plate and arrange sliced ripe mangoes alongside. Drizzle the remaining coconut sauce over the top and sprinkle toasted sesame seeds for garnish.

Notes

Soaking the rice is critical for achieving the perfect chewy texture. Choose ripe mangoes for the best sweetness.