Delicious Quick and Easy Fried Mushrooms You’ll Crave

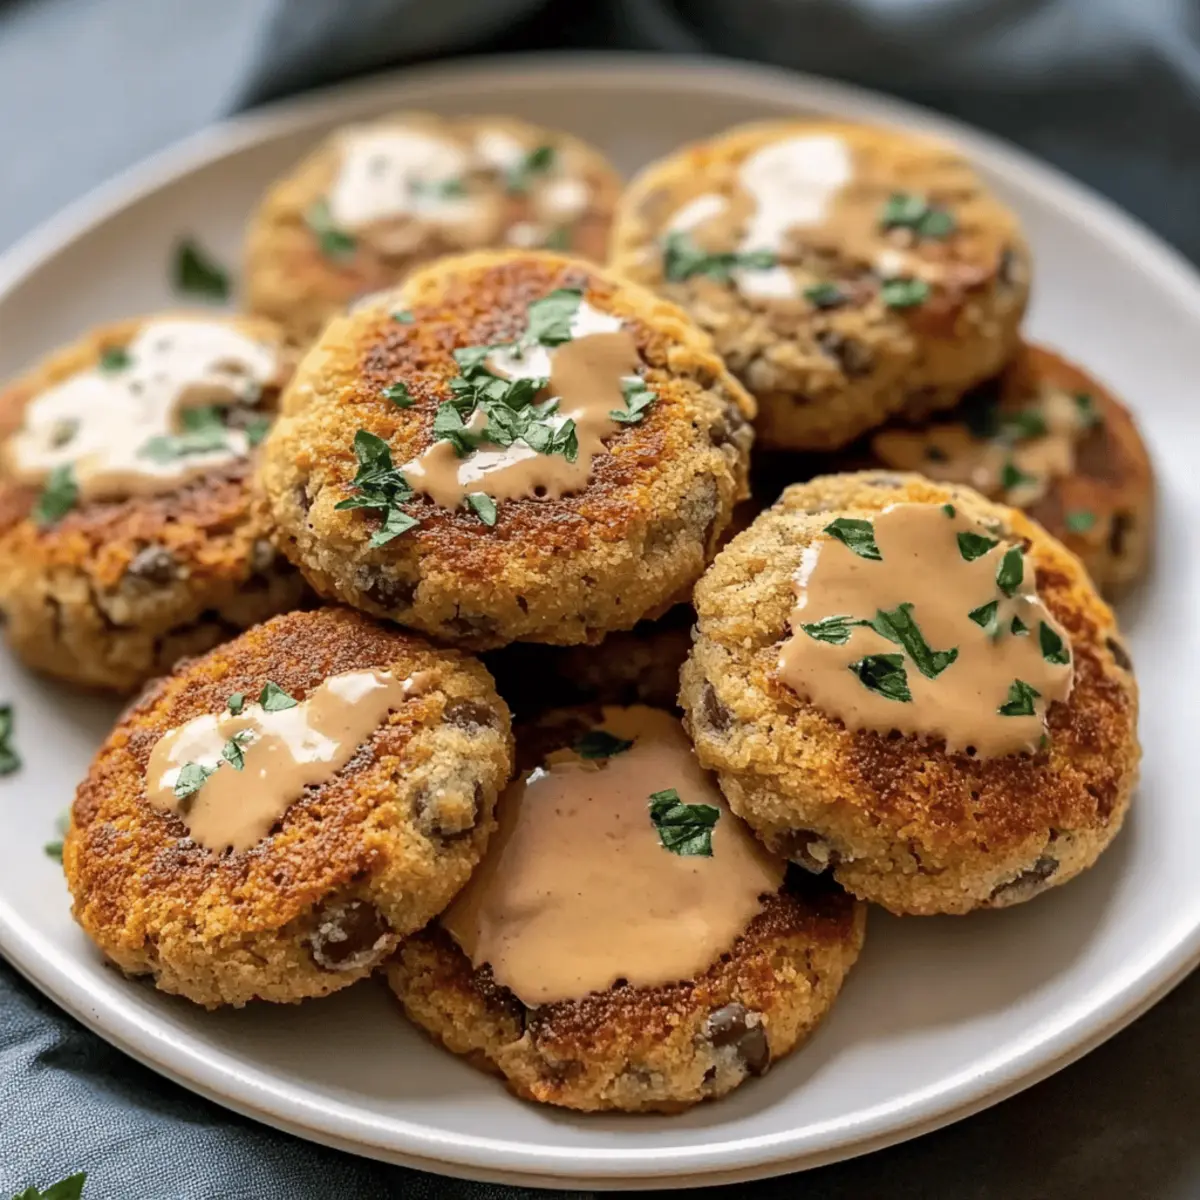
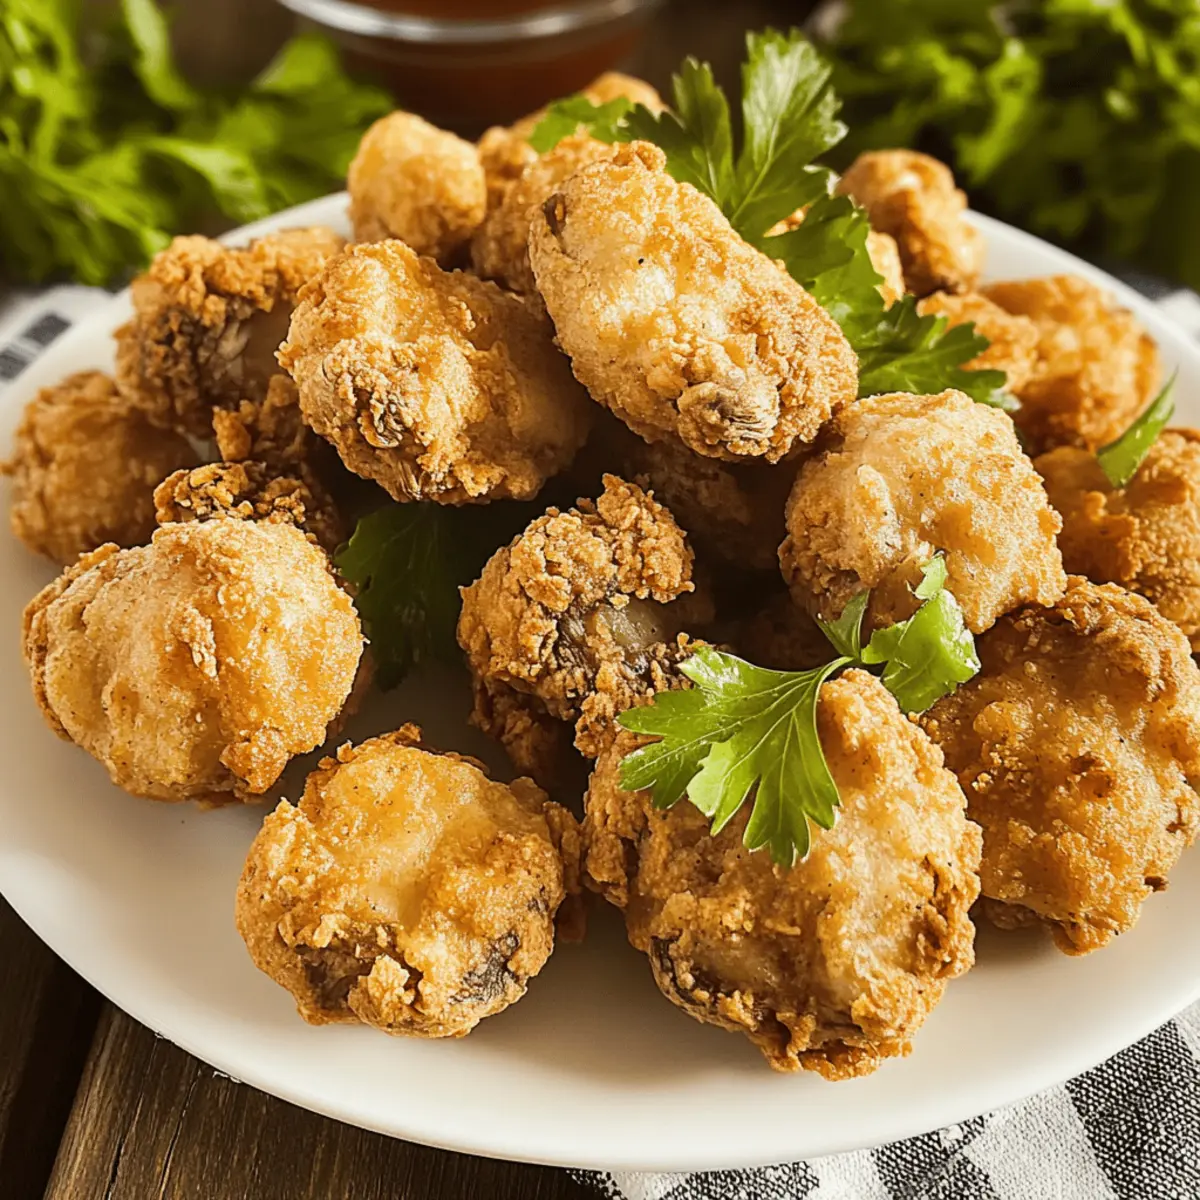
As the aroma of sizzling mushrooms wafts through the kitchen, it reminds me that some of the best culinary experiences come from the simplest dishes. Quick and Easy Fried Mushrooms are my ultimate go-to when I crave a crispy and savory snack that can be whipped up in no time. These delightful bites are perfect as an appetizer or side dish, making them a versatile addition to any meal. With easy-to-find ingredients and a straightforward cooking method, you can turn your weeknight dinner into something special without the fuss. Just imagine those golden, crunchy morsels waiting to be dipped into your favorite sauce! Are you ready to bring a little magic to your weeknight cooking?

Why Will You Crave These Mushrooms?

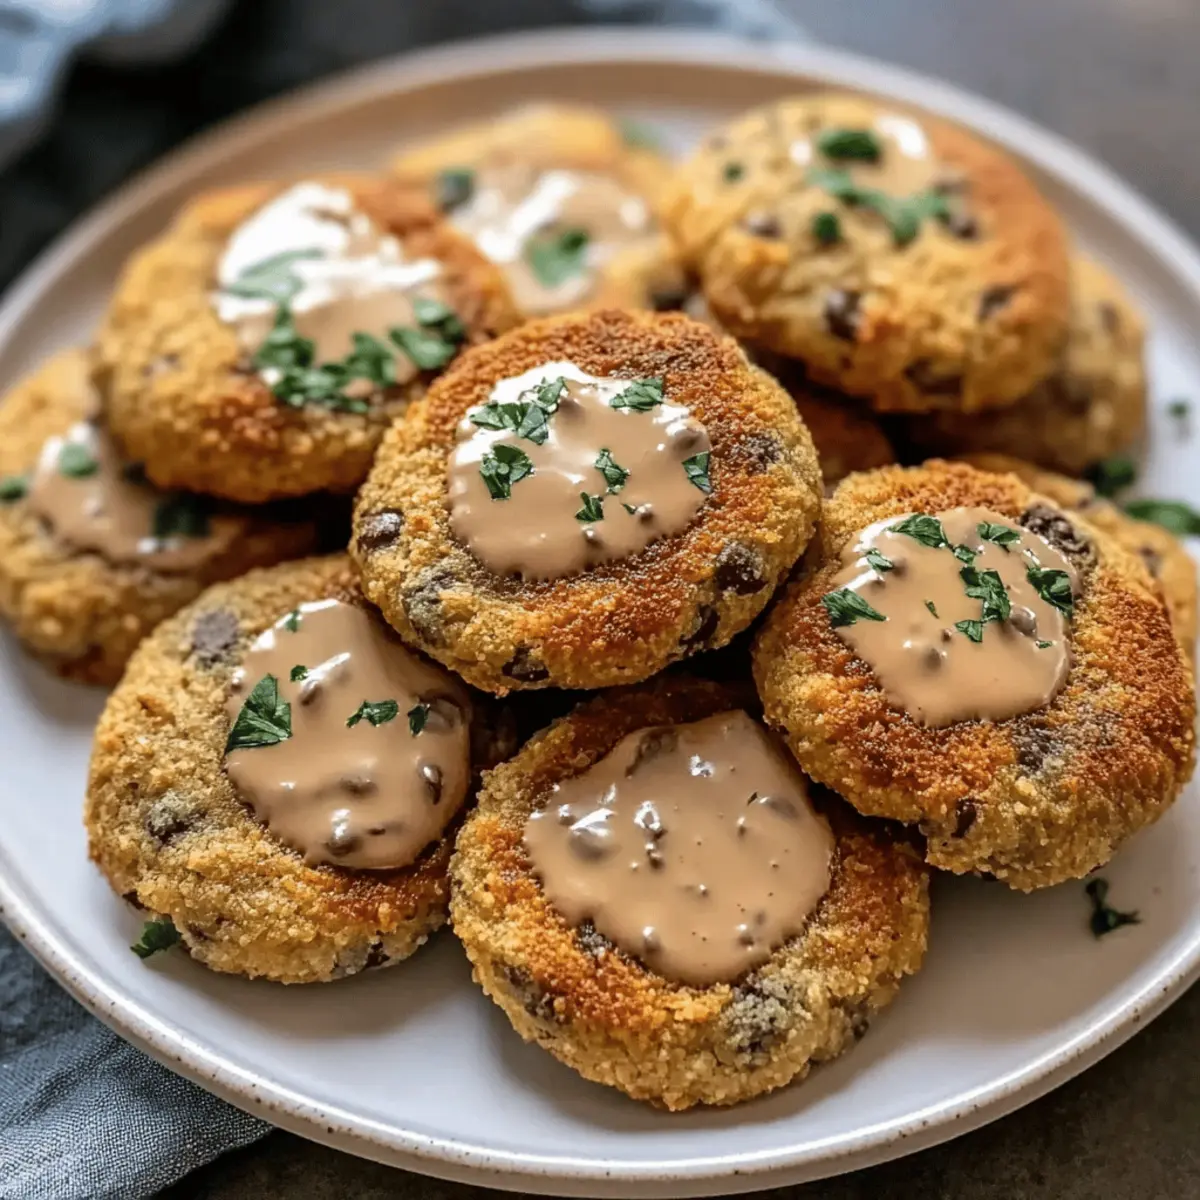
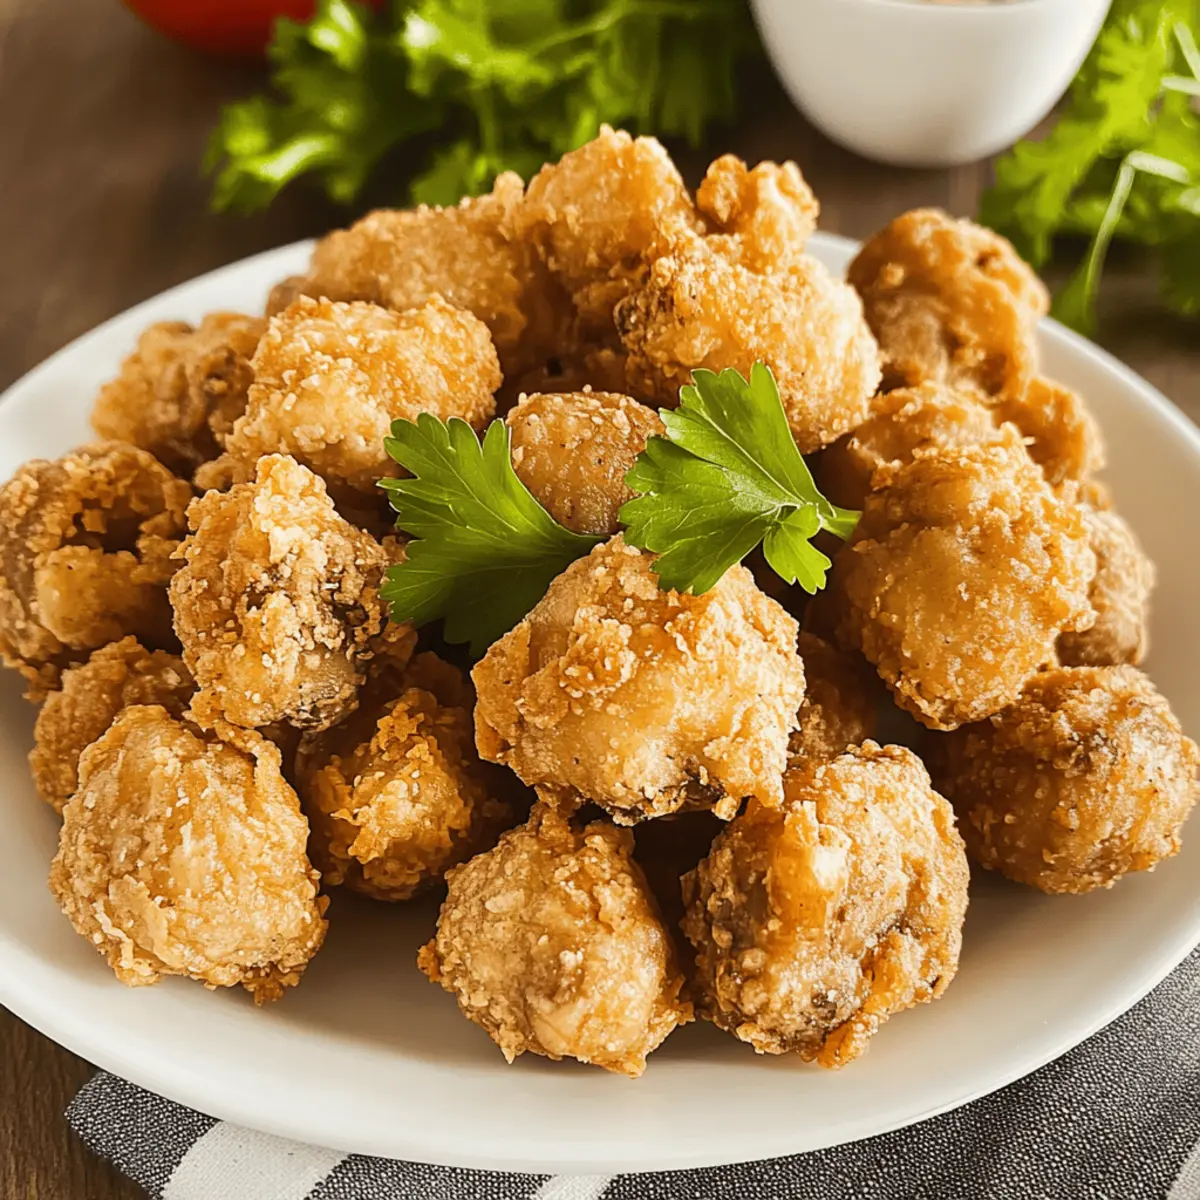
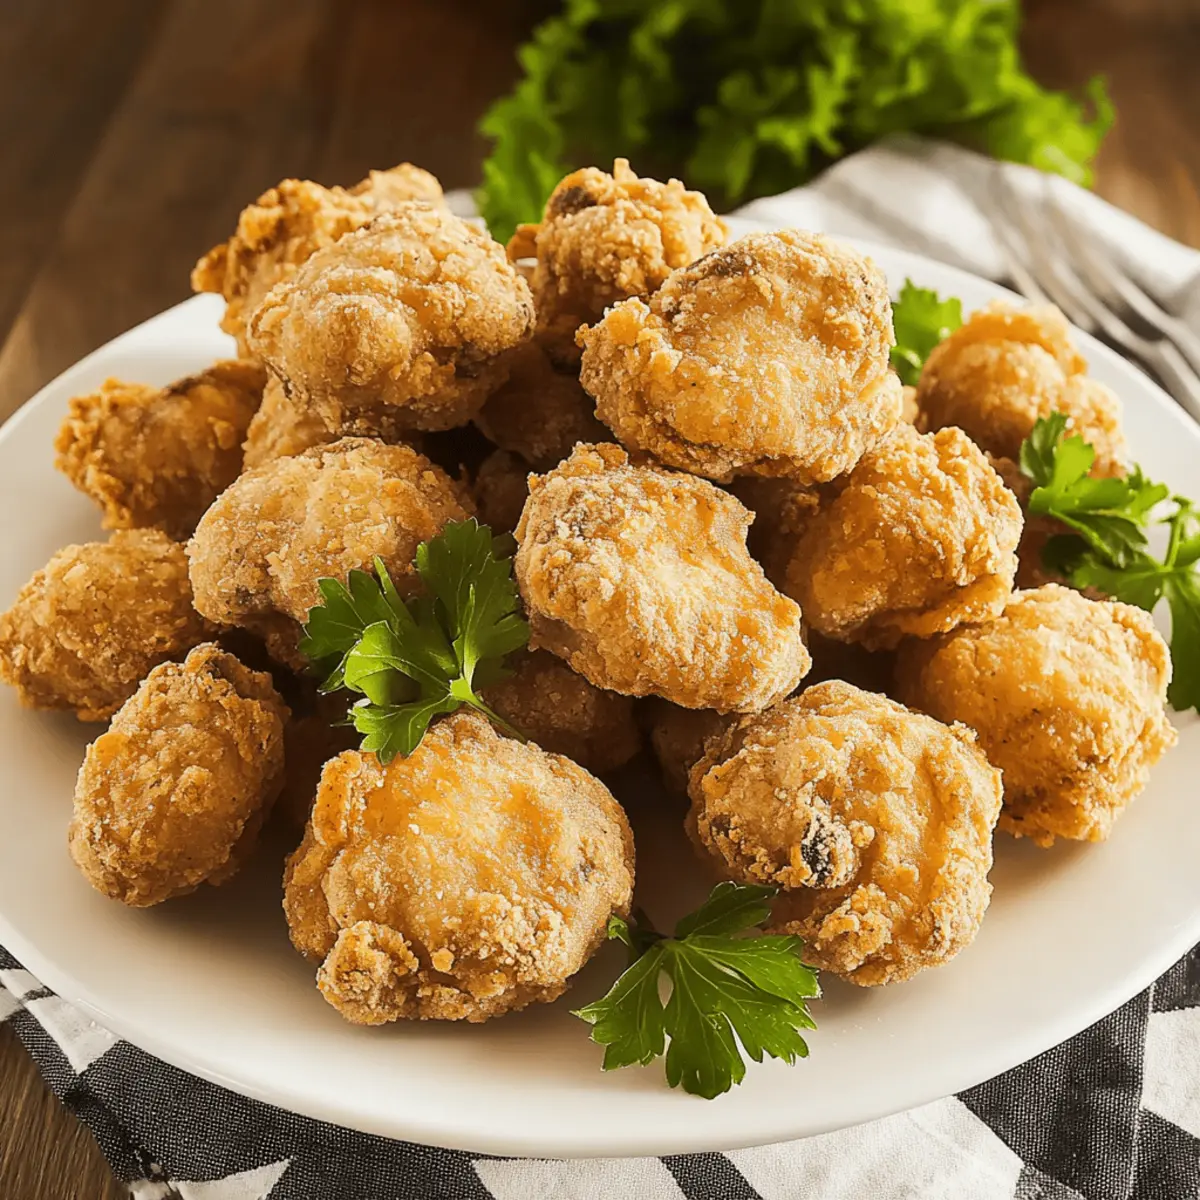
Crispy Delight: The moment you take a bite, the golden crust gives way to tender mushrooms inside, creating an unforgettable contrast.

Quick Preparation: With just a handful of ingredients, you’ll have these mouthwatering appetizers ready in no time, perfect for weeknight dinners or surprise guests.

Versatile Pairings: Enjoy them with your favorite dipping sauces like ranch or spicy aioli, or serve them alongside other dishes like Cheesy Bread for a fantastic spread.

Crowd-Pleaser: Whether for game nights or dinner parties, these savory bites will impress everyone, making them a hit at any gathering.

Simple Steps: No complicated techniques needed here, just a straightforward method that even novice cooks can master—making them a must-try for anyone!

Quick and Easy Fried Mushrooms Ingredients

• Indulge your taste buds with this irresistible appetizer!

For the Batter

  • Fresh White Mushrooms – The stars of this dish, bringing main flavor and texture; larger mushrooms can be cut for similar enjoyment.
  • Flour – Essential for structure in your batter; feel free to use a gluten-free blend if needed.
  • Cornstarch – Crucial for that delightful crispness in your fried mushrooms; don’t skip this!
  • Baking Powder – Lightens the batter to achieve a fluffy texture; a key ingredient for success.
  • Salt – Enhances the overall flavor; adjust based on your personal preference.
  • Water – Hydrates and combines dry ingredients to create the perfect batter consistency; tweak as needed to get the right drip.

For the Coating

  • Panko Breadcrumbs – Provides that irresistible crunchy coating; swap with regular breadcrumbs or crushed cornflakes if desired.

Dive into the delightful world of Quick and Easy Fried Mushrooms, and enjoy every crispy morsel!

Step‑by‑Step Instructions for Quick and Easy Fried Mushrooms

Step 1: Prepare the Batter
In a large mixing bowl, combine the flour, cornstarch, baking powder, and salt to create the dry mixture for your batter. Gradually whisk in water until you achieve a smooth, drippy consistency that coats the back of a spoon. It should not be too thick or too runny—aim for a texture that clings lightly to a mushroom.

Step 2: Mushroom Preparation
Rinse the fresh white mushrooms under cool water and pat them dry with a paper towel. For easy handling, insert a toothpick into the stem of each mushroom; this will help you dip and coat them more conveniently without getting your hands messy.

Step 3: Coating Process
Begin the coating by dipping each prepared mushroom into the batter, ensuring it’s fully submerged. Allow any excess batter to drip off before rolling the mushroom in Panko breadcrumbs for that perfect crispy outer layer. Make sure each mushroom is well-coated, then set aside on a plate while you prepare to fry.

Step 4: Frying
Heat about 2 inches of oil in a deep fryer or a large skillet over medium heat, aiming for around 350°F (175°C). Once the oil is hot, carefully add the coated mushrooms in batches, making sure not to overcrowd the pan. Fry the mushrooms until they turn a golden brown, approximately 3-5 minutes, and turn them halfway for even cooking.

Step 5: Drain
Using a slotted spoon, carefully remove the fried mushrooms from the oil and let them drain on a plate lined with paper towels or a wire rack. This will help absorb any excess oil and maintain that delicious crispy texture. Serve your Quick and Easy Fried Mushrooms warm for the best flavor experience!

Make Ahead Options

These Quick and Easy Fried Mushrooms are perfect for meal prep enthusiasts looking to save some time! You can prepare the batter by mixing flour, cornstarch, baking powder, and salt up to 24 hours in advance; simply store it in an airtight container in the fridge. Additionally, you can coat the mushrooms and keep them in the refrigerator for up to 3 days before frying. To ensure they stay crispy, use a single layer in a bowl or plate, and cover them tightly with plastic wrap. When you’re ready to serve, heat the oil and fry the mushrooms until golden brown as directed. This way, you’ll have perfectly golden, crispy bites with minimal effort when it’s time to eat!

Expert Tips for Quick and Easy Fried Mushrooms

  • Mushroom Size: Smaller mushrooms fry more evenly; cut larger ones into halves or quarters to ensure consistent cooking throughout.

  • Batter Consistency: Aim for a batter that coats the back of a spoon without being too thick. Adjust the water and flour as needed for perfect coverage.

  • Oil Temperature: Maintain oil at about 350°F (175°C) for optimal crispiness. Too hot will burn the crust before the mushrooms cook; too cool will lead to soggy results.

  • Batch Frying: Fry mushrooms in small batches to ensure they cook evenly and maintain their crunch. Overcrowding can lower oil temperature.

  • Store Wisely: Store any leftovers in an airtight container and reheat them in the oven to keep that delicious, crispy texture intact.

How to Store and Freeze Quick and Easy Fried Mushrooms

Fridge: Place leftovers in an airtight container and store in the refrigerator for up to 3 days. Reheat in the oven to regain crispiness.

Freezer: For longer storage, freeze mushrooms on a baking sheet until solid, then transfer to a freezer bag. They can be stored for up to 2 months.

Reheating: To bring back that delightful crunch, reheat frozen mushrooms directly from the freezer in a preheated oven at 375°F (190°C) for 10-15 minutes.

Leftover Tip: If you have leftover Quick and Easy Fried Mushrooms, consider using them in salads or as a topping for pizzas to maximize flavor!

Quick and Easy Fried Mushrooms Variations

Feel free to get creative and personalize your fried mushrooms with these delightful ideas that enhance flavor and texture!

  • Herbed Coating: Add Italian seasoning or garlic powder to the batter for an aromatic twist, making each bite burst with flavor.

  • Spicy Kick: Incorporate a dash of hot sauce into the batter for a subtle heat that complements the savory mushrooms beautifully.

  • Crunchy Topping: Use crushed cornflakes instead of Panko breadcrumbs for an extra crunchy exterior, adding a delightful surprise to every mouthful.

  • Cheesy Delight: Mix grated Parmesan cheese into the breadcrumb coating for a rich, cheesy flavor that takes your mushrooms to another level of decadence.

  • Dipping Sauce Adventure: Try serving the fried mushrooms with a variety of dips, such as sweet chili sauce or spicy aioli, for a fun and flavorful snacking experience that pairs perfectly together.

  • Vegetable Medley: Mix in thin slices of zucchini or bell peppers in the same batter, frying them along with the mushrooms for a colorful veggie feast.

  • Sweet Surprise: Drizzle a touch of balsamic glaze or maple syrup over the finished mushrooms for an unexpected sweetness that marries well with their savory profile.

  • Garnish Ideas: Top your final dish with freshly chopped herbs like parsley or chives for a splash of color and a fresh flavor boost.

Feel free to experiment with these variations next time you whip up your Quick and Easy Fried Mushrooms—or try them alongside other treats like Inspired Cabbage Egg for a delightful spread!

What to Serve with Quick and Easy Fried Mushrooms

Elevate your meal with delightful pairings that offer a contrast of flavors and textures to complement those crispy bites.

  • Garlic Aioli: This creamy, tangy dip enhances the savory mushrooms, adding a rich layer of flavor that elevates every bite.

  • Fresh Arugula Salad: A peppery arugula salad with lemon vinaigrette brings freshness, cutting through the richness of fried mushrooms for a balanced meal.

  • Creamy Parmesan Risotto: The creaminess of risotto pairs beautifully with the crispness of the mushrooms, creating a luxurious and comforting experience.

  • Roasted Red Pepper Hummus: The smoky sweetness of hummus harmonizes with the savory earthiness of the mushrooms, making for a deliciously dip-able combination.

  • Spicy Margherita Pizza: Serve these mushrooms alongside a zesty pizza to bring crunch and flavor contrasts that will excite your taste buds.

  • Chilled White Wine: A glass of chilled Sauvignon Blanc or Pinot Grigio refreshes your palate, complementing the savory profile of the mushrooms with fruity notes.

  • Twice-Baked Potatoes: These creamy, cheesy potatoes offer a hearty side that pairs excellently with your crispy mushrooms, adding a comforting touch to your meal.

  • Chocolate Lava Cake: For dessert, end the meal on a sweet note; the molten center of a chocolate lava cake offers a delightful contrast to your savory snacks.

Quick and Easy Fried Mushrooms Recipe FAQs

How do I select the freshest mushrooms for this recipe?
Absolutely! Look for mushrooms that are firm, plump, and dry, with no dark spots or blemishes. Fresh white mushrooms should have a light, even color and a pleasant earthy aroma. Avoid any with slime or dark spots all over, as these may indicate spoilage.

How should I store leftover fried mushrooms?
Very simply! Place any leftover Quick and Easy Fried Mushrooms in an airtight container in the refrigerator for up to 3 days. When you’re ready to enjoy them again, reheat in the oven at 350°F (175°C) for about 10-15 minutes to restore their crispiness.

Can I freeze the fried mushrooms?
Certainly! To freeze them, first lay the fried mushrooms on a baking sheet in a single layer and freeze until solid, about 1-2 hours. Once frozen, transfer them to a freezer bag, squeezing out excess air. They can be stored for up to 2 months. When ready to eat, you can reheat them directly from the freezer in a preheated oven at 375°F (190°C) for about 10-15 minutes until crispy again.

What if my batter is too thick or too runny?
No worries! If your batter is too thick, you can gently whisk in a bit more water, a tablespoon at a time, until you achieve that perfect smooth, drippy consistency. Conversely, if your batter is too runny, gradually add more flour until it thickens up enough to coat the mushrooms without dripping off too quickly. It should cling to the mushrooms nicely!

Are there any dietary considerations I should be aware of?
Definitely! If you’re making these Quick and Easy Fried Mushrooms for guests, keep in mind that some people may be allergic to mushrooms or gluten. For a gluten-free version, swap the regular flour with a gluten-free blend, and always check for any additional allergens in your pantry. Additionally, while these are vegetarian-friendly, be sure to pair them with dipping sauces that fit your dietary needs, such as vegan options or those free from dairy.

Can pets eat fried mushrooms?
Generally speaking, it’s best to avoid giving your pets fried mushrooms or any fried foods. While mushrooms themselves are safe for some pets, the batter and frying oils can pose risks. Always consult your veterinarian, as some mushroom varieties can be toxic to pets, and it’s safer to keep these delicious snacks just for you!

Quick and Easy Fried Mushrooms

Delicious Quick and Easy Fried Mushrooms You'll Crave

Quick and Easy Fried Mushrooms are a crispy and savory snack that can be whipped up in no time.
Prep Time 15 minutes
Cook Time 10 minutes
Total Time 25 minutes
Servings: 4 mushrooms
Course: Dinner
Cuisine: American
Calories: 80

Ingredients
  

For the Batter
  • 1 lb Fresh White Mushrooms Larger mushrooms can be cut for similar enjoyment.
  • 1 cup Flour Feel free to use a gluten-free blend if needed.
  • 1/4 cup Cornstarch Don’t skip this for crispness.
  • 1 tbsp Baking Powder Key ingredient for a fluffy texture.
  • 1 tsp Salt Adjust based on personal preference.
  • 1 cup Water Adjust as needed for batter consistency.
For the Coating
  • 1 cup Panko Breadcrumbs Swap with regular breadcrumbs or crushed cornflakes if desired.

Equipment

  • Large mixing bowl
  • whisk
  • deep fryer or large skillet

Method
 

Step-by-Step Instructions
  1. In a large mixing bowl, combine the flour, cornstarch, baking powder, and salt to create the dry mixture for your batter. Gradually whisk in water until you achieve a smooth, drippy consistency that coats the back of a spoon.
  2. Rinse the fresh white mushrooms under cool water and pat them dry with a paper towel. For easy handling, insert a toothpick into the stem of each mushroom.
  3. Dip each prepared mushroom into the batter, ensuring it's fully submerged. Allow any excess batter to drip off before rolling the mushroom in Panko breadcrumbs.
  4. Heat about 2 inches of oil in a deep fryer or a large skillet over medium heat, aiming for around 350°F (175°C). Fry the mushrooms until they turn golden brown, approximately 3-5 minutes, turning halfway for even cooking.
  5. Using a slotted spoon, carefully remove the fried mushrooms from the oil and let them drain on a plate lined with paper towels.

Notes

Store leftovers in an airtight container and reheat in the oven to keep that delicious, crispy texture intact.

Irresistible Hot Fudge Brownie Bread for Chocolate Lovers

As I stood in my kitchen, the rich aroma of melting chocolate wafted through the air, instantly brightening my day. With each moment, I could barely contain my excitement for this delicious creation: Hot Fudge Brownie Bread. This delightful fusion of brownies and loaf cake is not only perfect for dessert but also makes a sweet addition to breakfast or brunch gatherings. One of the best perks? It’s surprisingly easy to whip up, requiring minimal prep time for maximum chocolatey satisfaction—ideal for busy home chefs like us! After the first bite, you’ll find it hard to resist going back for another slice drizzled with hot fudge. Ready to indulge your chocolate cravings like never before? Let’s dive into this ultimate chocolate indulgence!

Why is Hot Fudge Brownie Bread a Must-Try?

Decadent, fudgy goodness: This recipe combines the richness of brownies with the delightful softness of a loaf cake.

Quick prep: Effortlessly whip this up in no time—perfect for busy days or unexpected guests.

Endless versatility: Add chocolate chips or nuts, or even bake in a muffin tin for sweet individual treats!

Crowd-pleaser: Whether at brunch or dessert, this bread is sure to impress family and friends alike.

Storage-friendly: Leftovers can be stored for several days, and you can freeze extras for future chocolate cravings.

Pair your slices with a scoop of vanilla ice cream or a drizzle from this Banana Bread Brownies for an extra treat!

Hot Fudge Brownie Bread Ingredients

For the Bread

  • All-Purpose Flour – Provides structure to the bread; try a gluten-free flour for a different option.
  • Unsweetened Cocoa Powder – Adds deep chocolate flavor; Dutch-processed cocoa gives a richer taste.
  • Baking Powder – Helps the bread rise; always check that it’s fresh for best results.
  • Salt – Enhances flavor; omit if you’re using salted butter.
  • Large Eggs – Binds the ingredients together while adding moisture.
  • Melted Unsalted Butter – Adds richness; swap it out for vegetable or coconut oil if desired.
  • Granulated Sugar – Sweetens the bread; feel free to use brown sugar for extra moisture and flavor.
  • Vanilla Extract – Infuses aromatic flavor; opt for pure vanilla for the best aroma.
  • Hot Fudge Sauce – Creates a rich, chocolaty sweetness; consider using melted chocolate or leaving it out for a lighter option.

Now that you have these ingredients gathered, you’re just a few steps away from creating this mouth-watering Hot Fudge Brownie Bread that will delight the chocolate lovers in your life!

Step‑by‑Step Instructions for Hot Fudge Brownie Bread

Step 1: Preheat and Prepare the Pan
Begin by preheating your oven to 350°F (175°C). While waiting, grab a 9×5-inch loaf pan and grease it thoroughly with butter or line it with parchment paper to prevent sticking. This essential step sets the stage for your Hot Fudge Brownie Bread to bake evenly and come out perfectly.

Step 2: Combine Dry Ingredients
In a medium bowl, whisk together the all-purpose flour, unsweetened cocoa powder, baking powder, and salt until well blended. This mixture provides the structure and deep chocolate flavor needed for your Hot Fudge Brownie Bread. Set the bowl aside, allowing the dry ingredients to meld together before incorporating them into the wet mixture.

Step 3: Mix Wet Ingredients
In a separate large bowl, whisk together the eggs and granulated sugar until the mixture is smooth and creamy, which should take about 1-2 minutes. Next, stir in the melted unsalted butter and vanilla extract, ensuring everything is well combined. This rich base will contribute to the deliciously fudgy texture of your bread.

Step 4: Add Hot Fudge Sauce
Carefully incorporate the hot fudge sauce into the wet mixture, stirring until the ingredients are fully combined. The hot fudge will enhance the chocolate intensity, giving your Hot Fudge Brownie Bread an extraordinary richness. Make sure there are no lumps remaining; you want this mixture to be silky smooth before proceeding.

Step 5: Combine Wet and Dry Ingredients
Now, gradually fold the dry ingredient mixture into the wet ingredients. Use a spatula to gently mix until just combined, avoiding overmixing to prevent dense bread. At this point, the batter should be thick and glossy, ready to be poured into the loaf pan.

Step 6: Bake the Bread
Pour the batter into the prepared loaf pan, using a spatula to spread it evenly. Place the pan in the preheated oven and bake for 35-45 minutes. To check for doneness, insert a toothpick into the center; it should come out clean or with just a few moist crumbs—your perfect Hot Fudge Brownie Bread is nearly done!

Step 7: Cool and Serve
Once baked, remove the loaf from the oven and let it cool in the pan for about 10 minutes. After that, transfer it to a wire rack to cool completely. Drizzle some extra hot fudge sauce over the top prior to slicing, serving it warm for an indulgent treat that your family and friends will adore.

Hot Fudge Brownie Bread Variations

Feel free to get creative with this recipe and explore delightful twists that excite your taste buds!

  • Chocolate Chips: Add 1 cup of chocolate chips to the batter for extra gooeyness and a delightful surprise in every slice.
    The added chocolate will intensify the fudgy goodness, making each bite even more indulgent!

  • Nutty Delight: Incorporate chopped walnuts or pecans for a crunchy texture that contrasts beautifully with the soft bread.
    Nuts bring out a wonderful nutty flavor that complements the rich chocolate, elevating your experience to a new level.

  • Flavored Extracts: Swap vanilla extract for almond or hazelnut extract to add a unique layer of aroma and flavor.
    This subtle change can make your Hot Fudge Brownie Bread an exciting variation you won’t want to miss!

  • Muffin Time: For easy individual servings, pour the batter into a muffin tin and bake for about 20-25 minutes.
    Just imagine having personal-sized treats to share or enjoy on the go—perfectly portioned and oh-so-tasty!

  • Cocoa Swap: Elevate the chocolate richness by using Dutch-processed cocoa powder instead of regular unsweetened cocoa.
    This simple swap introduces a deeper flavor profile that true chocolate lovers will appreciate.

  • Spicy Twist: For a hint of heat, add a pinch of cayenne pepper to the batter to create a uniquely spicy chocolate experience.
    This unexpected combination will surprise and delight your guests—pair it with creamy ice cream for a balanced treat.

  • Coffee Kick: Mix in 1 tablespoon of instant coffee granules into the hot fudge sauce for an invigorating mocha flavor.
    The coffee enhances the chocolate, creating a depth of flavor that coffee and chocolate lovers will adore.

While you experiment, don’t forget to check out these variations too: try different flavor profiles with this scrumptious Berry Banana Bread, or whip up a delightful Soft Milk Bread as a lovely contrast to nibble alongside your Hot Fudge Brownie Bread!

What to Serve with Hot Fudge Brownie Bread

Indulge your senses with these delightful pairings that turn your Hot Fudge Brownie Bread into a complete dessert experience.

  • Vanilla Ice Cream: The creamy sweetness balances the rich, chocolaty bread perfectly, creating a classic dessert duo.

  • Whipped Cream: Light and airy, this fluffy topping adds a lovely contrast to the dense fudginess of the bread.

  • Fresh Berries: Raspberries or strawberries bring a tartness that beautifully offsets the sweetness, enhancing every bite.

  • Chocolate Sauce: Drizzling more fudge or chocolate sauce elevates the dessert, making it even more indulgent and visually appealing.

  • Espresso or Coffee: The robust flavors of coffee complement the chocolate, making each slice an exquisite experience.

  • Nutty Toppings: Chopped walnuts or pecans provide a crunchy texture that contrasts with the soft bread, adding extra flavor dimensions.

Savor your Hot Fudge Brownie Bread accompanied by these delightful options, creating a truly memorable feast for chocolate enthusiasts!

Expert Tips for Hot Fudge Brownie Bread

Avoid Overmixing: Ensure you mix just until combined to prevent a dense texture in your Hot Fudge Brownie Bread.

Flavor Boost: For a richer taste, consider using Dutch-processed cocoa powder instead of regular unsweetened cocoa.

Sweetness Adjustments: If you prefer a sweeter loaf, try increasing the sugar by 2 tablespoons to enhance the dessert-like quality.

Nutty Crunch: Adding chopped walnuts or pecans can introduce a delightful crunch and flavor contrast to your bread.

Check Freshness: Always check the expiration date on your baking powder for best rise and texture in the final product.

How to Store and Freeze Hot Fudge Brownie Bread

Room Temperature: Store leftover Hot Fudge Brownie Bread in an airtight container at room temperature for up to 3 days to maintain its moist texture.

Fridge: For slightly longer storage, keep the bread in the fridge, where it can last for up to 1 week while remaining delicious and fudgy.

Freezer: Wrap the bread tightly in plastic wrap and then foil to store it in the freezer for up to 2 months. Thaw at room temperature before serving for the best taste and texture.

Reheating: To enjoy slices warm, gently reheat in the microwave for 10-15 seconds or place in a preheated oven at 350°F (175°C) for 5-7 minutes.

Make Ahead Options

These Hot Fudge Brownie Bread are perfect for busy cooks looking to save time during the week! You can prepare the batter up to 24 hours in advance by mixing all the wet and dry ingredients separately, and then refrigerating them in airtight containers. Keeping the ingredients separate helps maintain the bread’s texture and prevents any browning. When you’re ready to bake, simply combine the mixtures as directed and pour them into the prepared loaf pan. Bake as instructed, and you’ll enjoy the same delicious fudgy goodness without the last-minute rush. Trust me, your future self will thank you for this time-saving tip!

Hot Fudge Brownie Bread Recipe FAQs

How do I select the right ripeness for the ingredients?
Absolutely! When picking your ingredients, choose eggs that are fresh—check the expiration date on the carton. For melted butter, look for a creamy, pale yellow color with no dark spots. If you’re using cocoa powder, ensure it’s deep and fragrant; if it’s past its prime, the chocolate flavor won’t be as strong.

What is the best way to store Hot Fudge Brownie Bread?
After baking, let the bread cool completely, then store it in an airtight container at room temperature for up to 3 days. If you want it to last longer, refrigerate it for up to 1 week. Remember, the cooler you keep it, the longer it stays fresh—so aim for a nice, chilly spot!

Can I freeze Hot Fudge Brownie Bread?
Definitely! To freeze your Hot Fudge Brownie Bread, wrap it tightly in plastic wrap and then in aluminum foil to protect it from freezer burn. It can last up to 2 months in the freezer. When you’re ready to indulge again, simply thaw it at room temperature for a few hours or overnight.

What should I do if my bread comes out dense?
Very! If your Hot Fudge Brownie Bread turns out denser than you’d like, it could be due to overmixing the batter. Always fold the dry ingredients into the wet until just combined—you want to mix gently! Also, check if your baking powder is fresh; expired baking powder can prevent proper rising, resulting in a heavier loaf.

Are there any dietary considerations for this recipe?
Certainly! If you’re cooking for someone with allergies, this recipe can easily be adapted. For gluten-free options, you can substitute all-purpose flour with a gluten-free blend. Additionally, ensure that your hot fudge sauce doesn’t contain any allergens, such as dairy or nuts, if serving this to those with sensitivities. Always double-check ingredient labels for safety!

How do I make this suitable for a special occasion?
For a celebration, consider adding a special twist! You can layer in chocolate chips, nuts, or even a splash of flavored extract like almond or orange. This addition not only boosts flavor but also enhances presentation. Serve each slice warm with a scoop of ice cream for a truly memorable treat!

Hot Fudge Brownie Bread

Irresistible Hot Fudge Brownie Bread for Chocolate Lovers

A delicious and easy recipe for Hot Fudge Brownie Bread that combines the richness of brownies with the softness of loaf cake.
Prep Time 15 minutes
Cook Time 40 minutes
Cooling Time 10 minutes
Total Time 1 hour 5 minutes
Servings: 8 slices
Course: Dessert
Cuisine: American
Calories: 280

Ingredients
  

For the Bread
  • 2 cups All-Purpose Flour Try a gluten-free flour for a different option.
  • 3/4 cup Unsweetened Cocoa Powder Dutch-processed cocoa gives a richer taste.
  • 2 teaspoons Baking Powder Always check that it’s fresh for best results.
  • 1/2 teaspoon Salt Omit if using salted butter.
  • 3 Large Eggs Binds the ingredients together.
  • 1/2 cup Melted Unsalted Butter Swap for vegetable or coconut oil if desired.
  • 1 cup Granulated Sugar Feel free to use brown sugar for extra moisture.
  • 2 teaspoons Vanilla Extract Opt for pure vanilla for the best aroma.
  • 1/2 cup Hot Fudge Sauce Consider using melted chocolate or omitting for a lighter option.

Equipment

  • 9x5-inch loaf pan

Method
 

Step-by-Step Instructions
  1. Preheat your oven to 350°F (175°C) and prepare a 9x5-inch loaf pan by greasing it or lining with parchment paper.
  2. In a medium bowl, whisk together the flour, cocoa powder, baking powder, and salt until well blended.
  3. In a large bowl, whisk together the eggs and sugar until smooth, then stir in the melted butter and vanilla extract.
  4. Incorporate the hot fudge sauce into the wet mixture, ensuring everything is smooth and combined.
  5. Gradually fold the dry mixture into the wet ingredients until just combined, avoiding overmixing.
  6. Pour the batter into the prepared pan, spread evenly, and bake for 35-45 minutes until a toothpick comes out clean.
  7. Let the bread cool in the pan for about 10 minutes, then transfer it to a wire rack to cool completely.

Notes

Pair with a scoop of vanilla ice cream or drizzle extra hot fudge for an indulgent treat.

Cheesy Taco Potatoes: Comforting Flavor in Every Bite

The moment you slice into a perfectly baked potato, you’re greeted by a comforting cloud of steam that hints at the savory magic inside. My Cheesy Taco Potatoes are all about bringing that homey feeling into your kitchen, combining fluffy russets with seasoned ground beef—or black beans for the vegetarian version—creating a meal that satisfies like your favorite comfort food. Each potato is generously topped with melted cheddar cheese and a medley of fresh garnishes, making it not only a feast for the taste buds but also for the eyes. This recipe is a fantastic choice for a quick weeknight dinner or when entertaining friends and family; it’s customizable to suit every palate. Are you ready to discover how easy it is to create this delectable dish? Let’s dive in!

Why You’ll Crave Cheesy Taco Potatoes?

Comforting, Delicious Layers: Each bite offers a perfect balance of fluffy potato and savory filling.
Quick to Make: This recipe is ready in under an hour, perfect for busy weeknights!
Customizable Goodness: Choose from ground beef, black beans, or even lentils for a vegetarian option!
Crowd-Pleasing Appeal: Everyone loves a good potato, and these are sure to impress at any gathering!
Versatile Toppings: Load up with sour cream, diced tomatoes, or green onions—make it your own! Dive into a hearty meal that pairs beautifully with a fresh salad or some crispy Cheesy Fries for an extra treat.

Cheesy Taco Potatoes Ingredients

• Incredibly easy to gather and prepare!

For the Potatoes

  • Russet Potatoes – These hearty potatoes are perfect for stuffing and create a fluffy base.
  • Olive Oil – Coating the potatoes helps achieve crispy skin when baking.
  • Salt and Pepper – Essential seasoning to enhance the flavor of the potatoes.

For the Filling

  • Ground Beef – Adds richness and protein, or use black beans as a vegetarian option.
  • Taco Seasoning – This brings the necessary savory and spicy flavor to the filling.
  • Diced Tomatoes – Optional, but they add moisture and a burst of flavor.
  • Black Olives – Provide a salty note, perfect for garnish and flavor enhancement.

For the Toppings

  • Shredded Cheddar Cheese – Melts beautifully over the filling, adding delicious creaminess.
  • Sour Cream – Balances the spices; swap for Greek yogurt for a healthier twist.
  • Chopped Cilantro – Fresh herb that brightens the dish.
  • Green Onions – For a crunchy garnish and extra flavor.

With all these ingredients at hand, your Cheesy Taco Potatoes will come to life, delivering comfort in every delicious bite!

Step‑by‑Step Instructions for Cheesy Taco Potatoes

Step 1: Preheat the Oven
Begin by preheating your oven to 400°F (200°C). This temperature is ideal for achieving the perfectly tender and fluffy russet potatoes that will serve as the delicious base for your Cheesy Taco Potatoes. Preheating ensures that the potatoes will cook evenly and develop a lovely, crispy skin.

Step 2: Prepare the Potatoes
While the oven heats, scrub and dry the russet potatoes thoroughly to remove any dirt. Using a fork, pierce each potato several times on all sides; this allows steam to escape while baking. Properly preparing your potatoes will help them cook uniformly and make them easier to handle once they are baked.

Step 3: Season the Potatoes
Next, rub each potato generously with olive oil, ensuring they are evenly coated. Sprinkle salt and pepper over the potatoes for enhanced flavor. This seasoning, combined with the olive oil, will help create a crispy exterior as they bake. Place the prepared potatoes on a baking sheet for easy handling.

Step 4: Bake the Potatoes
Slide the baking sheet into the preheated oven and bake the potatoes for 45 to 60 minutes. You’ll know they’re done when the skins are golden brown, and a fork easily pierces through the flesh. Be sure to check for tenderness around the 45-minute mark to avoid overcooking.

Step 5: Cook the Filling
While the potatoes are baking, heat a skillet over medium heat and add the ground beef. Cook it for about 5-7 minutes, breaking it apart with a spatula, until browned. Drain any excess fat to keep your filling light and healthy. If you opt for a vegetarian version, cook black beans or lentils instead during this step.

Step 6: Add Seasoning
Once the beef is browned, stir in the taco seasoning according to the package instructions. Allow this mixture to simmer for 3-5 minutes, letting the flavors meld together. The aroma will infuse your kitchen with a delightful scent that’s perfect for your Cheesy Taco Potatoes.

Step 7: Fluff the Potatoes
Once the potatoes are cooked, take them out of the oven and allow them to cool for a few minutes. Carefully slice each potato lengthwise and gently fluff the insides with a fork, creating a light and airy base for your hearty filling. This step is essential for maximizing the comfort food experience of Cheesy Taco Potatoes.

Step 8: Fill the Potatoes
Now it’s time to fill your fluffy potato shells! Spoon the seasoned beef mixture generously into each potato. Be sure to leave some room for topping, as this is where the gooey melted cheese will shine. After filling, sprinkle a generous amount of shredded cheddar cheese atop each potato for a rich and comforting topping.

Step 9: Melt the Cheese
Return the stuffed potatoes to the oven for an additional 10-15 minutes, or until the cheese is melted and bubbly. Keep an eye on them to ensure the cheese doesn’t overcook—ideal melted cheese should have a golden hue and be delightfully stretchy when served.

Step 10: Add Toppings and Serve
Remove the Cheesy Taco Potatoes from the oven and let them sit for a moment. Top with sour cream, green onions, diced tomatoes, olives, and fresh cilantro as desired. Each topping adds a vibrant color and freshness, elevating your delicious potatoes into a satisfying meal that’s perfect when shared with family and friends.

What to Serve with Cheesy Taco Potatoes?

Let’s transform your Cheesy Taco Potatoes into a complete feast that tantalizes the senses and satisfies the soul.

  • Fresh Green Salad: A vibrant salad with mixed greens, cherry tomatoes, and a zesty vinaigrette brings a refreshing crunch to the hearty potatoes.
  • Caramelized Corn: Sweet, buttery corn enhances the dish with a delightful contrast and adds a touch of summer to your plate.
  • Cilantro Lime Rice: Fluffy rice infused with lemony zest pairs beautifully with the taco flavors, creating a comforting side that everyone will love.
  • Tortilla Chips & Salsa: Crispy chips with spicy salsa offer a fun and crunchy accompaniment, perfect for scooping up any leftovers!
  • Creamy Guacamole: Rich, smooth guacamole adds a buttery texture that balances the spices in your potatoes and elevates the entire meal experience.
  • Mexican Street Corn (Elote): Charred corn on the cob, slathered in creamy sauce, plays wonderfully with the flavors of your Cheesy Taco Potatoes—perfect for sharing!
  • Pineapple Agua Fresca: A refreshing drink made from ripe pineapple and mint provides a fruity and cool contrast to your savory meal.
  • Chocolate Chip Cookies: Cap off your dinner with warm, gooey cookies—the comforting sweetness is the ultimate way to end on a high note.

With these delightful pairings, prepare for a flavorful journey with your Cheesy Taco Potatoes that will linger in your heart and palate!

Expert Tips for Cheesy Taco Potatoes

  • Choose the Right Potatoes: Use large russet potatoes for the best stuffing experience, ensuring they hold all the savory flavors without falling apart.

  • Avoid Overbaking: Check for tenderness at the 45-minute mark when baking your potatoes; overcooking can lead to a mushy texture, ruining the comfort of your Cheesy Taco Potatoes.

  • Customize the Filling: Feel free to get creative! Consider adding sautéed bell peppers or corn to your taco filling for added nutrition and texture, ensuring everyone can enjoy their perfect potato.

  • Watch the Cheese: When melting the cheddar cheese, keep an eye on it; you want it perfectly melted and bubbly without burning, enhancing the overall deliciousness of your Cheesy Taco Potatoes.

  • Save for Later: If you have leftovers, store them in an airtight container in the fridge for up to three days; they’re quick to reheat and just as comforting the next day!

How to Store and Freeze Cheesy Taco Potatoes

Fridge: Store leftover Cheesy Taco Potatoes in an airtight container for up to 3 days. Make sure they cool to room temperature before sealing to retain the best texture.

Freezer: To freeze, wrap each fully cooled potato tightly in plastic wrap and then place in a freezer-safe bag. They can be frozen for up to 2 months.

Reheating: For best results, reheat in the oven at 350°F (175°C) for about 20-25 minutes, or until heated through. You can also use the microwave, but the oven retains the potato’s crispness.

Tip: If freezing, consider assembling but not baking them first. This way, you maintain the flavor and texture until you’re ready to enjoy your Cheesy Taco Potatoes fresh!

Cheesy Taco Potatoes Variations

Feel free to explore these delightful twists and substitutions to make the Cheesy Taco Potatoes your own!

  • Vegetarian Option: Swap ground beef for black beans or lentils for a hearty, protein-packed filling. This variation maintains all the comforting goodness while being meat-free!

  • Lighter Meat Choice: Use ground turkey or chicken in place of beef for a leaner option. The flavors from the taco seasoning still deliver that satisfying taste you crave.

  • Different Cheese: Experiment with Monterey Jack or pepper jack cheese for a spicier kick. Each cheese brings a unique creaminess that elevates the overall flavor profile.

  • Extra Veggies: Incorporate diced bell peppers, corn, or zucchini into your filling for added nutrition and texture. This not only makes the dish colorful but also boosts its health benefits.

  • Spicy Kick: Add diced jalapeños or a dash of cayenne pepper to the beef mixture for those who love a little heat. This fiery twist can turn your Comfort food into a fiesta on a plate!

  • Creamy Alternative: Swap sour cream for Greek yogurt for a healthier topping without sacrificing flavor. It adds a lovely tangy finish that pairs well with the savory potatoes.

  • Fresh Herbs: Top with fresh parsley or chives in addition to or instead of cilantro for a different herbaceous touch. Each herb offers a unique flavor experience and brightens the dish.

Feel inspired? Take these variations further and serve your Cheesy Taco Potatoes alongside vibrant sides like Cheesy Zucchini Rolls or a refreshing salad of your choice, blending freshness and comfort in every bite!

Make Ahead Options

These Cheesy Taco Potatoes are perfect for meal prep enthusiasts! You can bake the potatoes and prepare the filling up to 24 hours in advance. Simply follow the baking and filling instructions, then let the potatoes cool completely before refrigerating them (this prevents sogginess). When you’re ready to serve, reheat the stuffed potatoes in the oven at 375°F (190°C) for about 20-25 minutes or until heated through, then top with shredded cheese and return to the oven until melted. This way, you’ll have a warm, hearty meal with minimal effort on busy weeknights, making homemade goodness just as delicious and convenient!

Cheesy Taco Potatoes Recipe FAQs

How do I choose the right potatoes for this recipe?
Absolutely! For Cheesy Taco Potatoes, I recommend using large russet potatoes as they have a fluffy texture that holds up well when stuffed. Look for potatoes that are firm with no dark spots or blemishes, which indicate freshness and quality.

How should I store leftover Cheesy Taco Potatoes?
Leftover Cheesy Taco Potatoes can be stored in the fridge for up to 3 days. Place them in an airtight container after they’ve cooled to room temperature to help retain their fluffy texture. Just remember, they might lose some crispiness after being refrigerated, but they’ll still be delicious when reheated!

Can I freeze Cheesy Taco Potatoes?
Yes, you can! To freeze your Cheesy Taco Potatoes, let them cool completely first. Wrap each potato tightly in plastic wrap before placing them in a freezer-safe bag, ensuring to remove as much air as possible. They can be frozen for up to 2 months. When you’re ready to enjoy them, bake from frozen at 350°F (175°C) for about 25-30 minutes until heated through.

What can I do if my potatoes are too hard after baking?
If your potatoes are hard after baking, it’s likely they weren’t baked long enough. Bake them an additional 10-15 minutes, checking for tenderness. Use a fork to pierce the skin; it should easily go through the flesh. Make sure they are well-scrubbed and pierced with a fork before baking to facilitate even cooking.

Are Cheesy Taco Potatoes suitable for vegetarians?
Very! You can easily make a vegetarian version of Cheesy Taco Potatoes by substituting ground beef with black beans or lentils. This allows the flavors to shine while ensuring vegans can enjoy a hearty and filling meal too. Just follow the same seasoning instructions for the vegetarian filling!

Can I use different toppings for my Cheesy Taco Potatoes?
Of course! The beauty of Cheesy Taco Potatoes lies in their versatility. Feel free to load them with your favorite toppings—try diced bell peppers, corn, or a spicy salsa for an extra kick. The more the merrier! Get creative and make it your own!

Cheesy Taco Potatoes

Cheesy Taco Potatoes: Comforting Flavor in Every Bite

Cheesy Taco Potatoes are a delicious comfort food, featuring fluffy potatoes stuffed with savory filling and topped with melted cheese.
Prep Time 15 minutes
Cook Time 1 hour
Total Time 1 hour 15 minutes
Servings: 4 potatoes
Course: Dinner
Cuisine: American
Calories: 450

Ingredients
  

For the Potatoes
  • 4 large Russet Potatoes Hearty potatoes perfect for stuffing.
  • 2 tablespoons Olive Oil Coats the potatoes for crispy skin.
  • 1 teaspoon Salt Essential seasoning.
  • 1 teaspoon Pepper Essential seasoning.
For the Filling
  • 1 pound Ground Beef Adds richness and protein.
  • 1 packet Taco Seasoning Provides savory flavor.
  • 1 cup Diced Tomatoes Optional, adds moisture.
  • 1/2 cup Black Olives For garnish and flavor.
For the Toppings
  • 1 cup Shredded Cheddar Cheese Melts beautifully.
  • 1/2 cup Sour Cream Balances spices; can swap for Greek yogurt.
  • 1/4 cup Chopped Cilantro Fresh herb to brighten the dish.
  • 2 stalks Green Onions Adds crunch and flavor.

Equipment

  • oven
  • Skillet
  • baking sheet
  • Fork
  • spatula

Method
 

Cooking Steps
  1. Preheat your oven to 400°F (200°C) to prepare for baking the potatoes.
  2. Scrub and dry the russet potatoes, piercing each several times with a fork.
  3. Rub each potato generously with olive oil and sprinkle with salt and pepper.
  4. Place the potatoes on a baking sheet and bake for 45-60 minutes until tender.
  5. In a skillet, cook the ground beef over medium heat for 5-7 minutes until browned.
  6. Stir in the taco seasoning and simmer for 3-5 minutes.
  7. Take the cooked potatoes out of the oven, slice them lengthwise, and fluff the insides.
  8. Fill each potato with the seasoned beef mixture and top with shredded cheese.
  9. Return the stuffed potatoes to the oven for 10-15 minutes until the cheese melts.
  10. Add toppings like sour cream, green onions, diced tomatoes, and olives before serving.

Notes

Customize further with additional toppings to suit your taste. Great for meal prep and leftovers can be stored for 3 days in the fridge.

French-Canadian Poor Man’s Pudding: Comfort in a Bowl

The kitchen fills with a sweet, earthy aroma as I pour a cascade of molten maple syrup over the cake batter, a nostalgic nod to simpler times. French-Canadian Poor Man’s Pudding, or Pouding Chômeurs, is a beloved dessert that brilliantly showcases how frugality can lead to indulgence. This beloved recipe transforms basic pantry ingredients into a warm, gooey delight that you can whip up in no time—all in just one pan! It’s the perfect choice for cozy weeknight desserts or when you’re feeding a crowd on a budget. Trust me, this dessert not only ticks the box for quick prep but also delivers comfort that melts in your mouth. How does such a simple blend of ingredients create such a significant impact? Let’s dive into this delightful creation!

Why is French-Canadian Poor Man’s Pudding special?

Simple Ingredients: This delightful dessert transforms everyday pantry staples into a warm, indulgent treat, perfect for those looking to embrace home-cooked comfort.

One-Pan Wonder: The ease of a one-pan recipe means minimal cleanup while still impressing your family and guests with gourmet flavors.

Gooey Goodness: The molten maple syrup sauce creates a luscious layer beneath a fluffy cake, providing a rich, satisfying experience that warms the soul.

Budget-Friendly: This recipe is ideal for anyone on a budget, delivering an authentic taste of Quebec’s culinary tradition without breaking the bank.

Crowd-Pleaser: Serve it warm topped with crème fraîche or whipped cream, and watch your friends and family come back for seconds! This indulgent dessert lets you escape into a comforting world of flavors and nostalgia, whatever the occasion.

French-Canadian Poor Man’s Pudding Ingredients

For the Cake Batter

  • All-Purpose Flour – Provides the structure for the cake, but can be replaced with a gluten-free flour blend for a different twist.
  • Baking Powder – Acts as a leavening agent; make sure it’s fresh for the best rise.
  • Salt – Enhances the flavor; kosher or sea salt works well.
  • Eggs – Essential for moisture and binding; consider a flax egg for a vegan alternative.
  • Milk – Adds richness to the batter; feel free to switch to any non-dairy milk if preferred.

For the Syrup

  • Brown Sugar – Imparts sweetness with a caramel flavor; coconut sugar is a great substitute for a deeper taste.
  • Maple Syrup – The star of the dish providing a warm sweetness; always choose pure maple syrup for the best results.
  • Water – Helps in boiling the syrup; no substitutes needed here.

This delightful French-Canadian Poor Man’s Pudding is not only simple to make but brings a hint of nostalgia with every bite!

Step‑by‑Step Instructions for French-Canadian Poor Man’s Pudding

Step 1: Prepare the Syrup
In a medium saucepan, combine brown sugar, water, and pure maple syrup. Bring the mixture to a boil over medium heat, stirring until the sugar fully dissolves and the syrup becomes smooth. This should take about 5 minutes. Once boiling, set the syrup aside to cool slightly while you prepare the cake batter.

Step 2: Mix Cake Batter
In a large mixing bowl, whisk together the all-purpose flour, baking powder, and salt until well combined. In another bowl, combine the eggs and milk, mixing until smooth. Gradually add the dry ingredients to the wet mixture, stirring gently until just combined. Be careful not to overmix; a few lumps are perfectly fine for a fluffy cake in your French-Canadian Poor Man’s Pudding.

Step 3: Combine Ingredients
Grease a square baking pan with butter or cooking spray to prevent sticking. Pour the cake batter into the center of the prepared pan, using a spatula to spread it evenly. Next, carefully pour the hot syrup over the batter; it’s okay if it looks uneven, as the syrup will settle while baking. The unique layering is key to the delightful texture of this dessert.

Step 4: Bake
Preheat your oven to 350°F (175°C). Place the baking dish on a foil-lined tray to catch any potential spills during baking. Bake the pudding for about 35 minutes or until the cake is puffed and golden. You’ll know it’s done when the top springs back lightly when touched and a toothpick inserted into the cake comes out clean, revealing a gooey layer below.

Step 5: Cool & Serve
Once baked, remove your French-Canadian Poor Man’s Pudding from the oven and let it cool for at least 10 minutes before serving. This resting time helps the syrup settle and makes it easier to cut. Serve warm, ideally topped with a dollop of crème fraîche or whipped cream to enhance its rich flavors.

Make Ahead Options

These French-Canadian Poor Man’s Pudding are ideal for those on the go, allowing you to save time and enjoy a delicious dessert without the last-minute rush. You can prepare the cake batter and store it in the refrigerator for up to 24 hours; simply cover the bowl tightly with plastic wrap to maintain its freshness. The syrup can also be made ahead of time and kept in an airtight container in the fridge for up to 3 days. When you’re ready to bake, combine the components by pouring the prepared syrup over the batter and following the baking instructions as normal. This way, you’ll have a delightful dessert ready to impress your family with minimal effort!

What to Serve with French-Canadian Poor Man’s Pudding

Warm, comforting, and drizzled with syrup, this dessert is best enjoyed alongside delightful pairings to elevate your experience.

  • Crème Fraîche: The cool, tangy cream perfectly contrasts the warm cake, making every bite a balancing act of flavors. A dollop of crème fraîche can transform the dessert into a luxurious treat.

  • Whipped Cream: Light and airy, whipped cream adds a luscious touch to the pudding. Its sweetness complements the maple syrup without overpowering it.

  • Fresh Berries: Bright and juicy berries, like raspberries or strawberries, add a pop of color and freshness. Their tartness cuts through the richness, providing a refreshing twist.

  • Vanilla Ice Cream: A scoop of creamy vanilla ice cream melts beautifully over the warm pudding, creating a delightful combination of temperatures and textures.

  • Coffee: A cup of rich, brewed coffee brings out the earthy flavors of the maple syrup. The bitter notes balance the sweetness, making it a great dessert-time beverage.

  • Spiced Nuts: Crunchy spiced nuts add texture and a hint of warmth. Their toasty flavors enhance the otherwise soft, gooey pudding and make for a delightful contrast.

Each pairing complements the French-Canadian Poor Man’s Pudding in its own special way, inviting you to savor every moment. Enjoy!

How to Store and Freeze French-Canadian Poor Man’s Pudding

Fridge: Store covered in an airtight container for up to 3 days. The flavors continue to develop, making it even more delightful on the second day.

Freezer: For longer storage, freeze portions in airtight containers for up to 2 months. Thaw overnight in the fridge before reheating.

Reheating: Reheat individual servings gently in the oven at 350°F (175°C) until warm throughout. A splash of milk before warming revives moisture and flavor.

Wrap Carefully: If storing in the fridge, cover with plastic wrap to prevent the pudding from drying out and losing its gooey charm.

French-Canadian Poor Man’s Pudding Variations

Feel free to explore these delightful twists that will allow you to customize your French-Canadian Poor Man’s Pudding to your heart’s content!

  • Nutty Delight: Add chopped walnuts or pecans to the cake batter for a surprising crunch. The toasted flavor of the nuts complements the sweetness beautifully.

  • Spiced Up: Mix in a teaspoon of cinnamon or nutmeg into the batter for a warm, aromatic kick. These spices bring a cozy essence that enhances the overall flavor profile.

  • Fruity Twist: Top your pudding with fresh sliced bananas or berries before pouring on the syrup for a fresh burst of flavor. It adds a vibrant touch and a hint of tartness.

  • Dairy-Free Option: Substitute regular milk with almond or oat milk for a delightful dairy-free twist. Your pudding will still be luxurious while catering to dietary needs.

  • Sweet Swap: Use honey instead of maple syrup for an alternative sweetener. It offers a different level of sweetness, creating a slightly floral flavor in your dessert.

  • Cake Variation: Try adding a layer of chocolate chips to the batter for an indulgent chocolatey surprise. This little touch turns your pudding into a rich chocolate dessert.

  • Coconut Infusion: For a tropical flair, incorporate shredded coconut into the batter or sprinkle some on top after baking. This adds texture and a hint of coconut flavor that’s just heavenly.

  • Extra Gooey: For a more decadent experience, double the amount of syrup you pour over the batter. It creates an even richer sauce that transforms each bite into pure bliss.

No matter how you choose to customize your pudding, these variations ensure you can savor the essence of this classic dish again and again. And while you’re at it, why not explore more sweet adventures like Vanilla Pudding or the delightful Caramel Milk Pudding to inspire your next baking session? Enjoy the comforting journey!

Expert Tips for French-Canadian Poor Man’s Pudding

  • Check Freshness: Ensure your baking powder is fresh. An expired leavening agent could lead to a dense cake instead of the light, fluffy texture you want.

  • Syrup Layering: When pouring the syrup over the batter, take your time. An uneven pour is fine; the syrup will settle during baking, creating that signature gooey layer.

  • Baking Dish Matters: If you swap out your baking dish, adjust the baking time accordingly. A different size or material can affect how quickly your pudding cooks.

  • Serving Suggestions: For the ultimate experience, top your French-Canadian Poor Man’s Pudding with freshly whipped cream or crème fraîche. The cool cream contrasts perfectly with the warm dessert.

  • Storage Tips: Leftovers can be stored in an airtight container in the fridge for up to three days. Gently reheat to enjoy the gooey goodness all over again!

  • Experiment & Enjoy: Don’t hesitate to get creative! Adding nuts or spices can elevate your pudding, making it uniquely yours.

French-Canadian Poor Man’s Pudding Recipe FAQs

What kind of maple syrup should I use for this recipe?
Absolutely! For the best flavor in your French-Canadian Poor Man’s Pudding, always opt for pure maple syrup. The richness and complexity of pure syrup far exceed that of artificial ones. If you’re in a pinch, honey can work as an alternative, but it will change the flavor profile slightly.

How long can I store my leftover pudding?
You can store your French-Canadian Poor Man’s Pudding in an airtight container in the refrigerator for up to 3 days. The flavors actually deepen as it sits, making it even tastier on the second day! Just be sure to cover it well, as this dessert loves to retain its gooey goodness.

Can I freeze French-Canadian Poor Man’s Pudding?
Very! To freeze, slice the pudding into portions and place them in airtight containers or freezer-safe bags. It can be stored for up to 2 months. When you’re ready to enjoy it, simply thaw overnight in the fridge, then reheat gently in the oven at 350°F (175°C). A splash of milk before warming can help revive its moisture.

What should I do if my pudding is too watery after baking?
If you find your French-Canadian Poor Man’s Pudding turns out overly watery, it could be due to using too much syrup or not allowing sufficient baking time. Ensure you’re measuring the syrup correctly and keep an eye on the baking process. If it still comes out soggy, try adjusting your oven temperature for a longer bake next time, perhaps by about 5-10 minutes while keeping an eye on doneness.

Are there any dietary considerations I should think about?
Absolutely! If you’re catering to specific dietary needs, consider using a gluten-free flour blend for those with gluten sensitivities. For a vegan alternative, a flax egg can replace the egg, and any non-dairy milk can be substituted for regular milk. Just be cautious about the type of maple syrup you use, as some brands may have added allergens. Always check your ingredient labels!

Can I add other flavors or ingredients to the pudding?
Absolutely, the more the merrier! Feel free to get creative with your French-Canadian Poor Man’s Pudding. Consider adding chopped nuts like walnuts or pecans for a delightful crunch. Spices like cinnamon or nutmeg can bring an additional warmth to the flavor. You could also fold in some fresh berries or bananas before baking for a fruity twist!

French-Canadian Poor Man’s Pudding

French-Canadian Poor Man’s Pudding: Comfort in a Bowl

French-Canadian Poor Man’s Pudding is a beloved dessert that turns simple pantry ingredients into a warm, gooey delight.
Prep Time 10 minutes
Cook Time 35 minutes
Cooling Time 10 minutes
Total Time 55 minutes
Servings: 8 slices
Course: Dessert
Cuisine: French-Canadian
Calories: 250

Ingredients
  

For the Cake Batter
  • 1 cup all-purpose flour can be replaced with gluten-free flour blend
  • 1 tbsp baking powder ensure it’s fresh
  • 1/2 tsp salt kosher or sea salt works well
  • 1 large egg or use a flax egg for vegan
  • 1 cup milk can substitute with non-dairy milk
For the Syrup
  • 1 cup brown sugar or use coconut sugar
  • 1 cup pure maple syrup always choose pure maple syrup
  • 1 cup water

Equipment

  • Medium saucepan
  • Large mixing bowl
  • square baking pan
  • spatula

Method
 

Step-by-Step Instructions for French-Canadian Poor Man’s Pudding
  1. In a medium saucepan, combine brown sugar, water, and pure maple syrup. Bring to a boil over medium heat, stirring until smooth, about 5 minutes. Set aside to cool slightly.
  2. In a large mixing bowl, whisk together the all-purpose flour, baking powder, and salt. In another bowl, combine the egg and milk, mixing until smooth. Gradually add dry ingredients to wet mixture, stirring gently until just combined.
  3. Grease a square baking pan with butter. Pour the cake batter into the pan, spreading it evenly. Carefully pour the hot syrup over the batter.
  4. Preheat your oven to 350°F (175°C). Place the baking dish on a foil-lined tray. Bake for about 35 minutes or until puffed and golden with a toothpick coming out clean.
  5. Once baked, let the pudding cool for at least 10 minutes before serving. Serve warm, topped with crème fraîche or whipped cream.

Notes

Leftovers can be stored in an airtight container in the fridge for up to three days. Reheat to enjoy the gooey goodness again.

Irresistible Spezzatino di Manzo: Comfort in Every Bite

As the sun dips below the horizon on a chilly evening, the aroma of slow-cooked goodness beckons from the kitchen, transporting me straight to a bustling Italian trattoria. That’s right; today we’re diving into the heartwarming world of Spezzatino di Manzo, an Italian beef stew that captures the essence of comfort food. With tender chunks of beef and vibrant vegetables simmering in a luxurious red wine gravy, this stew is not only a nourishing meal but also a delightful escape from the usual fast food routine. The best part? It’s impressively easy to prepare; whether you choose the oven-baked version or the slow cooker for a hands-off approach, you’ll create a dish that brings the family together. So, are you ready to roll up your sleeves and discover how to make this hearty Italian stew that promises warmth and joy in every bite?

Why Is Spezzatino di Manzo So Special?

Comforting Warmth: This classic Italian stew is a hug in a bowl on chilly nights, perfect for bringing family together around the dinner table.

Simple Preparation: The recipe is easy to follow, requiring just basic cooking skills, making it accessible for all home chefs.

Flavor Elevation: Each bite bursts with earthy vegetables and tender beef, creating a symphony of irresistible flavors, especially when paired with buttery polenta.

Versatile Options: Want to switch it up? You can try a slow cooker version for a set-it-and-forget-it approach, freeing up your time while still delivering a fantastic meal.

Crowd Pleaser: This dish is guaranteed to impress guests at your next dinner party, evoking compliments and requests for seconds! Prepare to be hailed as the star of comfort food.

For more delicious chilly-weather dishes, check out my guide on hearty slow-cooked meals.

Spezzatino di Manzo Ingredients

• Ready to create an unforgettable Italian stew? Here’s what you’ll need!

For the Stew

  • Olive oil – Provides moisture and flavor; can substitute with vegetable oil.
  • Chuck steak (2 lbs / 900g) – The main protein, offers robust flavor and tenderness; can use brisket or beef shank.
  • Pancetta (3.5 oz / 100g) – Adds depth of flavor; can substitute with bacon.
  • Onion (1 large) – Base flavor for the soffrito; no direct substitute, but shallots can be used.
  • Carrots (2) – Adds sweetness and texture; can swap for parsnips.
  • Celery (2 stalks) – Builds the base flavor; can omit if unavailable.
  • Sea salt (2 tsp) – Enhances flavor; adjust to taste.
  • Black pepper (1 tsp) – Adds seasoning; can substitute with white pepper.
  • Brown sugar (optional, 1 tsp) – Balances acidity from tomatoes; can replace with honey or omit.
  • Crimini mushrooms (7 oz / 200g) – Introduces umami; can substitute with button mushrooms.
  • Garlic (4 cloves) – Adds aromatic flavor; use garlic powder in a pinch.
  • Tomato paste (2 tbsp) – Adds richness; can use crushed tomatoes.
  • Balsamic vinegar (2 tbsp) – Provides acidity and sweetness; can substitute with red wine vinegar.
  • Red wine (⅓ cup / 80ml) – Deepens the stew’s flavors; can replace with beef broth for a non-alcoholic version.
  • Beef broth (2.5 cups / 620ml) – The stew’s liquid base; homemade or store-bought is fine.
  • Bay leaf (1) – Infuses flavor; discard before serving.
  • Rosemary sprig (1) – Adds aroma; substitute with thyme if needed.
  • Cornstarch (2 tsp) – Thickens the stew; can use flour or arrowroot powder as alternatives.

Let’s gather these delicious ingredients to create a comforting bowl of Spezzatino di Manzo that your taste buds will remember!

Step‑by‑Step Instructions for Spezzatino di Manzo

Step 1: Preheat and Prepare
Begin by preheating your oven to 320°F (160°C) while you gather your ingredients and equipment. Arrange a large, heavy-bottomed casserole or Dutch oven on the stovetop, ready for action. This initial step ensures that your cooking surface is hot enough to sear the beef properly, allowing the flavors to develop beautifully.

Step 2: Sear the Beef
Heat 2 tablespoons of olive oil in the casserole over medium-high heat. Once the oil shimmers, add the chuck steak in batches, ensuring it doesn’t crowd the pan. Sear for about 4–5 minutes until browned on all sides. Remove the beef and set it aside, allowing the flavorful bits to remain in the pot.

Step 3: Cook the Pancetta
In the same pot, add the diced pancetta. Cook over medium heat for about 3–4 minutes until crispy and golden brown. This step infuses delightful flavor into the oil, creating a rich base for your Spezzatino di Manzo. Once crispy, return the seared beef to the pot and mix gently to combine.

Step 4: Deglaze with Wine
Pour in ⅓ cup of red wine to deglaze the pot, scraping up any browned bits from the bottom with a wooden spoon. Allow the wine to simmer for about 2–3 minutes, reducing slightly. This step adds depth to the stew’s flavor, blending the richness of the beef with the aromatic notes of the wine.

Step 5: Sauté Vegetables
Add the chopped onion, diced celery, and carrots to the pot. Season with 2 teaspoons of sea salt, 1 teaspoon of black pepper, and the optional teaspoon of brown sugar. Sauté the vegetables for about 10 minutes until they soften and the onions become translucent, stirring occasionally to prevent sticking.

Step 6: Add Mushrooms and Garlic
Stir in the sliced crimini mushrooms and minced garlic, sautéing for an additional minute until fragrant. The aroma will fill your kitchen! Then, add the balsamic vinegar and 2 tablespoons of tomato paste to deepen the flavor profile of the Spezzatino di Manzo.

Step 7: Combine the Stew
Pour in 2.5 cups of beef broth, mixing well to incorporate all the ingredients. Return the browned beef and pancetta to the pot, and add 1 bay leaf and a sprig of rosemary for an aromatic touch. Cover the pot tightly with a lid, ensuring heat and moisture stay locked in for the next step.

Step 8: Braise in the Oven
Transfer the covered casserole to your preheated oven. Bake for 90 minutes, checking for tenderness around the one-hour mark. The beef should be meltingly tender when ready. If not, continue baking for another 30 minutes, maintaining the luscious flavors of your Spezzatino di Manzo.

Step 9: Thicken the Stew
Once the beef is tender, mix 2 teaspoons of cornstarch with 2 tablespoons of water to create a slurry. Stir this mixture into the stew to thicken the gravy, allowing it to simmer for an additional 5 minutes. Taste and adjust the seasoning if necessary, ensuring it’s perfectly balanced before serving.

How to Store and Freeze Spezzatino di Manzo

Fridge: Store leftover Spezzatino di Manzo in an airtight container for up to 4 days. The flavors deepen as it sits, making it even more delicious on day two!

Freezer: For longer storage, freeze the stew in an airtight container or heavy-duty freezer bag for up to 3 months. Be sure to leave some space for expansion.

Reheating: Thaw in the refrigerator overnight, then gently reheat on the stovetop over medium-low heat, adding a splash of beef broth if necessary to regain moisture and creaminess.

Portioning: Consider freezing in individual portions for a quick, satisfying meal later. Grab and go during those busy nights when fast food might tempt you!

Make Ahead Options

For busy home cooks, this Spezzatino di Manzo is ideal for meal prep! You can chop the vegetables and marinate the beef in advance, allowing the flavors to meld overnight in the refrigerator, which enhances the richness of the stew. Additionally, the entire stew can be cooked and refrigerated for up to 3 days before serving; just reheat gently on the stove or in the oven. To maintain quality, avoid adding the cornstarch slurry until you’re ready to serve, ensuring a perfectly thickened gravy. Simply heat the stew, adjust the seasoning if needed, and you’ll savor the same comforting taste with minimal effort!

What to Serve with Hearty Italian Spezzatino di Manzo?

Elevate your dining experience with delightful sides that perfectly complement the bold flavors of this Italian beef stew.

  • Creamy Polenta: Its rich, buttery texture beautifully absorbs the savory gravy, adding an extra layer of comfort to your meal. Picture a warm bowl of polenta, each bite a creamy partner to the tender beef.

  • Crusty Bread: Perfect for mopping up every last drop of delicious gravy, a warm, crusty loaf is a must-have. The crunchiness creates a satisfying contrast to the stew’s softness.

  • Garlic Bread: A flavor-packed accompaniment that brings an aromatic touch to your table, making every meal feel like a special occasion. Its crispy edges and soft interior pair perfectly with the stew.

  • Roasted Vegetables: Add some color and nutrition with seasonal roasted veggies like carrots, Brussels sprouts, or zucchini. They enhance the meal with their caramelized sweetness, balancing the savory flavors of the stew beautifully.

  • Green Salad: A fresh, crisp salad with a light vinaigrette cuts through the richness of the stew, providing a refreshing contrast. Try tossing mixed greens with cherry tomatoes, cucumber, and a splash of lemon for brightness.

  • Red Wine: Sip on a glass of robust red wine to mirror the deep flavors of the beef and elevate your dining experience. The right wine can often make your comfort food heartier and more indulgent.

  • Mashed Potatoes: Fluffy mashed potatoes add another comforting element to your meal, soaking up the stew’s juices with every bite. This classic pairing will surely satisfy all the members of your family.

Expert Tips for Spezzatino di Manzo

  • Browning Matters: Make sure to sear the beef well; this step enhances the stew’s flavor profile. If beef isn’t browned, the stew may taste flat.

  • Patience Pays Off: Don’t rush the soffrito process; sautéing the vegetables slowly develops a rich flavor base, crucial for a comforting stew.

  • Tender Test: Always check the beef’s tenderness before adding the cornstarch. It should be melt-in-your-mouth delicious for the ideal Spezzatino di Manzo experience.

  • Slow Cooker Shortcut: If using a slow cooker, forget the browning step. Simply layer all the ingredients and let the magic happen without the extra dish to clean!

  • Adjust Seasoning: Taste the stew before serving, especially after thickening. You may want to adjust the seasoning for the perfect flavor balance.

Spezzatino di Manzo Variations & Substitutions

Feel free to let your creativity flow and customize this hearty stew with these delightful variations!

  • Lamb Swap: Use lamb instead of chuck steak for a rich, distinct flavor that elevates the dish.

  • Mushroom Medley: Mix in a variety of mushrooms like shiitake or portobello for deeper umami notes and a lovely texture.

  • Vegetable Medley: Incorporate seasonal vegetables like turnips, parsnips, or sweet potatoes to give the stew a fresh twist.

  • Spicy Kick: Add red pepper flakes or a dash of your favorite hot sauce for a delightful warmth that livens up each bite.

  • Herb Infusion: Instead of rosemary, try thyme or bay leaves for a slightly different aromatic profile that enhances the overall flavor.

  • Tomato Variation: Swap out the tomato paste for crushed tomatoes for a more rustic texture and slightly different taste.

  • Heat Level: For a milder stew, omit black pepper and replace it with a pinch of smoked paprika for subtle smokiness without too much heat.

  • Slow Cooker Option: Use a slow cooker for the same comforting results. Just layer your ingredients and let it work its magic for a hands-off dinner!

If you’re interested in exploring more hearty recipes like this one, don’t hesitate to check out my guide on warming winter meals!

Spezzatino di Manzo Recipe FAQs

How do I select the right meat for Spezzatino di Manzo?
Absolutely! For the best flavor and tenderness, I recommend using chuck steak, which is full of rich beefy flavor and becomes melt-in-your-mouth tender when cooked slowly. Look for a piece with good marbling, and avoid any cuts that have dark spots or a dry appearance, as these may indicate lower quality.

What’s the best way to store leftover Spezzatino di Manzo?
Leftovers can be stored in an airtight container in the fridge for up to 4 days. Make sure the stew is completely cooled before sealing it to prevent condensation. This stew often tastes even better the next day as the flavors meld, so don’t hesitate to enjoy it!

Can I freeze Spezzatino di Manzo? How?
Yes! You can freeze Spezzatino di Manzo for up to 3 months. To do this, allow the stew to cool completely, then transfer it into an airtight container or a heavy-duty freezer bag. Make sure to leave some room for expansion. Thaw it in the fridge overnight before gently reheating on the stovetop, adding a bit of extra beef broth if needed.

What should I do if my stew is too thin?
If your Stew comes out thinner than you’d like, no need to worry! Mix 2 teaspoons of cornstarch with a couple of tablespoons of cold water to make a slurry. Stir this into the simmering stew and cook for a few minutes until thickened. This will give your Spezzatino di Manzo that luscious texture you’re aiming for!

Is this recipe pet-friendly?
It’s always best to check before sharing human food with pets! While the ingredients in Spezzatino di Manzo, like beef and vegetables, can be safe for pets in small amounts, avoid seasoning with salt, pepper, or garlic, as these can be harmful to them. Stick to plain, unseasoned meat and veggies if sharing with furry friends.

Can I make this dish gluten-free?
Certainly! You can easily adapt Spezzatino di Manzo to be gluten-free. Just substitute the cornstarch for arrowroot powder to thicken the stew or use a gluten-free flour blend if you prefer. Additionally, check that your beef broth doesn’t contain gluten, ensuring it’s completely safe for anyone with dietary restrictions.

Spezzatino di Manzo

Irresistible Spezzatino di Manzo: Comfort in Every Bite

Experience the heartwarming flavors of Spezzatino di Manzo, an Italian beef stew that combines comfort and nourishment in every bite.
Prep Time 20 minutes
Cook Time 1 hour 30 minutes
Total Time 1 hour 50 minutes
Servings: 6 servings
Course: Dinner
Cuisine: Italian
Calories: 380

Ingredients
  

For the Stew
  • 2 tablespoons Olive oil Can substitute with vegetable oil.
  • 2 lbs Chuck steak Can use brisket or beef shank.
  • 3.5 oz Pancetta Can substitute with bacon.
  • 1 large Onion No direct substitute but shallots can be used.
  • 2 Carrots Can swap for parsnips.
  • 2 stalks Celery Can omit if unavailable.
  • 2 teaspoons Sea salt Adjust to taste.
  • 1 teaspoon Black pepper Can substitute with white pepper.
  • 1 teaspoon Brown sugar Optional; can replace with honey or omit.
  • 7 oz Crimini mushrooms Can substitute with button mushrooms.
  • 4 cloves Garlic Use garlic powder in a pinch.
  • 2 tablespoons Tomato paste Can use crushed tomatoes.
  • 2 tablespoons Balsamic vinegar Can substitute with red wine vinegar.
  • cup Red wine Can replace with beef broth for a non-alcoholic version.
  • 2.5 cups Beef broth Homemade or store-bought is fine.
  • 1 Bay leaf Infuses flavor; discard before serving.
  • 1 sprig Rosemary Substitute with thyme if needed.
  • 2 teaspoons Cornstarch Can use flour or arrowroot powder as alternatives.

Equipment

  • Casserole or Dutch oven

Method
 

Cooking Steps
  1. Preheat your oven to 320°F (160°C) while gathering your ingredients.
  2. Heat 2 tablespoons of olive oil in the casserole over medium-high heat. Sear the chuck steak in batches for 4–5 minutes until browned.
  3. In the same pot, cook the diced pancetta for 3–4 minutes until crispy. Return the seared beef to the pot.
  4. Deglaze the pot with ⅓ cup of red wine, scraping browned bits from the bottom. Let it simmer for 2–3 minutes.
  5. Add chopped onion, diced celery, and carrots, seasoning with sea salt, black pepper, and brown sugar. Sauté for about 10 minutes until softened.
  6. Stir in sliced crimini mushrooms and minced garlic, sautéing for an additional minute. Add balsamic vinegar and tomato paste.
  7. Pour in 2.5 cups of beef broth, return the beef and pancetta, and add a bay leaf and rosemary. Cover tightly.
  8. Bake for 90 minutes, checking tenderness around the one-hour mark. If not tender, continue baking for another 30 minutes.
  9. Mix 2 teaspoons of cornstarch with 2 tablespoons of water to create a slurry. Stir into the stew and let simmer for 5 minutes.

Notes

Store leftover Spezzatino di Manzo in an airtight container for up to 4 days in the fridge or freeze for longer storage.

Spooktacular Halloween Dessert: Candy Corn Fruit Parfait Delight

“Did you hear about that spooktacular Halloween dessert that’s taking the season by storm?” As a passionate home-chef myself, I couldn’t resist trying out this vibrant Easy No-Bake Candy Corn Fruit Parfait. With layers of creamy Greek yogurt, a colorful medley of seasonal fruits, and a playful sprinkle of candy corn, this festive treat is pure joy in a cup. Not only is it super quick to whip up, making it perfect for busy days, but it’s also a healthy option that the whole family can enjoy. Whether you’re hosting a Halloween bash or just looking to add a touch of whimsy to your weeknight dessert, this parfait serves as a delicious centerpiece. Curious how to layer these goodies for maximum wow-factor? Let’s dive into the recipe!

Why is this Halloween dessert a must-try?

Festive Appeal: The Candy Corn Fruit Parfait is not just visually stunning; it captures the spirit of Halloween with its vibrant colors and playful layers.

Healthy Indulgence: Packed with Greek yogurt and seasonal fruits, this treat offers a healthier alternative to traditional sweets without compromising on flavor.

Quick & Easy: With minimal preparation and no baking required, it’s delightful for busy days when you still want something special, just like the popular Coconut Cheese Dessert.

Family-Friendly Fun: Perfect for kids and adults alike, everyone will enjoy building their parfait, mixing flavors and textures to suit personal tastes.

Versatile Options: Feel free to adapt the recipe by swapping fruits or using dairy-free yogurt, ensuring every family member can join in the fun!

Spooktacular Halloween Dessert Ingredients

Prepare for a colorful twist on a classic treat!

For the Parfait

  • Greek Yogurt – A creamy base high in protein; opt for plain to keep it less sweet.
  • Mixed Fresh Fruits – Seasonal favorites like bananas, oranges, and strawberries for vibrant colors and natural sweetness; substitute with any favorite fruits based on availability.
  • Candy Corn – Adds fun texture and nostalgia; pick your favorite brand for the best flavors!
  • Honey or Maple Syrup (optional) – Provides an extra touch of sweetness; adjust according to your taste.
  • Granola (optional) – Adds delightful crunch; choose your favorite variety or omit if you prefer a softer texture.

This spooktacular Halloween dessert promises both fun and healthiness, making it a fantastic addition to your festive lineup!

Step‑by‑Step Instructions for Spooktacular Halloween Dessert

Step 1: Prepare the Fruits
Start by gathering your seasonal fruits, such as bananas, oranges, and strawberries. Thoroughly wash them under cool water, then slice them into bite-sized pieces that are easy to layer. Aim for vibrant colors to create an eye-catching presentation for your Candy Corn Fruit Parfait.

Step 2: Layer the Yogurt
In clear cups or jars, begin creating your colorful dessert by adding a generous layer of Greek yogurt as the base. Use about 1/3 of the cup for this layer. Make sure the yogurt is smooth and even, setting a creamy foundation for the delicious layers to come.

Step 3: Add the Fresh Fruits
Carefully layer your mixed fruits on top of the yogurt, creating a bright, colorful display. You can alternate the fruits for contrasting colors and textures, aiming for at least two different types in each parfait. This vibrant medley not only pops visually but also brings a delightful freshness to your Candy Corn Fruit Parfait.

Step 4: Drizzle with Sweetness
For an extra touch of sweetness, drizzle honey or maple syrup over the fruit layer, depending on your preference. Aim for a light coating to balance flavors without overpowering the freshness of the fruits. This step enhances the overall taste of your spooktacular Halloween dessert.

Step 5: Top with Candy Corn
Crowning your parfaits, generously sprinkle candy corn on top. This whimsical addition not only adds fun but also ties the theme of Halloween to your dessert. The pop of color from the candy corn provides a playful finish, making your Candy Corn Fruit Parfait irresistibly festive.

Step 6: Chill and Serve
If time allows, place the parfaits in the refrigerator for about 30 minutes before serving. Chilling enhances the flavors and creates a refreshing dessert experience. Once ready, bring them out for everyone to enjoy, showcasing your beautifully layered spooktacular Halloween dessert.

Helpful Tricks for Candy Corn Fruit Parfait

  • Fruit Prep: Wash and slice fruits ahead of time for a speedy assembly. This not only saves time but ensures a fresh, appealing presentation in your parfait.

  • Layering Technique: Aim for even layers of Greek yogurt and fruits to create visual appeal. Avoid overstuffing, which can make the dessert messy and less enjoyable.

  • Sweetness Balance: Taste your fruits before adding honey or maple syrup. If they’re sweet enough, skip the syrup to keep your spooktacular Halloween dessert healthy.

  • Candy Corn Placement: For the best aesthetic, add candy corn just before serving to maintain crunchiness. This keeps your parfaits looking festive and helps them stand out.

  • Storage Tip: These parfaits are best enjoyed fresh. Store in an airtight container in the fridge for up to 24 hours to retain flavor and texture, but avoid freezing.

What to Serve with Easy No-Bake Candy Corn Fruit Parfait

Elevate your festive gatherings with delightful pairings that bring out the best in this cheerful dessert.

  • Crunchy Granola: Adds a satisfying texture that complements the creamy yogurt, enhancing the overall crunchiness of each bite.
  • Festive Ginger Snap Cookies: Their spicy sweetness pairs beautifully with the parfait, offering a contrast that delights the palate.
  • Fresh Berry Salad: A mix of sweetness and tartness from seasonal berries balances the richness of the yogurt nicely.
  • Creamy Sweet Potato Mash: The buttery texture and subtle sweetness provide a warm contrast to the cold parfait, making it a comforting choice.
  • Hot Apple Cider: This seasonal drink infuses warmth and spice, perfect for cozy evenings together while enjoying a light dessert.
  • Pumpkin Spice Whipped Cream: Adding this atop your parfait can amplify the autumnal flavors, creating a harmonious holiday treat!

Make Ahead Options

These Candy Corn Fruit Parfaits are perfect for meal prep, allowing you to delight in the festive spirit without last-minute stress! You can prepare the Greek yogurt and layer sliced seasonal fruits in advance, refrigerating them for up to 24 hours. To maintain freshness, keep the yogurt separate from the fruits until ready to serve to prevent browning and sogginess. Once you’re set to enjoy, simply layer the yogurt with fruits in clear cups, drizzle with honey or maple syrup, and top with candy corn for that iconic Halloween touch. You’ll have a dazzling dessert ready in minutes, making it ideal for busy weeknights or holiday gatherings!

How to Store and Freeze Candy Corn Fruit Parfait

Fridge: Store your Candy Corn Fruit Parfait in an airtight container for up to 24 hours to maintain freshness and prevent sogginess.

Room Temperature: Avoid leaving parfaits at room temperature for more than 2 hours. The creamy yogurt and fresh fruits are best kept chilled.

Freezer: Do not freeze your parfaits, as the texture of yogurt and fruits will become unappetizing once thawed.

Reheating: There’s no need to reheat this dessert; serve it cold for a refreshing treat!

Spooktacular Halloween Dessert Variations

Embrace your creativity and customize this delightful dessert to your family’s preference with these fun substitutions and twists!

  • Dairy-Free: Swap Greek yogurt with coconut or almond yogurt for a creamy, dairy-free delight. Whether you choose coconut or almond, both variations maintain the richness and flavor of this spooky treat.

  • Fruit Variety: Try using different seasonal fruits such as blueberries, kiwi, or pineapple. Mixing unique fruits creates an artistic collage of flavors and colors that’s sure to please any palate.

  • Extra Layer: Add a layer of vanilla pudding or whipped cream for a richer texture. This twist not only enhances the creaminess but also brings a new flavor dimension that kids will absolutely love!

  • Crunch Factor: Substitute granola with crushed nuts or seeds for added crunch and health benefits. Nuts not only provide delightful texture but also boost the nutrient content of your parfait.

  • Swirl of Nut Butter: For a nutty twist, swirl in some almond or peanut butter between the layers. This adds a delicious depth of flavor that pairs beautifully with the sweetness of candy corn.

  • Spicy Surprise: Give a hint of heat by sprinkling a pinch of chili powder or cayenne on top before adding candy corn. The unusual combination of sweet and spicy will ignite curious taste buds!

  • Gummy Alternative: For a playful touch, replace candy corn with gummy worms or other Halloween-themed candies that bring a whimsical and festive flair to your dessert. Kids will enjoy the unexpected surprise!

  • Chilled Variation: Turn this recipe into a refreshing smoothie bowl by blending the yogurt and fruits together. Serve in a bowl and top with candy corn and granola for a delightful twist, perfect for warm days!

With these variations, feel free to tailor your Candy Corn Fruit Parfait to suit everyone’s tastes while celebrating spooky season in style! If you’re looking for more delightful dessert ideas, you might also enjoy my Heavenly No-Bake Cake: A Light and Refreshing Dessert or check out this quick Coconut Cheese Dessert for a creamy treat.

Candy Corn Fruit Parfait Recipe FAQs

How do I choose ripe fruits for my parfait?
Absolutely! Look for fruits that are vibrant and firm to the touch. Bananas should have a few spots, indicating ripeness, while oranges should feel heavy for their size. Strawberries should be bright red with no dark spots. If you find fruits that smell fragrant and sweet, they’re likely bursting with flavor!

How should I store the prepared parfaits?
Very important! Store your Candy Corn Fruit Parfait in an airtight container in the refrigerator for up to 24 hours. This keeps them fresh and visually appealing. Avoid storing them at room temperature for more than 2 hours to ensure the yogurt and fruits stay safe and delicious!

Can I freeze these parfaits?
No, I wouldn’t recommend freezing the parfaits. Freezing affects the texture of yogurt and fruits, resulting in a mushy finish when thawed. It’s best enjoyed fresh, so prepare just before serving or store in the fridge for a maximum of 24 hours for the ideal taste!

What if my yogurt becomes watery?
Very common! If your yogurt separates and becomes watery, give it a good stir to mix the moisture back in. This can happen due to excess liquid in the yogurt. To prevent this, choose a thicker variety or strain the yogurt through a cheesecloth to achieve the desired creaminess before layering.

Is this recipe safe for kids and those with allergies?
Absolutely! This Candy Corn Fruit Parfait is generally safe for most, but always check for allergies. If someone in your family has a dairy allergy, consider using coconut or almond yogurt instead. Additionally, for younger children or those with allergies, skip the candy corn or choose allergy-friendly alternatives.

How can I customize the parfait for dietary preferences?
The more the merrier! Feel free to mix and match the fruits based on what’s available or family preferences. For a dairy-free option, substitute Greek yogurt with a plant-based yogurt. You can also use sweeteners like agave if you’re looking for vegan options. Experimenting with layers of pudding or whipped cream can add a rich twist as well!

Spooktacular Halloween Dessert

Spooktacular Halloween Dessert: Candy Corn Fruit Parfait Delight

Experience the joy of this spooktacular Halloween dessert filled with layers of Greek yogurt, fresh fruits, and candy corn.
Prep Time 10 minutes
Chilling Time 30 minutes
Total Time 40 minutes
Servings: 4 parfaits
Course: Dessert
Cuisine: American
Calories: 220

Ingredients
  

For the Parfait
  • 2 cups Greek Yogurt plain for less sweetness
  • 2 cups Mixed Fresh Fruits bananas, oranges, strawberries
  • 1 cup Candy Corn your favorite brand
  • 2 tablespoons Honey or Maple Syrup optional, adjust to taste
  • 1 cup Granola optional, choose your favorite variety

Equipment

  • clear cups or jars

Method
 

Step-by-Step Instructions for Spooktacular Halloween Dessert
  1. Prepare the Fruits: Gather and wash your seasonal fruits, then slice them into bite-sized pieces.
  2. Layer the Yogurt: In clear cups, add a layer of Greek yogurt as the base, about 1/3 of the cup.
  3. Add the Fresh Fruits: Layer your mixed fruits on top of the yogurt for a colorful display.
  4. Drizzle with Sweetness: Drizzle honey or maple syrup over the fruit layer for added sweetness.
  5. Top with Candy Corn: Sprinkle candy corn on top for a whimsical and festive finish.
  6. Chill and Serve: Refrigerate for about 30 minutes before serving to enhance flavors.

Notes

Best enjoyed fresh, store in an airtight container for up to 24 hours.

Autumn Harvest Salad with Pomegranates for Cozy Days

As fall blankets the world in a tapestry of colors, there’s a delightful sense of anticipation in the kitchen. The aroma of roasted delicata squash fills the air, mingling with the earthy scent of kale and the sweet tang of pomegranate arils. This Autumn Harvest Salad with Pomegranates is my culinary ode to the season, celebrating the bounty of ingredients that autumn provides. Not only is this salad a feast for the eyes, but its hearty yet refreshing nature makes it a perfect choice for those crisp days when comfort food is a must. With quick prep in mind, you’ll find that this vibrant dish is not only a crowd-pleaser but also offers a wonderful gluten-free option with a simple farro swap. Are you ready to create something spectacular that captures the essence of the fall harvest? Let’s dive into this mouthwatering recipe!

Why is this Salad a Fall Favorite?

Vibrant Colors: This Autumn Harvest Salad features a stunning array of hues, making it a feast for the eyes and a perfect centerpiece for your table.

Hearty Ingredients: With roasted delicata squash, nutty farro, and tangy pomegranate arils, this salad is both filling and flavorful, providing a satisfying meal option.

Quick Preparation: The straightforward instructions mean you can whip up this salad in no time, leaving you more moments to savor the season.

Crowd-Pleasing Flavor: Its delightful combination of flavors—from creamy goat cheese to sweet maple vinaigrette—will impress guests and family alike, making it perfect for fall gatherings.

Adaptable Recipe: Feel free to customize this dish by adding your favorite proteins or substituting seasonal fruits. For more salad inspiration, check out the Garden Harvest Salad or the Crunchy Cabbage Bruschettas for a refreshing twist!

Embrace the autumn spirit with this easy, delicious salad that highlights the best of the season.

Autumn Harvest Salad Ingredients

• Discover the fresh flavors that make this salad shine!

For the Salad

  • Kale – A hearty base for your salad; opt for fresh, tender leaves for the best texture.
  • Delicata Squash – Sweet and creamy, this roasted vegetable is perfect for autumn; no peeling needed!
  • Farro – Offers a nutty flavor and chewy texture; substitute quinoa for a gluten-free option.
  • Goat Cheese – Adds a rich creaminess; feta is a delicious alternative.
  • Pomegranate Arils – These juicy, vibrant bursts bring a tangy sweetness; dried cranberries can work as a replacement if needed.

For the Dressing

  • Olive Oil – Adds richness to your dressing and roasted veggies; avocado oil can provide a unique twist.
  • Chili Powder – Introduces some warmth; for less heat, simply use paprika instead.
  • Maple Syrup – Sweetens the vinaigrette, balancing the acidity; honey can serve as an excellent substitute.
  • Apple Cider Vinegar – Provides necessary acidity; feel free to use lemon juice if you’re out.
  • Garlic – Infuses aromatic depth; omit if you prefer a milder taste.
  • Smoked Paprika – Enhances the smokiness of the dish; while optional, it’s recommended for added flavor.

Seasoning

  • Salt and Pepper – Essential for enhancing flavors; adjust to your personal taste preferences.

Now you’re well-equipped with all the essentials to whip up an unforgettable Autumn Harvest Salad with Pomegranates that captures the essence of the season!

Step‑by‑Step Instructions for Autumn Harvest Salad with Pomegranates

Step 1: Preheat the Oven
Begin by preheating your oven to 400°F (204°C). This temperature is perfect for roasting the delicata squash to achieve that delectable caramelization. While the oven heats, prepare your baking sheet by lining it with parchment paper for easy cleanup. This step sets the stage for the flavorful Autumn Harvest Salad with Pomegranates you’re about to create.

Step 2: Prepare the Delicata Squash
Slice the delicata squash into half-moons, about ½ inch thick. In a mixing bowl, toss the squash slices with a drizzle of olive oil, a pinch of salt, pepper, and chili powder for warmth. Once coated, spread the pieces evenly on your prepared baking sheet. This will ensure even roasting and enhance their lovely golden color during baking.

Step 3: Roast the Squash
Place the baking sheet in the oven and roast the delicata squash for about 15 minutes. Keep an eye on it; you’ll know it’s ready when the squash is golden brown and tender when pierced with a fork. The aroma wafting from the oven will surely excite your senses, signaling a delicious start to your Autumn Harvest Salad with Pomegranates.

Step 4: Make the Dressing
While the squash is roasting, grab a mason jar and combine olive oil, maple syrup, apple cider vinegar, minced garlic, smoked paprika, salt, and pepper. Seal the jar and shake vigorously until all the ingredients are well mixed. This dressing will add a delightful zing to the salad, enhancing the flavors beautifully.

Step 5: Assemble the Salad
In a large mixing bowl, add a generous handful of fresh, chopped kale as the base of your salad. Then, combine the roasted delicata squash, cooked farro, creamy goat cheese, and juicy pomegranate arils. Each ingredient adds a unique texture and flavor, bringing your Autumn Harvest Salad with Pomegranates to life.

Step 6: Dress the Salad
Finally, pour the dressing over the salad mixture in the bowl. Using tongs, toss everything together gently to ensure that all the greens and toppings are evenly coated with the dressing. This step will infuse a harmonious blend of flavors, making each bite of your salad a delicious experience.

What to Serve with Autumn Harvest Salad with Pomegranates

As you savor the vibrant flavors of this hearty salad, consider these delightful pairings that will elevate your autumn dining experience.

  • Creamy Mashed Potatoes: The rich, buttery texture of mashed potatoes creates a delightful contrast to the crunchy kale and roasted squash. A perfect side dish for cozy nights.

  • Herb-Roasted Chicken: This succulent dish complements the fresh ingredients beautifully, adding a savory depth and making it an ideal main course alongside the salad.

  • Warm Bread Rolls: Freshly baked bread is always a winning side. Serve warm, with a bit of butter to soak up the salad’s delicious dressing.

  • Savory Pumpkin Soup: A bowl of velvety pumpkin soup mirrors the autumn flavors, enhancing the seasonal experience and creating a comforting meal.

  • Roasted Beet and Citrus Salad: With its earthy beets and bright citrus notes, this refreshing salad can harmonize with the Autumn Harvest Salad while providing additional textures and flavors.

  • Sparkling Cider: The effervescence and fruity notes of sparkling cider make for a refreshing beverage that pairs perfectly with the sweetness of pomegranate and maple dressing.

Imagine enjoying a cozy evening with friends, surrounded by the warmth of your kitchen and delicious aromas—it’s the perfect backdrop for this delectable meal!

Make Ahead Options

These Autumn Harvest Salad with Pomegranates components are perfect for meal prep to save you time on busy weeknights! You can roast the delicata squash and cook the farro up to 3 days in advance. Simply store the roasted squash in an airtight container in the refrigerator to maintain its delicious texture. For best results, keep the pomegranate arils, goat cheese, and dressing separate until you’re ready to serve. Just before meal time, toss everything together in a large bowl for a fresh and vibrant salad. With these make-ahead options, you’ll enjoy a stress-free, hearty lunch or dinner that feels just as special, even on the busiest of days!

Expert Tips for Autumn Harvest Salad

  • Fresh Ingredients: Use fresh, tender kale for the best texture. Wilted or older leaves can make your Autumn Harvest Salad with Pomegranates less appealing.

  • Roasting Perfection: Keep an eye on the delicata squash while roasting to prevent burning. You want golden, tender pieces, not charred ones!

  • Chill the Farro: Make sure the cooked farro cools completely before mixing it in. Warm farro can wilt the greens, detracting from your salad’s freshness.

  • Dress Just Before Serving: To maintain crispness, dress your salad right before serving. If you prepare it ahead, store the dressing separately.

  • Season to Taste: Don’t skip on seasoning your roasted squash; it enhances flavor. Adjust salt and pepper to suit your palate—it can elevate the entire dish!

Autumn Harvest Salad Variations & Substitutions

Feel free to get creative with this Autumn Harvest Salad and adapt it to your taste preferences!

  • Dairy-Free: Replace goat cheese with nutritional yeast for a cheesy flavor without the dairy.
  • Gluten-Free: Swap farro for quinoa; it adds a similar texture while keeping the salad gluten-free.
  • Protein Boost: Add grilled chicken or chickpeas for a heartier meal that transforms this salad into a main dish.
  • Sweet Addition: Incorporate sliced apples or pears for a pop of natural sweetness and extra crunch.
  • Nutty Crunch: Toss in some toasted pecans or walnuts for a delightful crunch that complements the soft roasted veggies.
  • Hearty Greens: Replace kale with baby spinach or arugula for a lighter base and different flavor profile.
  • Dressing Flexibility: Use balsamic vinegar instead of apple cider vinegar for a rich, tangy twist; it pairs beautifully with all the autumn flavors!

These suggestions will help you personalize your dish, just like the delicious Cabbage Cucumber Salad or the vibrant Crunch Cucumber Salad. Enjoy mixing and matching to make this Autumn Harvest Salad truly your own!

How to Store and Freeze Autumn Harvest Salad with Pomegranates

Fridge: Keep the assembled salad in an airtight container for up to 3 days. For best results, store the dressing separately to maintain freshness and prevent wilting of the kale.

Freezer: It’s not ideal to freeze the complete salad, as the delicate textures will change. Instead, consider freezing any leftover roasted delicata squash or farro separately for future meals.

Reheating: If you have frozen farro or squash, thaw in the fridge overnight and gently reheat on the stove with a splash of olive oil. This will help revive their textures while keeping your Autumn Harvest Salad with Pomegranates flavors intact.

Make-Ahead Tip: You can prepare all components in advance! Roast the squash, cook the farro, and even make the dressing a day ahead—just assemble right before serving for maximum crispness and flavor.

Autumn Harvest Salad with Pomegranates Recipe FAQs

How do I choose ripe delicata squash?
Absolutely! When selecting delicata squash, look for ones that are firm, free from blemishes, and have a creamy yellow color with green stripes. The skin should be unblemished and hard, indicating the squash is ripe and ready to eat. Avoid any squash with soft spots or dark blemishes as those may be signs of spoilage.

How should I store leftover Autumn Harvest Salad?
Very good question! Store the assembled salad in an airtight container in the refrigerator for up to 3 days. However, for the best flavor and texture, it’s ideal to keep the dressing separate and add it just before serving. This prevents the greens from wilting and maintains that vibrant crunch you love!

Can I freeze parts of the Autumn Harvest Salad?
Great thought! You generally shouldn’t freeze the complete salad due to the texture changes, especially of the greens and cheese. However, you can freeze any leftover roasted delicata squash or cooked farro in airtight containers for up to 3 months. Just thaw them in the fridge overnight and gently reheat before adding to your salad again.

What should I do if my pomegranate isn’t juicy?
No worries! If you find a pomegranate that seems dry or lacks juice, you can improve the overall juiciness by gently rolling it on the countertop with your palm before cutting; this helps release some juice. Alternatively, consider using fresh raspberries or blueberries for a burst of sweetness and color if the pomegranate isn’t up to par.

How can I make this salad kid-friendly?
Absolutely! For a more kid-friendly version of the Autumn Harvest Salad with Pomegranates, you can omit the goat cheese or replace it with shredded cheddar if your kids prefer that flavor. Additionally, you can add sweeter fruits like apples or pears to entice their taste buds. Just ensure the flavors are balanced out so that everyone enjoys the meal.

What can I substitute if I have dietary restrictions?
I recommend it! If you need a gluten-free option, substitute farro with quinoa or a gluten-free grain of your choice. For dairy-free alternatives, try using cashew cheese or a plant-based feta. Adjust the flavoring to suit your dietary needs while keeping the essence of this luscious Autumn Harvest Salad with Pomegranates intact.

Autumn Harvest Salad with Pomegranates

Autumn Harvest Salad with Pomegranates for Cozy Days

This Autumn Harvest Salad with Pomegranates is a vibrant, hearty dish celebrating seasonal ingredients, perfect for cozy fall days.
Prep Time 15 minutes
Cook Time 15 minutes
Total Time 30 minutes
Servings: 4 servings
Course: Lunch
Cuisine: American
Calories: 350

Ingredients
  

For the Salad
  • 4 cups Kale Fresh, tender leaves
  • 1 medium Delicata Squash Sliced into half-moons, no peeling needed
  • 1 cup Farro Cooked; substitute with quinoa for gluten-free
  • 1 cup Goat Cheese Feta can be used as an alternative
  • 1 cup Pomegranate Arils Juicy and vibrant
For the Dressing
  • 1/4 cup Olive Oil Or avocado oil
  • 1 teaspoon Chili Powder Use paprika for less heat
  • 1 tablespoon Maple Syrup Or honey as a substitute
  • 2 tablespoons Apple Cider Vinegar Or lemon juice if unavailable
  • 1 clove Garlic Minced; optional
  • 1 teaspoon Smoked Paprika Optional for added flavor
Seasoning
  • to taste Salt
  • to taste Pepper

Equipment

  • oven
  • baking sheet
  • mixing bowl
  • Mason jar

Method
 

Step-by-Step Instructions
  1. Preheat the oven to 400°F (204°C) and line a baking sheet with parchment paper.
  2. Slice the delicata squash into half-moons, about ½ inch thick, and toss with olive oil, salt, pepper, and chili powder. Spread evenly on the baking sheet.
  3. Roast the squash for about 15 minutes, until golden brown and tender.
  4. In a mason jar, combine olive oil, maple syrup, apple cider vinegar, minced garlic, smoked paprika, salt, and pepper. Seal and shake until well mixed.
  5. In a large mixing bowl, add chopped kale as the base, then combine with roasted delicata squash, cooked farro, goat cheese, and pomegranate arils.
  6. Pour the dressing over the salad mixture and toss gently to combine.

Notes

Dress the salad just before serving to maintain crispness. Store dressing separately if making ahead.

Why is this autumn salad irresistible?

Fresh Ingredients: This salad features seasonal produce that highlights autumn’s beauty, making every bite feel like a warm embrace.

Easy Preparation: With just a few simple steps and straightforward ingredients, you’ll be enjoying this dish in no time—perfect for busy weeknights!

Nutritious Delight: Packed with vitamins and fiber, this salad serves as a wholesome meal that fuels your body during colder months while satisfying your taste buds.

Versatile Options: Whether you’re preparing a festive feast or a light lunch, you can easily switch out ingredients to suit your cravings; try adding grilled chicken or using quinoa for a gluten-free option.

Crowd-Pleaser: Serve it as a stunning side for gatherings, along with other fresh salads like our Garden Harvest Salad, and watch your friends rave about the flavors!

Get ready to impress not only with a beautiful dish but also with the heartwarming essence of autumn in every serving!

Autumn Salad Ingredients

For the Salad
Mixed greens – a variety of textures and flavors for a delightful base.
Butternut squash – adds a sweet, nutty flavor, perfect for the season.
Cranberries – brings a burst of tartness and a festive touch.
Pecans – for a satisfying crunch and healthy fats.
Apple – use a crisp variety for a refreshing sweetness.

For the Dressing
Olive oil – acts as the main base, providing richness and flavor.
Apple cider vinegar – adds a tangy brightness that complements the autumn salad.
Maple syrup – a touch of sweetness that enhances the seasonal flavors.
Dijon mustard – brings a bit of zing to the mix.
Salt and pepper – to taste, enhancing all the delightful flavors.

Step-by-Step Instructions for Autumn Salad

Step 1: Roast the Butternut Squash
Preheat your oven to 400°F (200°C). While it warms, peel, seed, and dice the butternut squash into bite-sized pieces. Spread the squash evenly on a baking sheet, drizzle with olive oil, and season with salt and pepper. Roast for 25-30 minutes, or until the squash is tender and lightly caramelized, stirring halfway for even cooking.

Step 2: Prepare the Dressing
In a small bowl, whisk together the olive oil, apple cider vinegar, maple syrup, and Dijon mustard until well combined. Season the mixture with salt and pepper to taste. This tangy-sweet dressing will bring your autumn salad to life. Set aside while you prepare the rest of the ingredients, allowing the flavors to meld.

Step 3: Assemble the Salad Base
In a large serving bowl, add a generous handful of mixed greens as your base. These leafy greens will add a delightful crunch and freshness to your autumn salad. Layer your roasted butternut squash over the greens, followed by sliced apples for a crisp sweet element that complements the squash beautifully.

Step 4: Add Cranberries and Pecans
Sprinkle a handful of dried cranberries over the salad for a burst of tartness that carries the essence of autumn. Next, toss in pecans to provide a satisfying crunch. Their nutty flavor ties together the seasonal ingredients, creating a well-rounded dish.

Step 5: Dress and Toss the Salad
Drizzle your homemade dressing over the assembled salad, ensuring all ingredients are lightly coated. Use salad tongs to gently toss everything together, being careful not to bruise the greens. This ensures every bite is packed with the delightful flavors of the autumn salad.

Step 6: Serve and Enjoy
Transfer the tossed autumn salad to a stunning serving platter, or serve individual portions. Garnish with extra cranberries and pecans for a beautiful presentation. This inviting dish not only looks glorious on the table but also tastes fantastic, making it a perfect centerpiece for any meal.

What to Serve with Autumn Salad

As the colors of fall fill your kitchen, delight in creating a complete meal that captures the essence of the season.

  • Creamy Goat Cheese: The creamy richness of goat cheese adds depth and tang, perfectly balancing the sweetness of the salad’s ingredients.
  • Warm Dinner Rolls: Soft, buttery rolls are ideal for mopping up any leftover dressing, enhancing the cozy feel of your autumn meal.
  • Roasted Chicken: Juicy, herb-infused chicken provides a hearty contrast that complements the salad’s vibrant flavors while satisfying your hunger.
  • Savory Quinoa Pilaf: Nutty quinoa pilaf mixed with herbs creates a protein-packed side that beautifully aligns with the salad’s roasted elements.
  • Caramelized Pears: Sweet caramelized pears bring an extra touch of autumn sweetness, echoing the salad’s apples and cranberries harmoniously.
  • Apple Cider: An inviting glass of apple cider, warm or chilled, ties in the seasonal flavors and refreshes your palate throughout the meal.
  • Pumpkin Soup: A warm, velvety pumpkin soup makes a comforting companion that encapsulates the flavors of fall, serving as a great appetizer.
  • Chocolate Pecan Pie: End your meal with this decadent dessert which mirrors the flavors in your salad through its rich pecan crunch and hints of sweetness.

Expert Tips for Autumn Salad

Ingredient Selection: Choose seasonal produce for the freshest flavors. Look for firm apples and vibrant greens to enhance your autumn salad.

Roasting Perfection: Ensure even cooking by stirring the butternut squash halfway through roasting. Look for a tender texture without burning for optimal sweetness.

Dressing Balance: Tweak your dressing to personal taste. If it’s too tangy, add more maple syrup; if too sweet, a splash of apple cider vinegar will brighten it up.

Textural Contrast: Include a variety of textures for depth. Crispy apples and crunchy pecans are essential to elevate your autumn salad experience.

Make Ahead: Prep your ingredients a day in advance and assemble just before serving. This saves time and helps meld the flavors beautifully.

Autumn Salad Variations & Substitutions

Feel free to get creative with this autumn salad; every twist will bring out unique flavors and delights!

  • Gluten-Free: Substitute quinoa for the butternut squash for a hearty, gluten-free option; it’s packed with protein and gives a lovely chew.

  • Vegan: Instead of honey in the dressing, use maple syrup or agave syrup for a delightful sweetness without the animal product.

  • Extra Crunch: Add sunflower seeds or pumpkin seeds for additional texture and a beautiful pop of color on your plate.

  • Cheesy Twist: Sprinkle some feta or goat cheese to add a creamy richness that beautifully balances the tangy dressing and sweet apples.

  • Spicy Kick: Toss in a few slices of jalapeño or red pepper flakes for a spicy twist that complements the sweetness of the butternut squash.

  • Fruit Swap: Try pomegranate seeds instead of cranberries for an unexpected burst of juicy flavor and a stunning presentation.

Experimenting with your autumn salad is a delightful way to enjoy the season! For even more ideas, consider pairing with a warm soup, such as our comforting Autumn Harvest Soup, for a cozy meal that’s perfect for the cooler days ahead.

How to Store and Freeze Autumn Salad

Fridge: Store any leftover autumn salad in an airtight container for up to 3 days. Keep the dressing separate to maintain freshness and crispness of the greens.

Freezer: It’s best to avoid freezing the salad as the fresh ingredients, particularly the greens and apples, will lose their texture and flavor.

Reheating: If you’ve roasted extra butternut squash, it can be refrigerated for 3-5 days. Reheat gently in the oven to maintain its sweetness before adding to the salad.

Prepping Ahead: For meal prep, chop veggies and prep the dressing in advance, storing them separately. This makes it a breeze to assemble your autumn salad when you’re ready to eat!

Make Ahead Options

Preparing this autumn salad in advance is a fantastic way to save time on busy weeknights! You can roast the butternut squash up to 3 days ahead; simply cool it completely before storing it in an airtight container in the refrigerator, which helps maintain its texture. The salad dressing can be prepared and refrigerated for up to 1 week—just whisk it again before serving to re-emulsify. For best results, assemble the salad without dressing and store all components separately until you’re ready to serve. When it’s time to enjoy your autumn salad, toss everything together, drizzle on the dressing, and relish in the ease of a delicious meal that feels gourmet!

Autumn Salad Recipe FAQs

How do I choose ripe butternut squash?
Look for a butternut squash that feels heavy for its size with a smooth, beige skin and deep color. Avoid ones with dark spots or soft patches, as these can indicate overripeness. A perfect squash will have a slightly dull sheen, which signals it’s ripe for roasting!

How long can I store leftover autumn salad?
You can keep any leftover autumn salad in an airtight container in the fridge for up to 3 days. Remember to store the dressing separately to keep the greens fresh and crisp, adding it just before you dive in for the perfect taste!

Can I freeze the autumn salad for later?
It’s best to skip freezing this salad since the fresh ingredients, especially the mixed greens and apples, will lose their texture and flavor. If you have leftover roasted butternut squash, refrigerate it for 3-5 days, and you can gently reheat it to maintain its deliciousness.

What should I do if my dressing is too tangy?
If your dressing has a tangy kick that’s a little too strong, simply add a bit more maple syrup to balance the flavors. Adjusting one ingredient at a time will help you achieve your desired flavor. Remember, it’s all about your personal taste, so don’t hesitate to experiment!

Are there any allergy considerations for this autumn salad?
Absolutely! This salad contains nuts (pecans) and may not be suitable for those with nut allergies. You can substitute the pecans with seeds like sunflower seeds or pumpkin seeds for a crunchy bite without the nuts. Always double-check the labels on dressings and dressings to ensure they meet dietary restrictions.

Can I prepare the salad in advance?
Certainly! A favorite tip is to prep your veggies and the dressing a day ahead. Store them separately in the fridge, then simply assemble the salad when you’re ready to enjoy. This not only saves time but also blends the flavors beautifully. Just keep those precious greens in mind and add them last for the best crunch!

Irresistible Autumn Salad

This autumn salad features fresh seasonal ingredients, making it a nutritious and delicious meal perfect for busy weeknights.
Prep Time 15 minutes
Cook Time 30 minutes
Total Time 45 minutes
Servings: 4 servings
Course: Salad
Cuisine: American
Calories: 250

Ingredients
  

For the Salad
  • 4 cups mixed greens a variety of textures and flavors for a delightful base
  • 2 cups butternut squash peeled, seeded, and diced into bite-sized pieces
  • 1 cup cranberries dried for a burst of tartness
  • 1 cup pecans for a satisfying crunch
  • 1 medium apple use a crisp variety for refreshing sweetness
For the Dressing
  • 1/4 cup olive oil acts as the main base
  • 2 tablespoons apple cider vinegar adds a tangy brightness
  • 2 tablespoons maple syrup enhances the seasonal flavors
  • 1 teaspoon Dijon mustard adds a bit of zing
  • salt to taste
  • pepper to taste

Equipment

  • oven
  • baking sheet
  • whisk
  • large serving bowl
  • salad tongs

Method
 

Step-by-Step Instructions
  1. Preheat your oven to 400°F (200°C). Peel, seed, and dice the butternut squash into bite-sized pieces. Spread on a baking sheet, drizzle with olive oil, and season with salt and pepper. Roast for 25-30 minutes, stirring halfway through.
  2. In a small bowl, whisk together the olive oil, apple cider vinegar, maple syrup, and Dijon mustard until well combined. Season with salt and pepper to taste. Set aside.
  3. In a large serving bowl, add mixed greens as your base. Layer roasted butternut squash and sliced apples.
  4. Sprinkle dried cranberries and pecans over the salad. Toss to combine.
  5. Drizzle dressing over the salad, tossing gently to coat without bruising the greens.
  6. Serve on a platter, garnished with extra cranberries and pecans.

Notes

For best texture, store dressing separately until ready to serve. Can prep ingredients a day ahead.

Baked Falafel with Tahini Sauce Recipe: Flavorful and Crisp

As the aroma of baking cookies wafts through the house, I’m whisked back to cherished moments in my childhood kitchen. These Ultimate Chocolate Chip Cookies are a perfect nod to those sweet memories, bringing together the delightful blend of soft, chewy goodness and a hint of nostalgia. What I love most about this chocolate chip cookies recipe is its quick prep time, making it an ideal solution for busy days or sudden cravings. Plus, these treats are entirely customizable, whether you’re looking to whip up a classic version or adapt them for gluten-free or vegan diets—everyone deserves a delicious cookie experience! Are you ready to dive into the world of homemade bliss? Let’s get baking!

Why Are These Cookies So Irresistible?

Nostalgic Flavor: Each bite transports you back to warm, cozy kitchens with the sweet aroma of freshly baked cookies.
Quick and Easy: In just 30 minutes, you can enjoy warm cookies fresh from the oven, perfect for snacking or sharing.
Customizable Options: Whether gluten-free, vegan, or nut-free, everyone can indulge in these delightful cookies.
Chewy Perfection: The soft center and crispy edges create a satisfying textural contrast that will keep you coming back for more. For a twist, try adding your favorite ingredients like dried fruit from my Nutty Chocolate Date Cookies or spices like cinnamon.
Crowd-Pleaser: These cookies are sure to impress family and friends, making them a staple for gatherings or simple treats.

Chocolate Chip Cookie Ingredients

• Unlock the secrets to the ultimate chocolate chip cookies with this ingredient list.

For the Cookie Dough

  • All-Purpose Flour – Provides structure; for a gluten-free option, use a gluten-free flour blend.
  • Baking Soda – Acts as a leavening agent to achieve those perfect cookie heights.
  • Unsalted Butter – Adds richness and flavor; substitute with coconut oil for a dairy-free option.
  • Granulated Sugar – Sweetness and crispiness in your cookies; try coconut sugar for a healthier alternative.
  • Brown Sugar – Imparts moisture and chewiness; using dark brown sugar intensifies the caramel flavor.
  • Eggs – Bind the ingredients and enrich texture; for vegan, replace with a mixture of flaxseed meal and water.
  • Vanilla Extract – Enhances the overall flavor; homemade vanilla can elevate your cookies to another level.
  • Chocolate Chips – The star ingredient that brings the signature flavor; for variations, opt for dark or dairy-free chips.

Step‑by‑Step Instructions for Baked Falafel with Tahini Sauce Recipe

Step 1: Preheat Your Oven
Begin by preheating your oven to 400°F (200°C). This is essential for achieving the perfect crispiness for your baked falafel. While the oven heats, gather your baking sheet and line it with parchment paper for easy cleanup and to prevent sticking.

Step 2: Prepare the Chickpeas
In a food processor, combine drained and rinsed chickpeas, garlic, onion, fresh herbs, and spices. Pulse until the mixture is coarsely blended but not pureed. The texture should be slightly chunky, ensuring your baked falafel retains a delightful bite in each mouthful.

Step 3: Mix in the Bindings
Transfer the chickpea mixture to a large bowl and incorporate flour, baking powder, and a drizzle of olive oil. Stir until well combined, ensuring the mixture holds together but isn’t overly sticky. This creates the perfect base for your flavorful baked falafel with tahini sauce.

Step 4: Shape the Falafel
Using your hands, form the mixture into small balls or patties, about 1.5 inches wide. Place each on the prepared baking sheet, ensuring they have a little space between them for even cooking. This is key to achieving that delightful crisp outside you desire in your baked falafel.

Step 5: Bake the Falafel
Slide the baking sheet into the preheated oven and bake for 20-25 minutes, flipping the falafel halfway through. Look for a golden-brown crust forming on the outside, which indicates they are perfectly cooked while maintaining a soft and flavorful interior.

Step 6: Prepare the Tahini Sauce
While the falafel bake, whisk together tahini, lemon juice, garlic, and water in a small bowl until smooth and creamy. Adjust the consistency by adding more water if needed. The tahini sauce is your delicious complement that will bring your baked falafel to life.

Step 7: Serve and Enjoy
Once baked, allow the falafel to cool slightly before serving. Drizzle with the tahini sauce and garnish with fresh herbs or toppings of your choice. These baked falafel with tahini sauce are a delightful, healthy alternative that will satisfy your cravings.

Baked Falafel with Tahini Sauce Variations

Feel free to play around with these baked falafel variations to create your perfect dish and enjoy a delightful medley of flavors!

  • Gluten-Free:
    Use chickpea flour instead of regular flour to keep your falafel gluten-free without losing any flavor.

  • Spicy Kick:
    Add a pinch of cayenne pepper or chopped jalapeños to the mixture for an exciting spicy touch that warms the palate.

  • Herbaceous Delight:
    Mix in a handful of fresh herbs like parsley or cilantro for a refreshing burst of flavor in every bite.

  • Nutty Texture:
    Fold in finely chopped nuts, such as almonds or walnuts, for an added crunch and depth of flavor that complements the chickpeas beautifully.

  • Baked Stuffed Falafel:
    Try stuffing some patties with feta cheese or a spicy filling before baking for an unexpected savory surprise.

  • Lemon Zest:
    Incorporate some lemon zest into the mixture to brighten the flavors, enhancing the overall freshness of your falafel.

  • Savory Spice Blend:
    Experiment with spices like cumin or coriander to add a unique twist; they pair wonderfully with tahini sauce.

  • Creamy Avocado Sauce:
    Instead of tahini, whip up a creamy avocado sauce to drench your falafel in rich, healthy fats that elevate your dish.

Get creative and enjoy the process! These variations not only enhance the taste but also make each meal a delightful experience. Don’t forget to share your favorites with others as you dive into this culinary adventure!

What to Serve with Ultimate Chocolate Chip Cookies?

Indulging in warm cookies fresh from your oven is only the beginning; let’s elevate your tasting experience with perfect pairings.

  • Cold Milk: The classic companion that enhances the chocolatey goodness while balancing sweetness with its creamy texture. Every dip is a nostalgic treat!

  • Vanilla Ice Cream: A scoop of cool vanilla ice cream creates a blissful contrast against the warm cookies, turning each bite into a dreamy dessert experience.

  • Fresh Berries: A handful of ripe strawberries or blueberries adds a burst of freshness that cuts through the richness of the cookies, creating a delightful flavor balance.

  • Coffee or Espresso: The bitter notes of a good cup of coffee naturally complement the sweet, buttery cookies, making this a perfect pick-me-up for any time of day.

  • Nutty Chocolate Milkshake: A thick, creamy shake loaded with chocolate and nuts matches perfectly with the cookies, ensuring a double chocolate delight that’s hard to resist.

  • Chai Tea: The spices in chai tea bring warmth and aromatic flavors that enhance the cozy experience of enjoying cookies, creating a unique contrast that tantalizes the taste buds.

  • Chunky Peanut Butter: Spread a bit of chunky peanut butter on a cookie for an added layer of richness and texture that turns your treat into something extraordinary.

  • Brownie Sundae: Layering your cookie crumbles with brownie chunks and a scoop of ice cream creates a decadent dessert that’s irresistible and perfect for sharing.

Expert Tips for the Best Chocolate Chip Cookies

  • Butter Temperature: Make sure your unsalted butter is at room temperature. This will help create a light, fluffy texture that is essential for the perfect cookie.
  • Don’t Overmix: Once you add the flour, mix just until combined. Overmixing can lead to tough cookies, ruining the wonderful chewy texture we all love.
  • Chill the Dough: For thicker cookies, chill the dough for at least 30 minutes before baking. This helps them maintain their shape and enhances the flavor.
  • Keep an Eye on Baking: Baking times can vary by oven. Watch your cookies closely after the 10-minute mark; pull them out when the edges are golden and the centers look soft for that perfect melt-in-your-mouth experience.
  • Try Variations: Feel free to get creative! Swapping in dark chocolate chips, adding nuts, or even incorporating spices like cinnamon can elevate your chocolate chip cookies to new heights.
  • Storage Matters: To keep your baked chocolate chip cookies fresh, store them in an airtight container. They’ll stay soft and delicious for up to a week!

Make Ahead Options

These Ultimate Chocolate Chip Cookies are perfect for busy home cooks looking to save time! You can prepare the cookie dough up to 24 hours in advance. Simply mix all the ingredients as instructed, and then wrap the dough tightly in plastic wrap or place it in an airtight container before refrigerating. This helps maintain its moisture and flavor. When you’re ready to bake, scoop the chilled dough onto a baking sheet directly from the refrigerator and bake as directed. Your cookies will be just as delicious with that delightful soft and chewy texture, all without the last-minute rush!

How to Store and Freeze Chocolate Chip Cookies

Room Temperature: Store cookies in an airtight container at room temperature for up to 1 week. This keeps their delightful softness intact, ready to enjoy anytime!

Fridge: If you live in a warm climate, consider refrigerating cookies for up to 2 weeks to maintain their freshness. Just remember to let them sit at room temperature for a few minutes before indulging.

Freezer: For longer storage, freeze chocolate chip cookies in an airtight freezer bag for up to 3 months. To enjoy, simply thaw at room temperature or warm in the oven.

Reheating: To bring back that freshly baked taste, reheat cookies in a microwave for about 10-15 seconds or in a preheated oven at 350°F (175°C) for a few minutes. Enjoy warm!

Chocolate Chip Cookies Recipe FAQs

What type of flour should I use for the best chocolate chip cookies?
I recommend using all-purpose flour for a classic cookie texture. If you’re looking for a gluten-free option, a high-quality gluten-free flour blend works wonderfully as a substitute!

How should I store leftover chocolate chip cookies?
Store your cookies in an airtight container at room temperature for up to 1 week. To maintain their chewiness, you can place a slice of bread in the container—this helps keep them soft and delightful!

Can I freeze chocolate chip cookies?
Absolutely! For freezing, place the cookies in a single layer in an airtight freezer bag, separating layers with parchment paper. They can be frozen for up to 3 months. When you’re ready to enjoy them, simply thaw at room temperature or warm them in a preheated oven at 350°F (175°C) for a few minutes.

What should I do if my cookie dough is too sticky?
If your dough seems too sticky, don’t worry! You can gradually add a little more flour—start with one tablespoon at a time. Mix gently until the dough is firm enough to handle. Chilling the dough for at least 30 minutes will also make it easier to shape.

Can I make these cookies vegan?
Yes, you can! To make vegan chocolate chip cookies, substitute the eggs with a flaxseed meal mixture. Combine 1 tablespoon of flaxseed meal with 2.5 tablespoons of water, stir, and let it sit for about 5 minutes until it becomes gelatinous. This works great as a binding agent!

Are there any common allergies I should be aware of with chocolate chip cookies?
Yes, traditional chocolate chip cookies contain common allergens like gluten, dairy, and eggs. For people with allergies, consider using gluten-free flour, coconut oil instead of butter, or flaxseed meal to replace eggs, along with dairy-free chocolate chips. Everyone should be able to enjoy a delicious cookie!

Baked Falafel with Tahini Sauce Recipe

Baked Falafel with Tahini Sauce Recipe: Flavorful and Crisp

Enjoy these baked falafel with tahini sauce, a flavorful and healthy twist on traditional falafel.
Prep Time 15 minutes
Cook Time 25 minutes
Total Time 40 minutes
Servings: 4 servings
Course: Other
Cuisine: Middle Eastern
Calories: 150

Ingredients
  

For the Falafel
  • 1 can Chickpeas drained and rinsed
  • 2 cloves Garlic minced
  • 1 Onion chopped
  • 1 cup Fresh Herbs such as parsley or cilantro
  • 1 tsp Cumin
  • 1 tsp Coriander
  • 1 cup Flour or gluten-free flour
  • 1 tsp Baking Powder
  • 2 tbsp Olive Oil plus more for drizzling
For the Tahini Sauce
  • 1/2 cup Tahini
  • 2 tbsp Lemon Juice freshly squeezed
  • 1 clove Garlic minced
  • 3 tbsp Water adjust as needed

Equipment

  • oven
  • Food Processor
  • baking sheet
  • parchment paper

Method
 

Falafel Preparation
  1. Preheat your oven to 400°F (200°C) and line a baking sheet with parchment paper.
  2. In a food processor, combine all falafel ingredients and pulse until coarsely blended.
  3. Transfer mixture to a bowl and mix in flour, baking powder, and olive oil.
  4. Form the mixture into small balls or patties and place on the baking sheet.
  5. Bake for 20-25 minutes, flipping halfway through, until golden brown.
  6. While baking, whisk tahini, lemon juice, garlic, and water until smooth.
  7. Serve baked falafel drizzled with tahini sauce and garnished with fresh herbs.

Notes

Feel free to customize these falafel by adding spices or ingredients like chili powder for heat.

Lumpiang Hubad: Fresh & Healthy Filipino Spring Roll Delight

Stepping into the vibrant world of Filipino cuisine is like unwrapping a beautifully colored gift—the excitement and anticipation of something delightful await. Today, I’m thrilled to share my take on Lumpiang Hubad, a healthy Filipino spring roll salad that brilliantly showcases fresh ingredients and flavors that brighten your plate. This dish is not only easy to prepare but also a fantastic vegetarian option, perfect for those seeking a light yet satisfying meal. Whip it up for a casual family dinner or impress guests at your next gathering with this colorful medley of sautéed vegetables and proteins. Are you ready to explore the delicious layers of flavors and textures that make Lumpiang Hubad a true culinary gem? Let’s dive in!

Why Is Lumpiang Hubad So Popular?

Vibrant, Nutrient-Packed: Bursting with colorful vegetables, Lumpiang Hubad is a feast for the eyes and a boost for your health. Easy Preparation: This dish doesn’t require advanced cooking skills; you’ll have a meal ready in no time! Versatile Ingredients: Adjust proteins and veggies based on what you have on hand; it’s perfect for sneakily using up leftovers. Delicious Sauce: The creamy peanut sauce adds a rich layer of flavor that will leave everyone wanting more. Crowd-Pleasing: Great for both family dinners and gatherings, this dish shines as a lighter alternative to greasy takeout while staying true to Filipino culture. Enjoy it as a standalone meal or with steamed rice for an added touch!

Lumpiang Hubad Ingredients

For the Sautéed Base
Oil – Use vegetable or canola oil for a neutral flavor, perfect for sautéing.
Onion – Adds depth and aroma; shallots can substitute for a milder taste.
Garlic – Freshly minced garlic enhances flavor; it’s a key ingredient for aroma.
Ground Pork – Provides richness; replace with ground turkey or omit for a vegetarian option.
Fish Sauce – Imparts umami; use soy sauce or miso as a vegetarian substitute.
White Ground Pepper – Adds mild heat; black pepper can be used for extra kick.
Shrimp – Adds sweetness and a seafood element; omit or replace with tofu for vegetarian.
Sweet Potato – Provides natural sweetness and texture; butternut squash works well as an alternative.
Carrot – Offers crunch and sweetness; any root vegetable can be used instead.
Cabbage – Adds bulk and freshness; savoy or napa cabbage are great substitutes.
Green Beans – Adds crisp texture; snap peas can be an alternative.
Salt – Enhances flavors; adjust according to taste preferences.

For the Sauce
Cornstarch – Thickens the sauce; arrowroot powder can be used as a substitute.
Soy Sauce – Adds saltiness and umami; try Tamari for a gluten-free option.
Crushed Peanuts – Provide texture and flavor; sunflower seeds are perfect for nut-free alternatives.
Water – Helps achieve desired sauce consistency.
Brown Sugar – Balances flavors with a touch of sweetness; coconut sugar works as an alternative.

Explore the delightful layers of flavors and textures in Lumpiang Hubad with these fresh ingredients!

Step‑by‑Step Instructions for Lumpiang Hubad

Step 1: Prepare the Sauce
In a medium bowl, combine 2 tablespoons of cornstarch with 1 cup of water and 4 tablespoons of soy sauce; set aside. In a heated pan over medium heat, toast ½ cup of crushed peanuts until they turn light brown and fragrant. Reserve half for garnish, then add the remaining peanuts to the pan along with 2 tablespoons of brown sugar and 2 minced garlic cloves. Stir until the sugar dissolves.

Step 2: Sauté Vegetables
Heat 2 tablespoons of oil in a large wok or skillet over medium-high heat. Add 1 diced onion and 3 minced garlic cloves, sautéing until fragrant, about 2-3 minutes. Toss in ½ pound of ground pork and 2 tablespoons of fish sauce, breaking the meat into smaller pieces. Cook for 3 minutes until the pork is no longer pink. Then, add ½ pound of shrimp, cooking until they turn pink and opaque, about 2-3 minutes more.

Step 3: Add Main Vegetables
Stir in 1 large sweet potato (diced) and 2 medium carrots (julienned), adding a splash of water to help them steam. Cover the pan and cook for 3-5 minutes until the sweet potatoes are just tender but still firm. This enables the vibrant flavors to meld while keeping the vegetables wholesome. The mixture should remain slightly crunchy for the ideal texture in your Lumpiang Hubad.

Step 4: Finish with Greens
Add 2 cups of chopped cabbage and 1 cup of trimmed green beans to the pan. Season with salt to taste, and toss everything together, cooking for an additional 2-3 minutes. Stir continuously until the greens are tender yet still crisp, allowing them to maintain their bright color and vibrant nutrients in this healthy Lumpiang Hubad dish.

Step 5: Serve
Once prepared, plate the sautéed mixture in a vibrant serving bowl. Generously drizzle your homemade sauce over the top, allowing it to enrich the flavors. Finish with a sprinkle of the reserved crushed peanuts for added texture and a delightful crunch. Serve your Lumpiang Hubad warm, whether on its own or with a side of steamed rice for an enjoyable meal.

What to Serve with Lumpiang Hubad

Elevate your meal with delightful complements that enhance the fresh flavors of this vibrant spring roll salad.

  • Jasmine Rice: The subtly fragrant rice adds a perfect balance to the savory lumpiang hubad, soaking up the delicious sauce with each bite.
  • Fresh Green Salad: A crisp cucumber and tomato salad provides a refreshing crunch that contrasts beautifully with the warm sautéed vegetables.
  • Sweet Mango Slices: Juicy slices of ripe mango add a delightful sweetness, making an excellent contrast to the savory and umami flavors of the dish.
  • Grilled Chicken Skewers: Tender grilled chicken seasoned with garlic and herbs adds an extra protein option, perfect for those who prefer a heartier meal.
  • Coconut Iced Tea: A lightly sweetened iced tea infused with coconut makes a cooling beverage that harmonizes well with the lively flavors of lumpiang hubad.
  • Chili Garlic Sauce: For a spicy twist, drizzle on some chili garlic sauce to heat things up—a little goes a long way in boosting the flavor profile!
  • Peanut Sauce Dip: Serve alongside a creamy peanut sauce for an extra indulgent touch; it further complements the dish’s flavor while adding richness.
  • Fruit Sorbet: A light mango or coconut sorbet provides a frosty dessert option that cleanses the palate and wraps up your meal with a refreshing finish.

Lumpiang Hubad Variations & Substitutions

Feel free to mix and match ingredients to make this delightful dish your own and savor every bite!

  • Vegetarian Option: Replace ground pork and shrimp with tofu or seitan, providing a hearty, protein-packed alternative for plant-based eaters.
  • Seasonal Veggies: Use seasonal vegetables like bell peppers or bok choy to add freshness and variety to your dish, enhancing flavor and nutrition.
  • Crunchy Wrap: Serve your Lumpiang Hubad wrapped in crisp lettuce leaves or rice paper for a fun twist, making it interactive and playful for gatherings.
  • Flavor Boost: Add a splash of lime juice or rice vinegar to the sauce for a zesty kick, which brightens up the flavors even further.
  • Nut-Free Alternative: Substitute crushed peanuts with sunflower seeds for those with nut allergies, maintaining that delightful crunch while keeping it safe for everyone.
  • Heat Level: Spice things up by adding chili flakes or fresh chili slices to the sautéed mix for a warm, delightful kick that enhances the overall experience.
  • Rice Alternative: Instead of using traditional rice, try cauliflower rice for a low-carb twist that complements the colorful veggies beautifully.
  • Herb Infusion: Incorporate fresh herbs like cilantro or basil into your sautéed vegetables for an aromatic twist that adds another level of flavor depth.

As you let your creativity flow, consider trying out some of these variations. Explore different flavor profiles and have fun crafting a recipe that feels just right! If you’d like more inspiration, check out our vegetarian options for additional ideas, or learn how to serve it with perfect side dishes that elevate your meals.

Make Ahead Options

These Lumpiang Hubad are perfect for busy home cooks looking to save time during the week! You can prepare the sautéed vegetables and sauce up to 3 days in advance; simply store them separately in airtight containers in the refrigerator. Sauté your vegetables until they’re just tender and let them cool before placing them in the fridge; this prevents sogginess. When you’re ready to enjoy your meal, reheat the vegetables in a pan, add the sauce, and stir until everything is heated through. This way, you still get that delightful fresh taste and texture, making your weeknight dinners a breeze!

Expert Tips for Lumpiang Hubad

  • Prep Ahead: Chop your vegetables in advance to save time during cooking; this ensures you can whip up your Lumpiang Hubad quickly on busy days.
  • Use Fresh Ingredients: Choose the freshest vegetables available for the best flavor and texture in your Lumpiang Hubad. Fresh veggies brighten the dish!
  • Customize Proteins: Feel free to switch the ground pork and shrimp for tofu or seitan if you want a vegetarian option, making it versatile for all diets.
  • Get the Sauce Right: Adjust the thickness of your sauce to your liking; if it’s too thick, add a little water for a smoother drizzle over your dish.
  • Avoid Overcooking: Keep an eye on your vegetables while cooking; tender yet crisp veggies make your Lumpiang Hubad delightful and nutritious.
  • Serve Warm: Serve your Lumpiang Hubad immediately to enjoy the vibrant flavors at their peak; it’s best enjoyed fresh from the pan!

How to Store and Freeze Lumpiang Hubad

Fridge: Store leftover Lumpiang Hubad in airtight containers for up to 3 days, separating the sauce from the vegetables to maintain their texture.

Freezer: If you want to freeze Lumpiang Hubad, package the sautéed vegetables and sauce separately in freezer-safe containers for up to 3 months.

Reheating: When you’re ready to enjoy your Lumpiang Hubad, thaw in the fridge overnight, then reheat in a pan over medium heat, stirring gently until warmed through.

Room Temperature: Serve leftover Lumpiang Hubad at room temperature to retain the freshness of the ingredients for a short time, ideally not exceeding 2 hours.

Lumpiang Hubad Recipe FAQs

What type of vegetables works best in Lumpiang Hubad?
Absolutely! The beauty of Lumpiang Hubad lies in its versatility. I often use a colorful mix of vegetables like sweet potatoes, carrots, cabbage, and green beans, but this dish welcomes any seasonal vegetables you have on hand. Bell peppers or bok choy are delightful additions too!

How do I store leftover Lumpiang Hubad?
Very! To keep your leftover Lumpiang Hubad fresh, store each component in separate airtight containers. The sautéed vegetables and sauce should be refrigerated for up to 3 days. This separation helps maintain the texture and flavor of the veggies while keeping the sauce delicious.

Can I freeze Lumpiang Hubad?
Yes, definitely! If you’re looking to freeze Lumpiang Hubad, package the sautéed vegetables and sauce in freezer-safe containers. They can last up to 3 months in the freezer. When you’re ready to enjoy, thaw them overnight in the refrigerator, then reheat in a pan over medium heat until warmed through. This way, you can enjoy your favorite dish even when you’re pressed for time!

What substitutes can I use for shrimp in this recipe?
Certainly! If you’d like to make a vegetarian version of Lumpiang Hubad, feel free to swap out the shrimp for additional tofu or tempeh. You can also replace it with more of the other sautéed vegetables to keep that vibrant texture while ensuring a wholesome meal.

How do I know if my vegetables are fresh enough?
Great question! Look for vibrant colors and firm textures in your vegetables. Avoid those with dark spots all over or are wilted, as these tend to be past their prime. Fresh veggies not only taste better but also pack more nutrients, enhancing the overall nutrition of your Lumpiang Hubad.

Is Lumpiang Hubad suitable for gluten-free diets?
Absolutely! To adapt Lumpiang Hubad for gluten-free diets, simply swap out regular soy sauce for gluten-free Tamari. Additionally, you can replace cornstarch with arrowroot powder for thickening, ensuring that all your ingredients support your dietary needs. Enjoy worry-free!

Lumpiang Hubad

Lumpiang Hubad: Fresh & Healthy Filipino Spring Roll Delight

Lumpiang Hubad is a fresh and healthy Filipino spring roll salad, showcasing vibrant ingredients.
Prep Time 15 minutes
Cook Time 20 minutes
Total Time 35 minutes
Servings: 4 servings
Course: Lunch
Cuisine: Filipino
Calories: 320

Ingredients
  

For the Sautéed Base
  • 2 tablespoons vegetable oil for sautéing
  • 1 large onion diced
  • 3 cloves garlic minced
  • 0.5 pound ground pork or ground turkey
  • 2 tablespoons fish sauce or soy sauce for vegetarian option
  • 0.5 teaspoon white ground pepper
  • 0.5 pound shrimp or tofu for vegetarian
  • 1 large sweet potato diced
  • 2 medium carrots julienned
  • 2 cups cabbage chopped
  • 1 cup green beans trimmed
  • to taste salt
For the Sauce
  • 2 tablespoons cornstarch
  • 1 cup water
  • 4 tablespoons soy sauce or Tamari for gluten-free
  • 0.5 cup crushed peanuts reserve half for garnish
  • 2 tablespoons brown sugar

Equipment

  • large wok or skillet
  • Medium bowl

Method
 

Step-by-Step Instructions
  1. In a medium bowl, combine 2 tablespoons of cornstarch with 1 cup of water and 4 tablespoons of soy sauce; set aside. Toast ½ cup of crushed peanuts until they turn light brown and fragrant. Reserve half for garnish, then add the remaining peanuts to the pan along with 2 tablespoons of brown sugar and 3 minced garlic cloves. Stir until the sugar dissolves.
  2. Heat 2 tablespoons of oil in a large wok or skillet over medium-high heat. Add 1 diced onion and 3 minced garlic cloves, sautéing until fragrant, about 2-3 minutes. Add ½ pound of ground pork and 2 tablespoons of fish sauce, breaking the meat into smaller pieces. Cook for 3 minutes until the pork is no longer pink. Add ½ pound of shrimp, cooking until they turn pink and opaque, about 2-3 minutes more.
  3. Stir in 1 large sweet potato (diced) and 2 medium carrots (julienned), adding a splash of water to help them steam. Cover the pan and cook for 3-5 minutes until the sweet potatoes are just tender but still firm.
  4. Add 2 cups of chopped cabbage and 1 cup of trimmed green beans to the pan. Season with salt to taste, and toss everything together, cooking for an additional 2-3 minutes.
  5. Plate the sautéed mixture in a vibrant serving bowl. Drizzle your homemade sauce over the top, and finish with a sprinkle of the reserved crushed peanuts. Serve warm.

Notes

Store leftovers in airtight containers for up to 3 days, separating sauce from vegetables. Freeze in containers for up to 3 months. Reheat before serving.